Detecting objects with your own two eyes is so last year!
Now…you can use a computer to do all the heavy lifting for you.
All you have to do is…
- Spin up a GPU server
- Install Tensorflow AND get it working
- Write a heap of Python code and train it using the CoCo dataset
- Then work out how to deploy it
- Write your own API with flask
- Host your service
- Predict stuff
That’s all there is to it…easy right!
Well…it could be soooo much easier. This is all thanks to the new and shiny Object Detection API within Watson Studio. It kills off a whole bunch of the boring bits described above and gets you building and deploying models so much faster. This means you can focus your efforts on actually putting your awesome Vision Recognition models into the hands of your users.
With a few clicks you can:
- Load your training data
- Easily label it with the objects you want to detect
- Train a deep learning model on your domain specific images
- And finally deploy it with a slick user interface that you can use to wow your users
Aren’t we all just trying to wow our users at the end of the day??
Want to try it out?! Ready to get your hands on it?! Get cracking with the tutorial below….
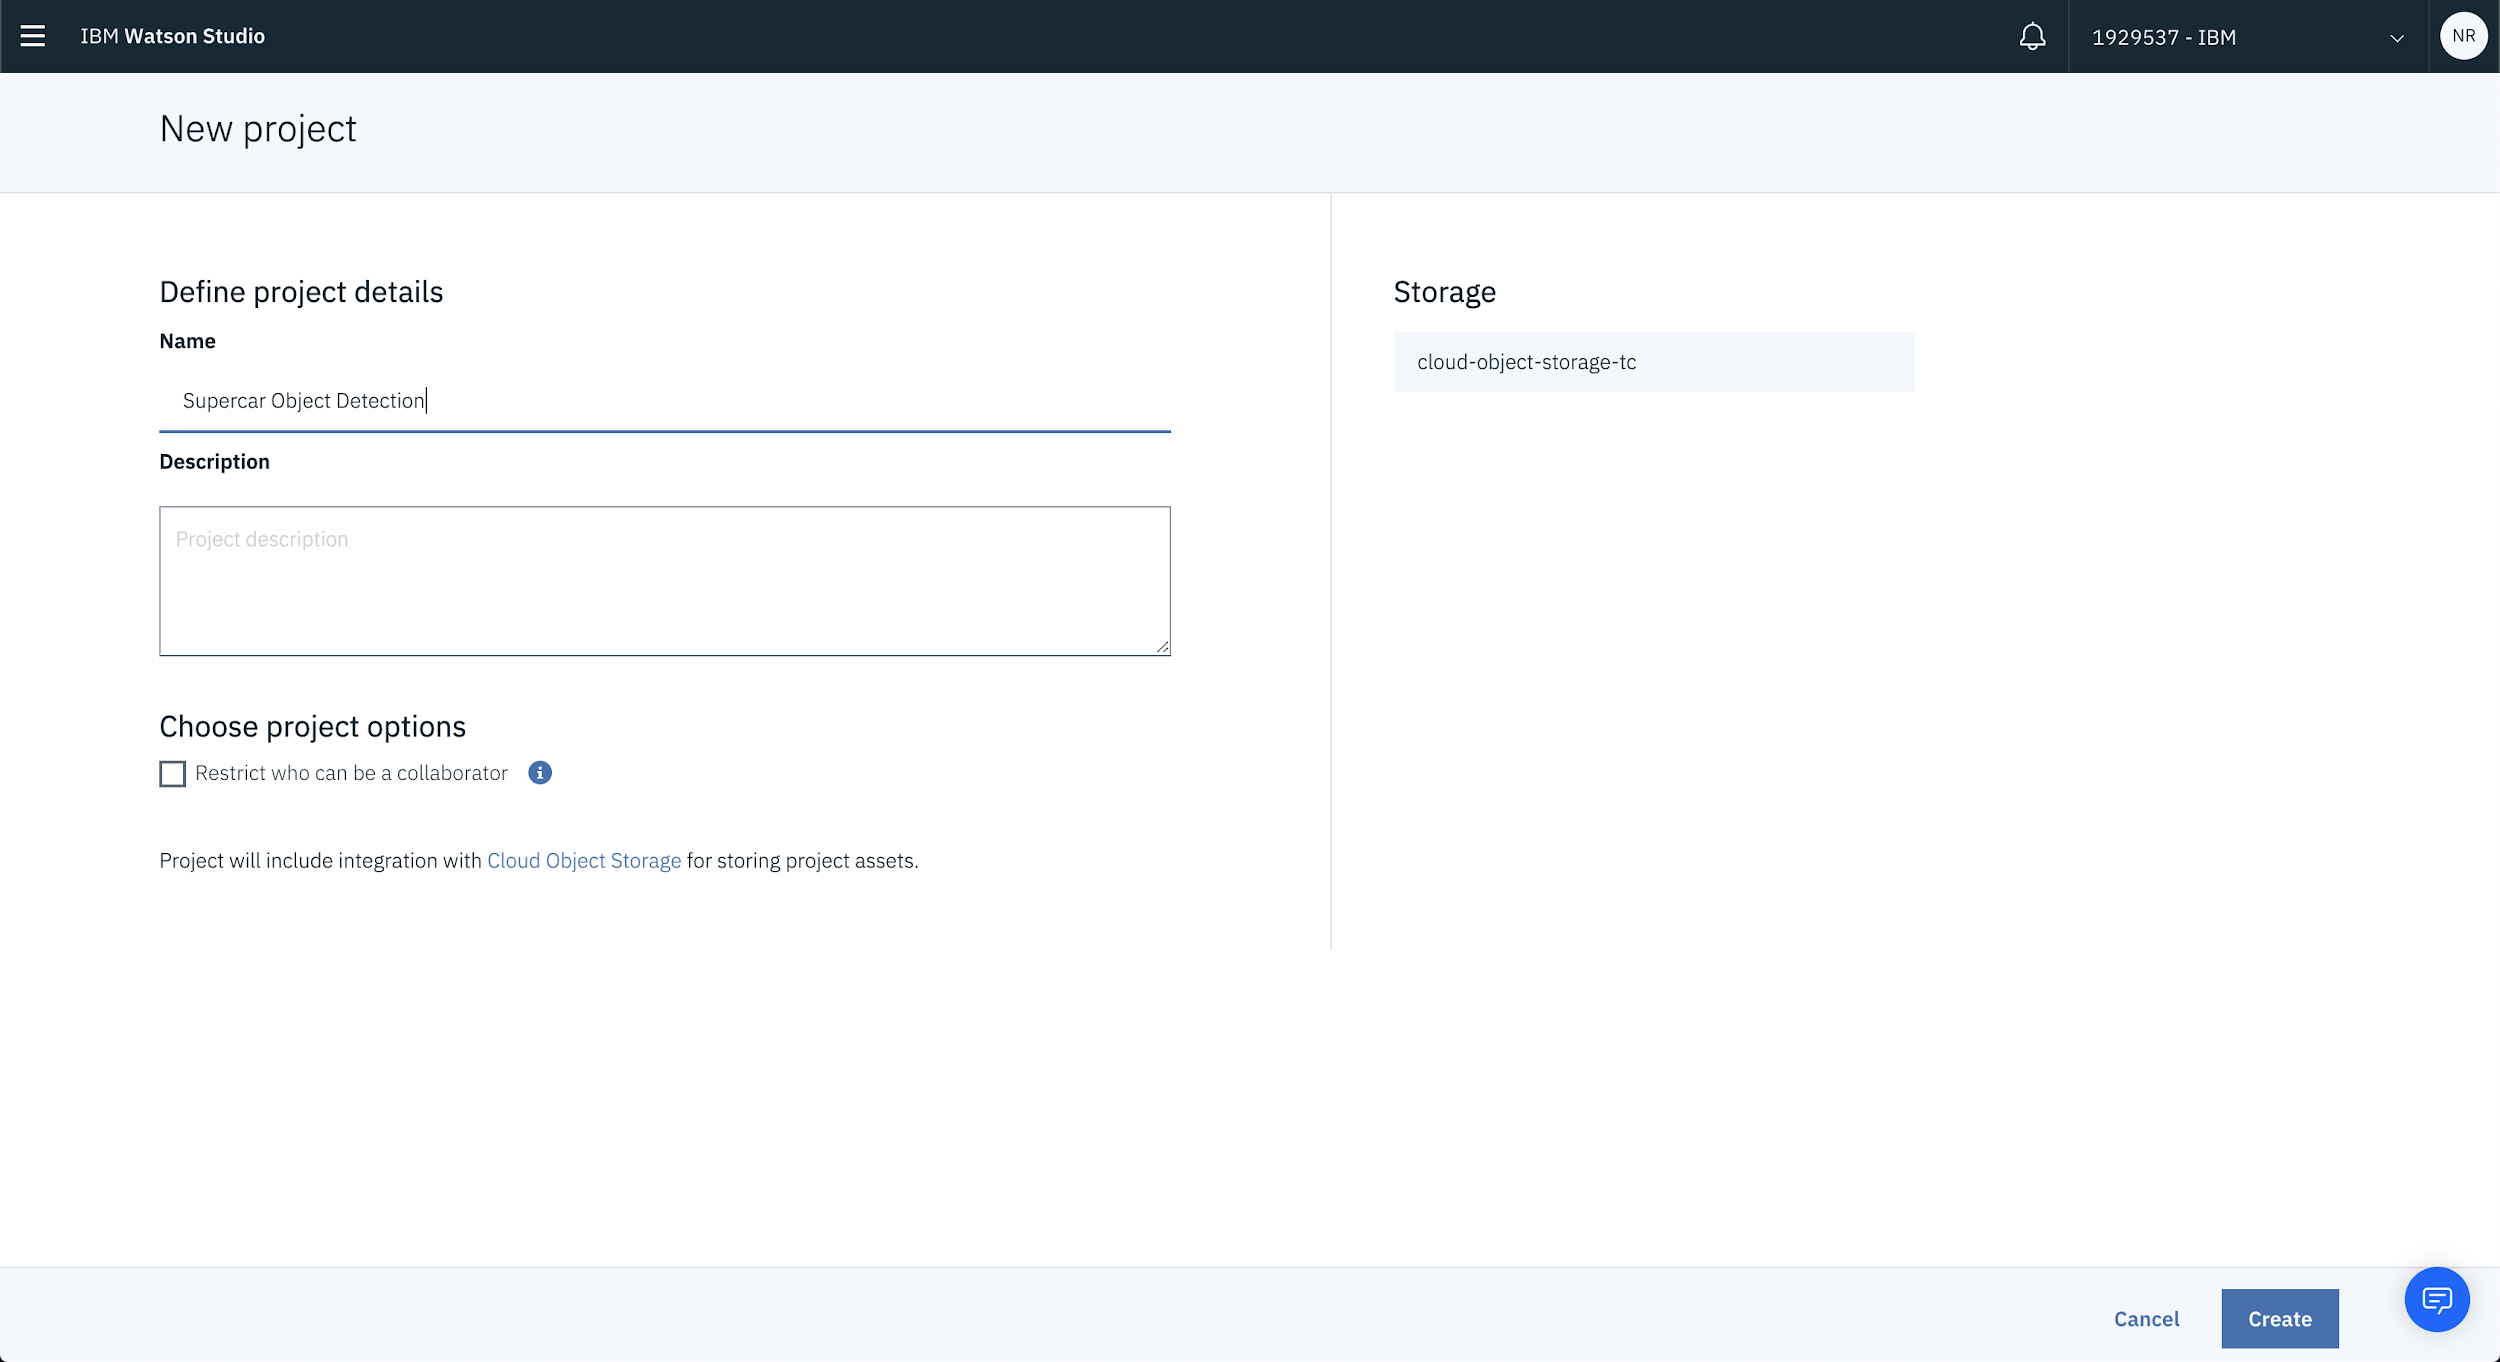
1. Create a New Project in Watson Studio
First thing’s first, the easiest way to work with the Object Detection API is to create a new project inside of Watson Studio. So…head on over to dataplatform.ibm.com and create a new project.
For this run-through we’ll be detecting different components on supercars but feel free to name the project anything you want then hit Create.
Once your project is created select Add to Project and Object Detection model (Beta) to add the Object Detection API into your project.
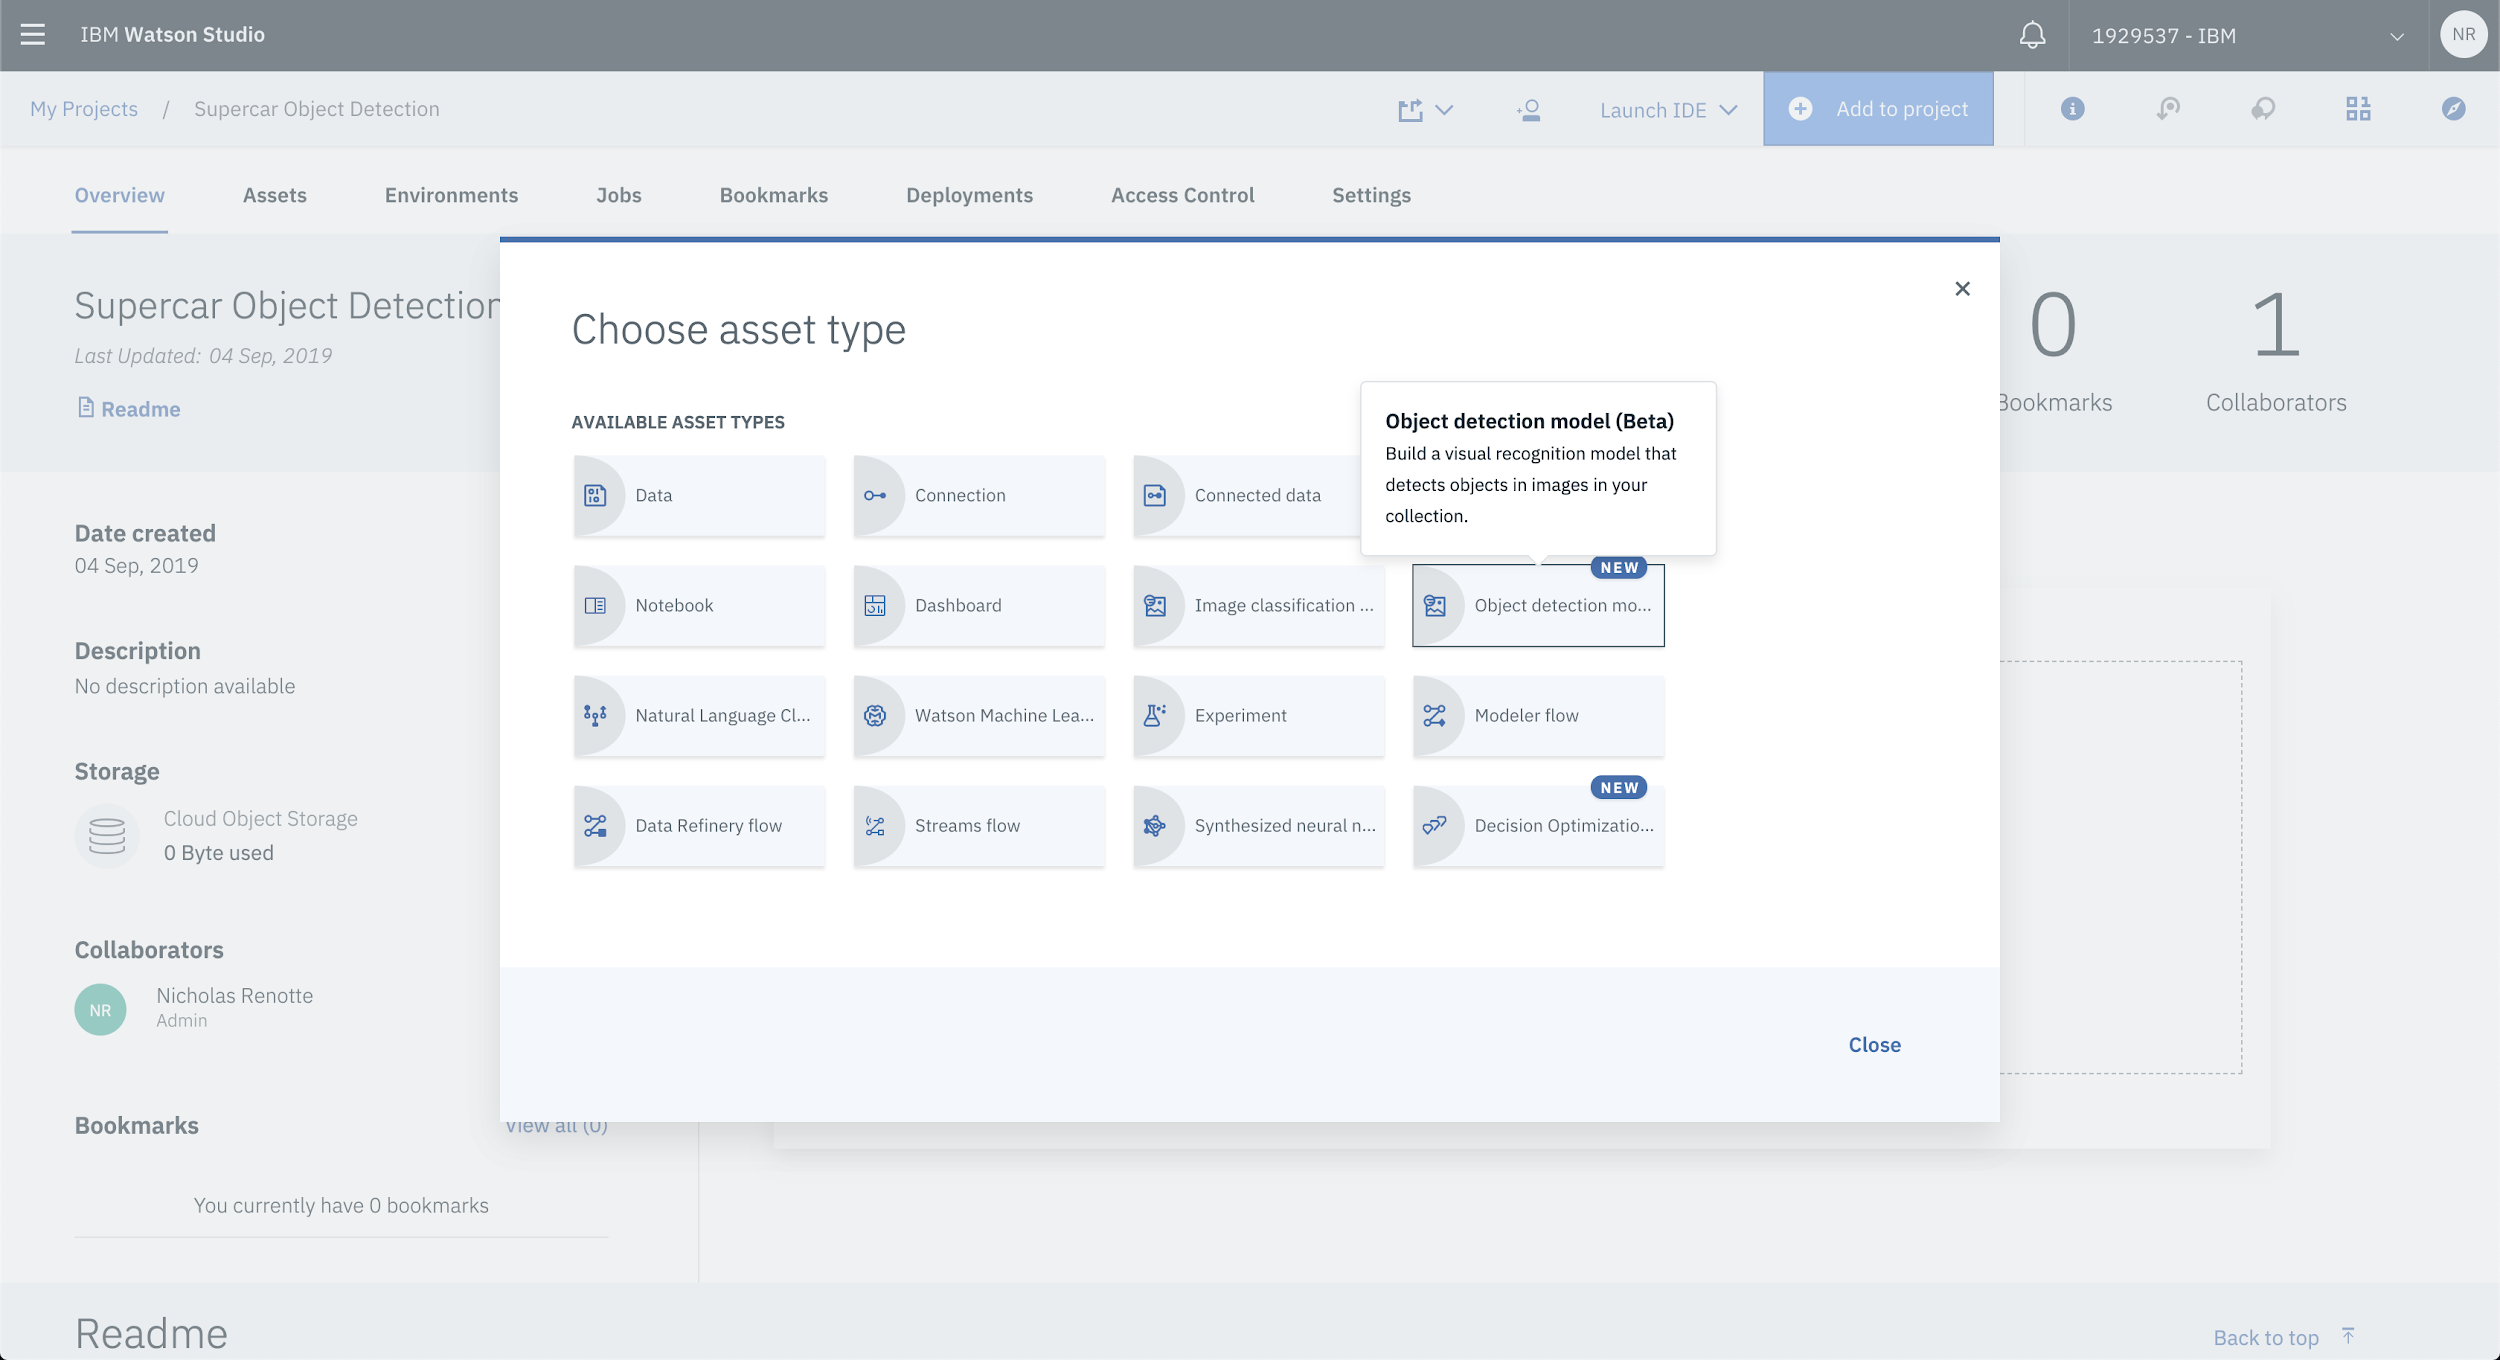
You’ll then be prompted to associate a Vision Recognition service. 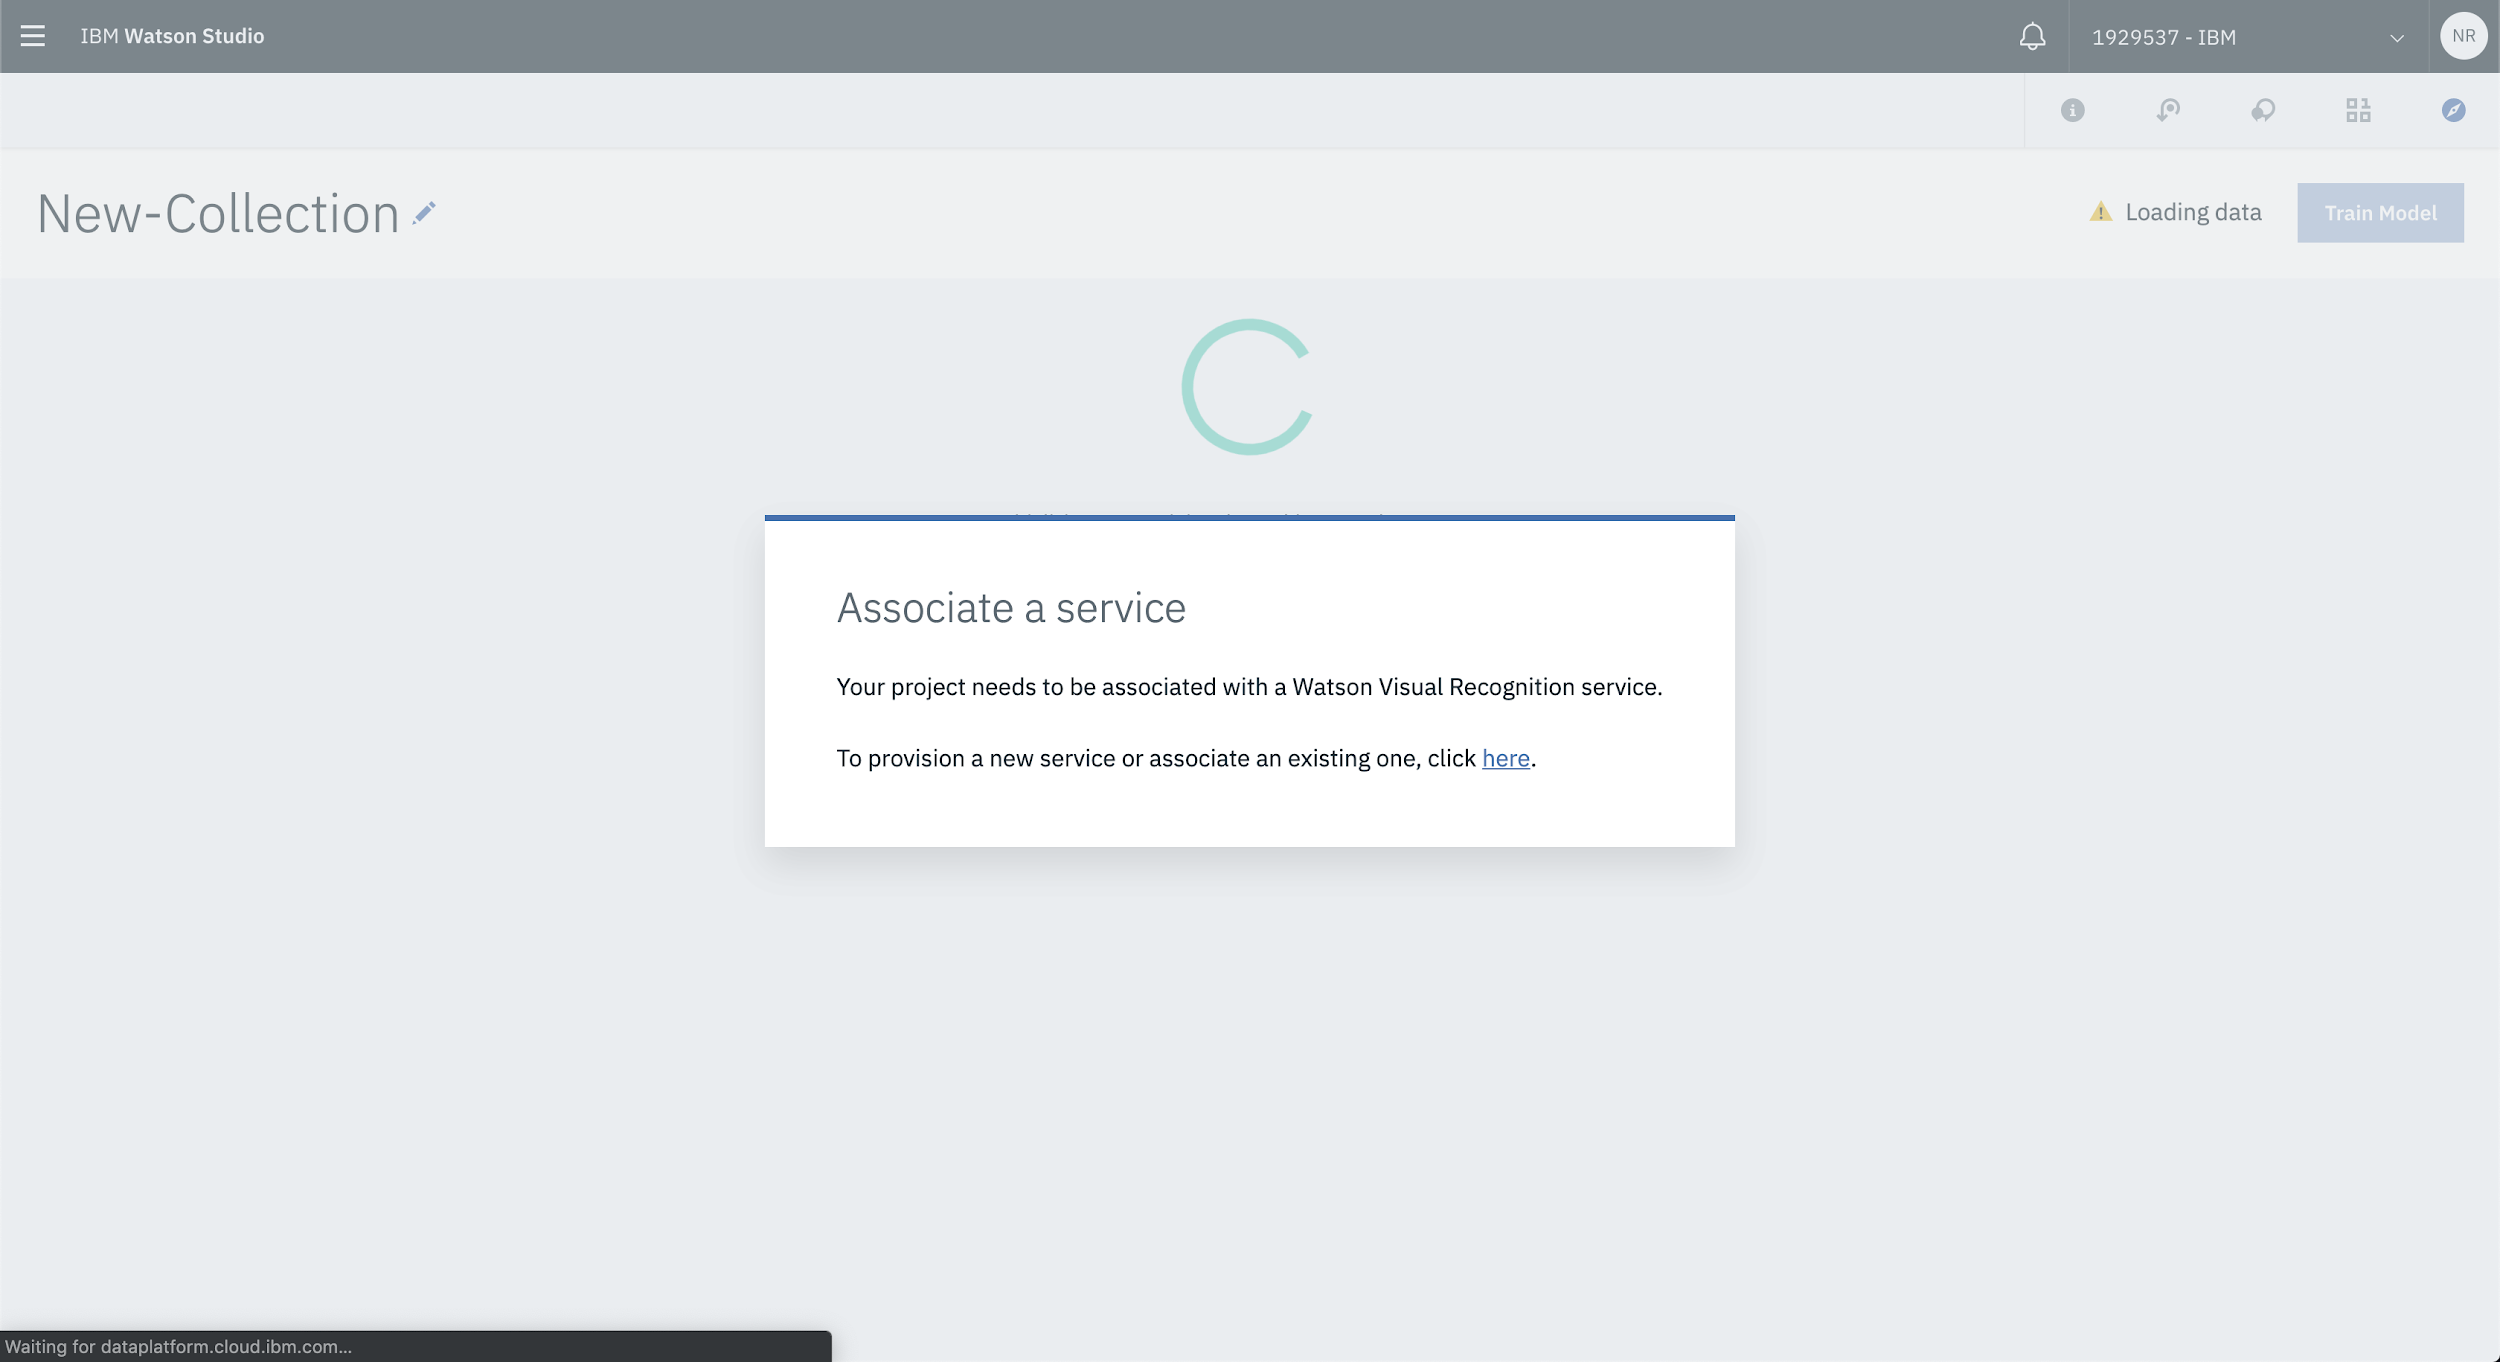
If you have an existing Vision Recognition service, simply select the service from the list of available services.
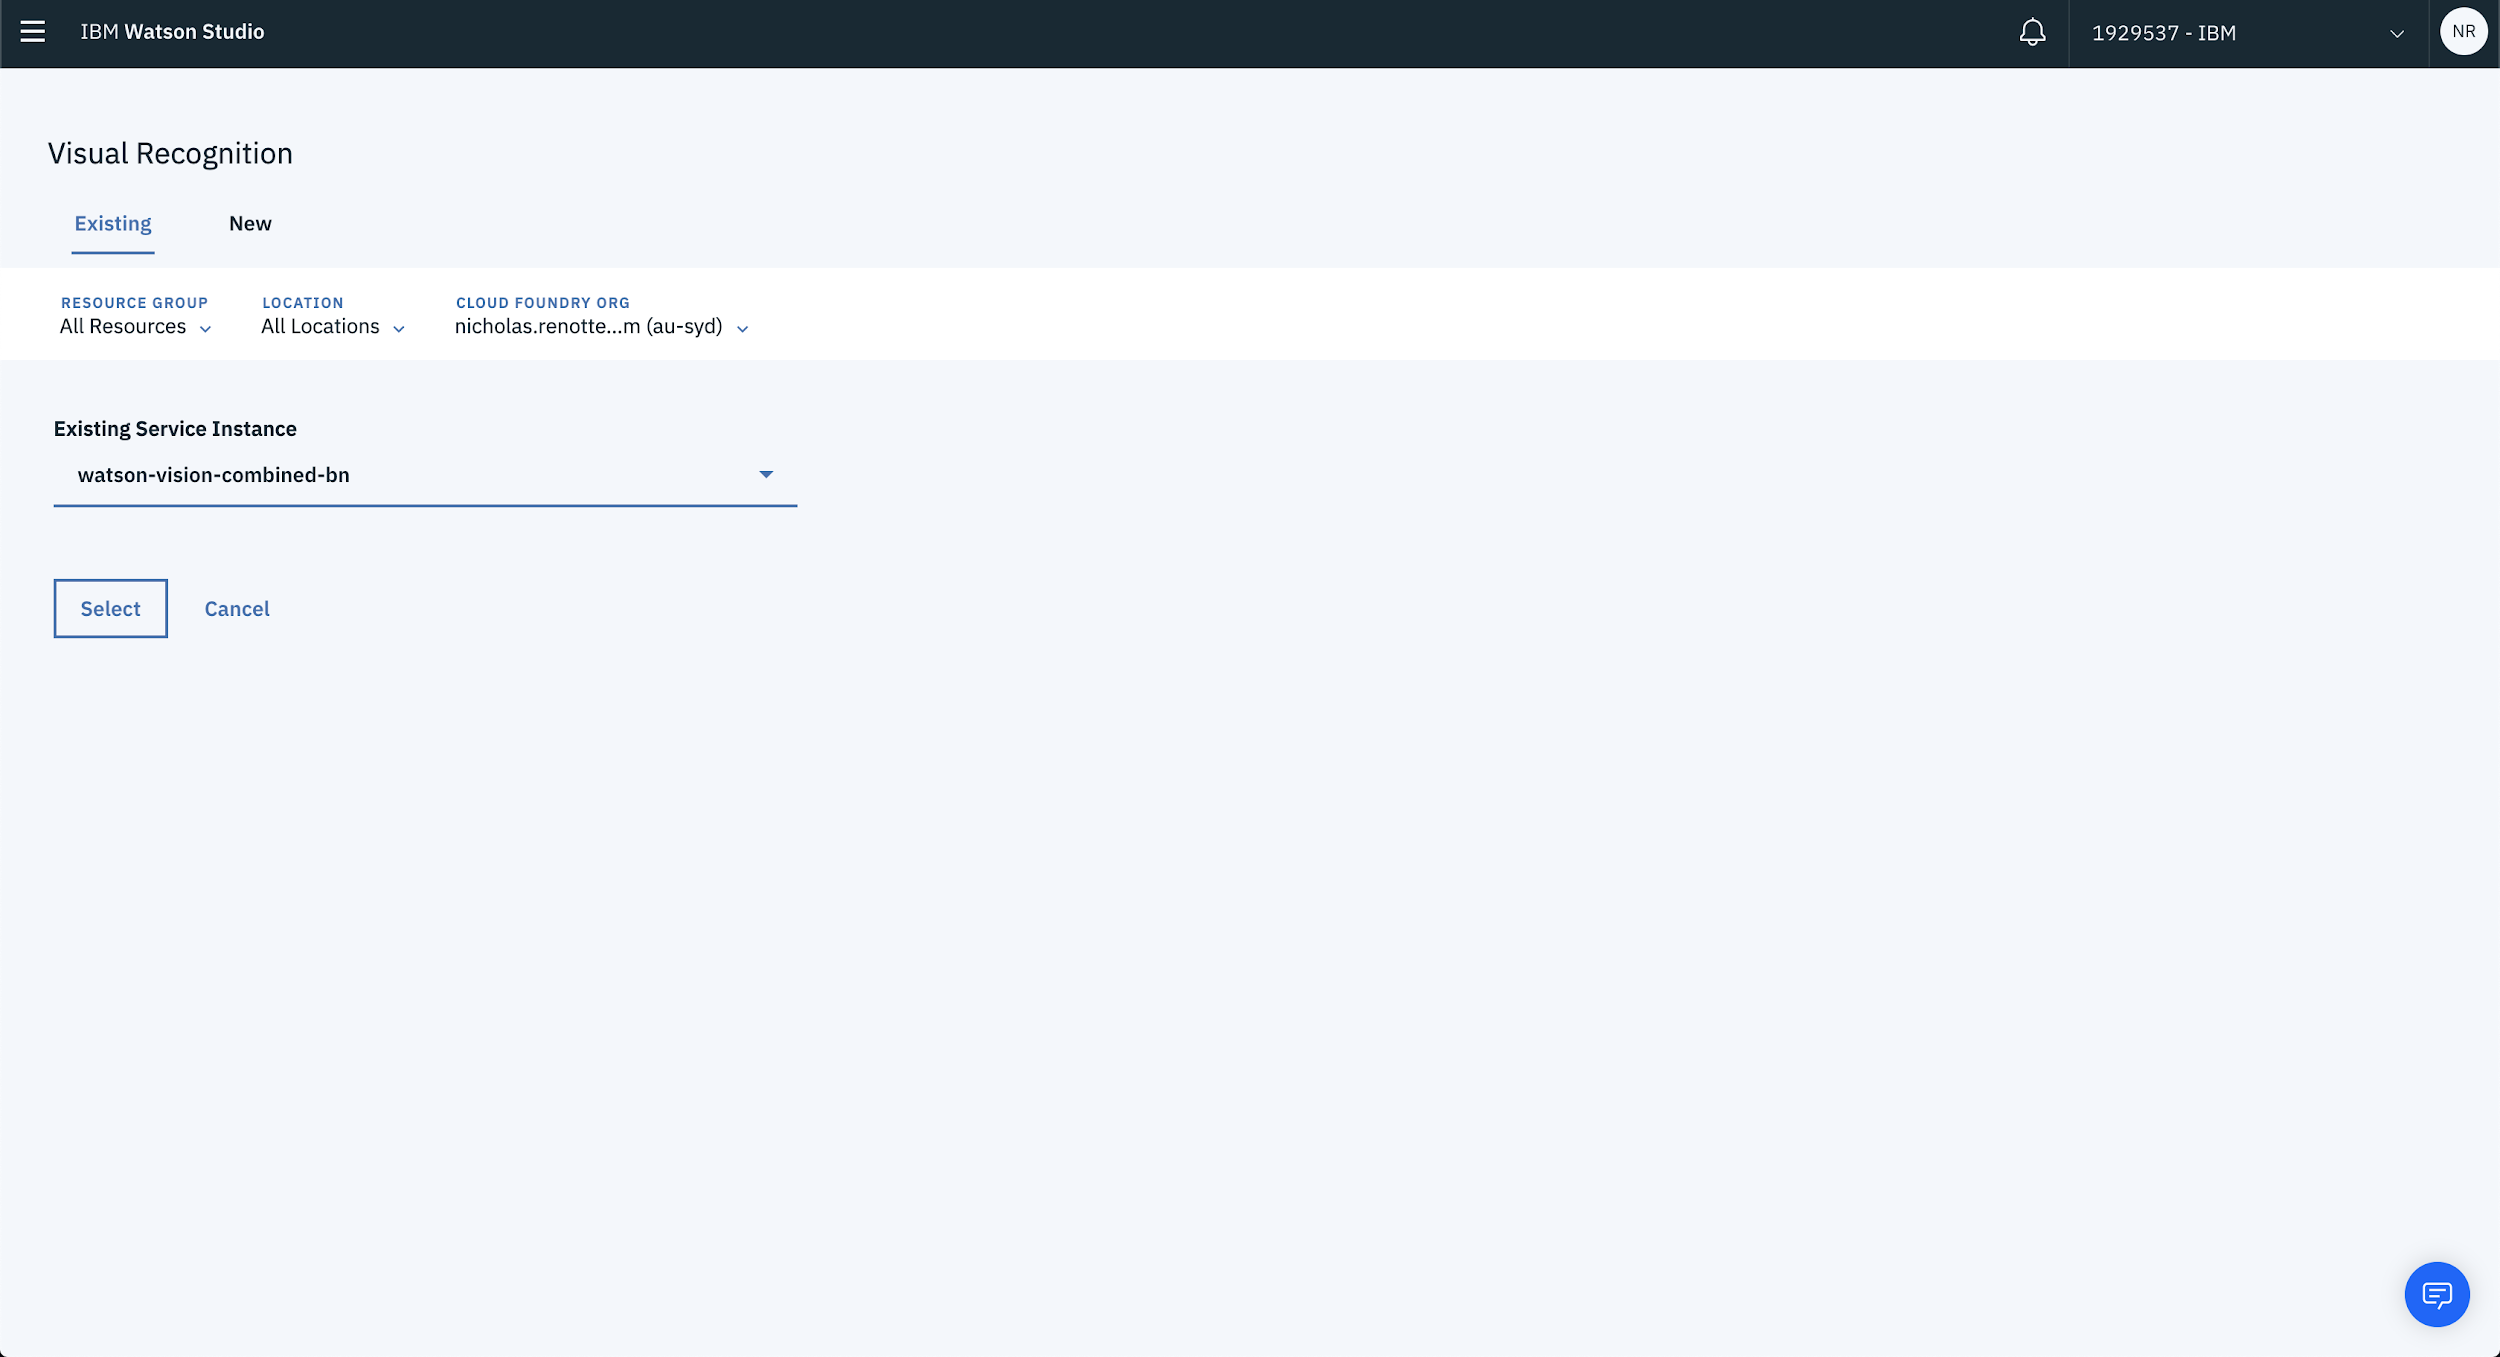
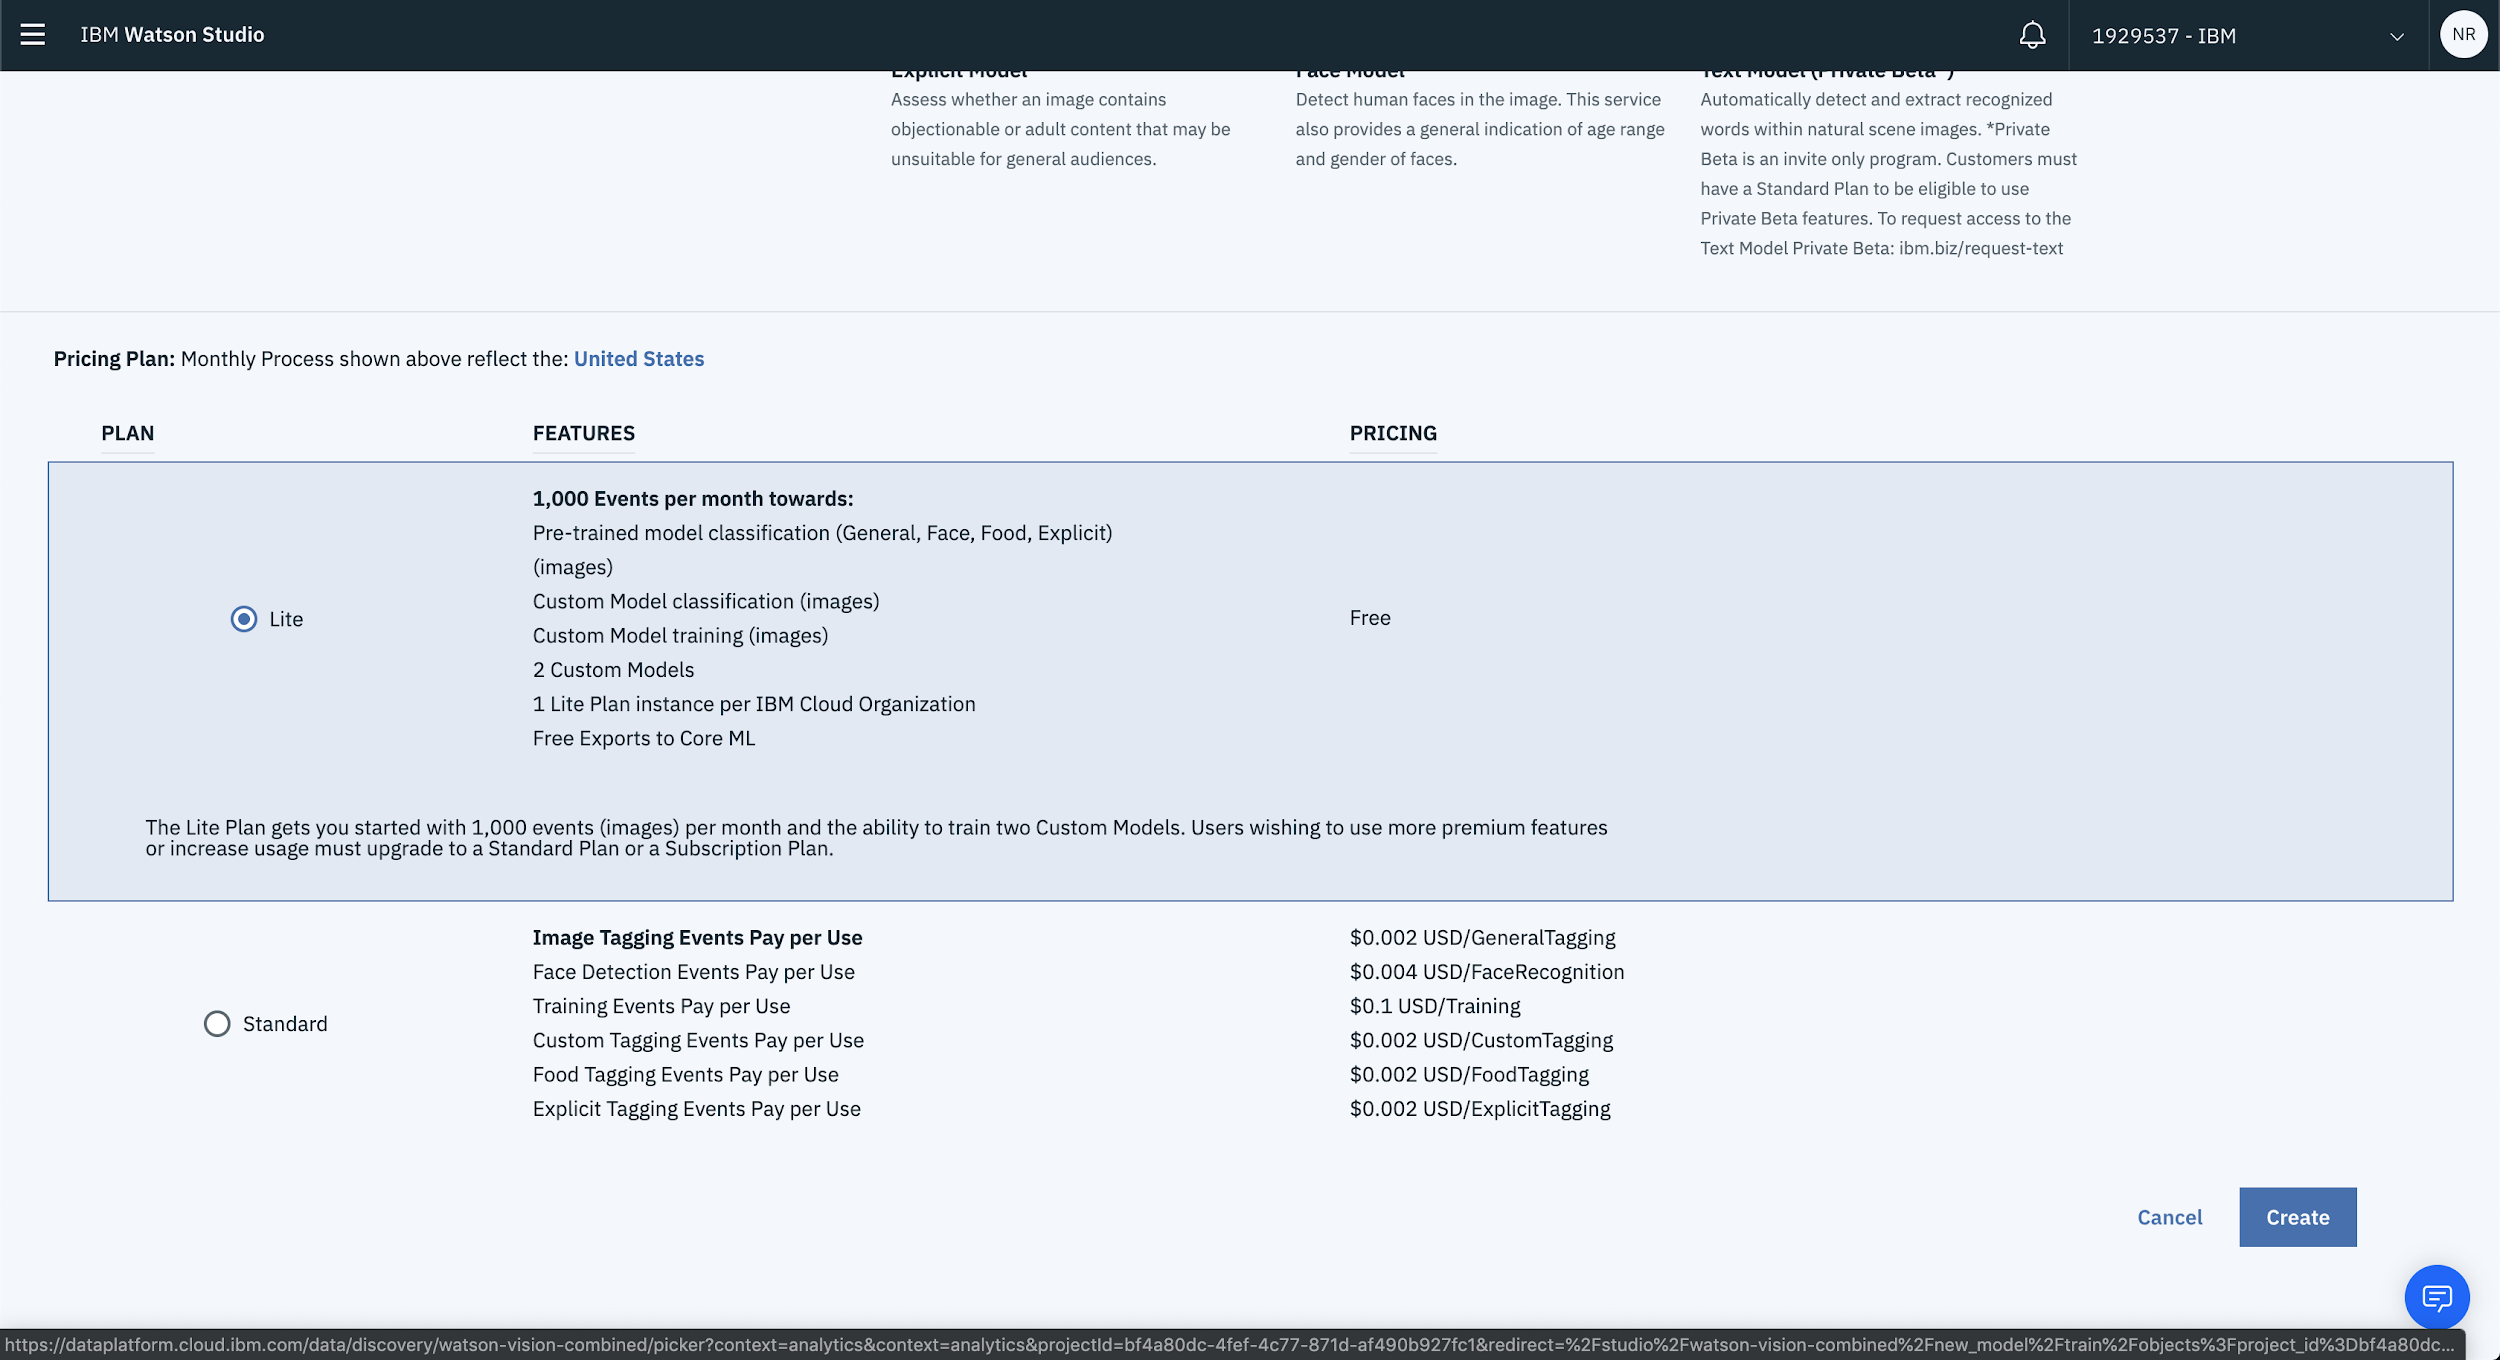
If you don’t have a service available, select New from the top of the page and choose an appropriate plan. The Lite Plan is more than sufficient to get up and running with a proof of concept. If you plan on building out a beefier application then take a look at the Standard Plan.
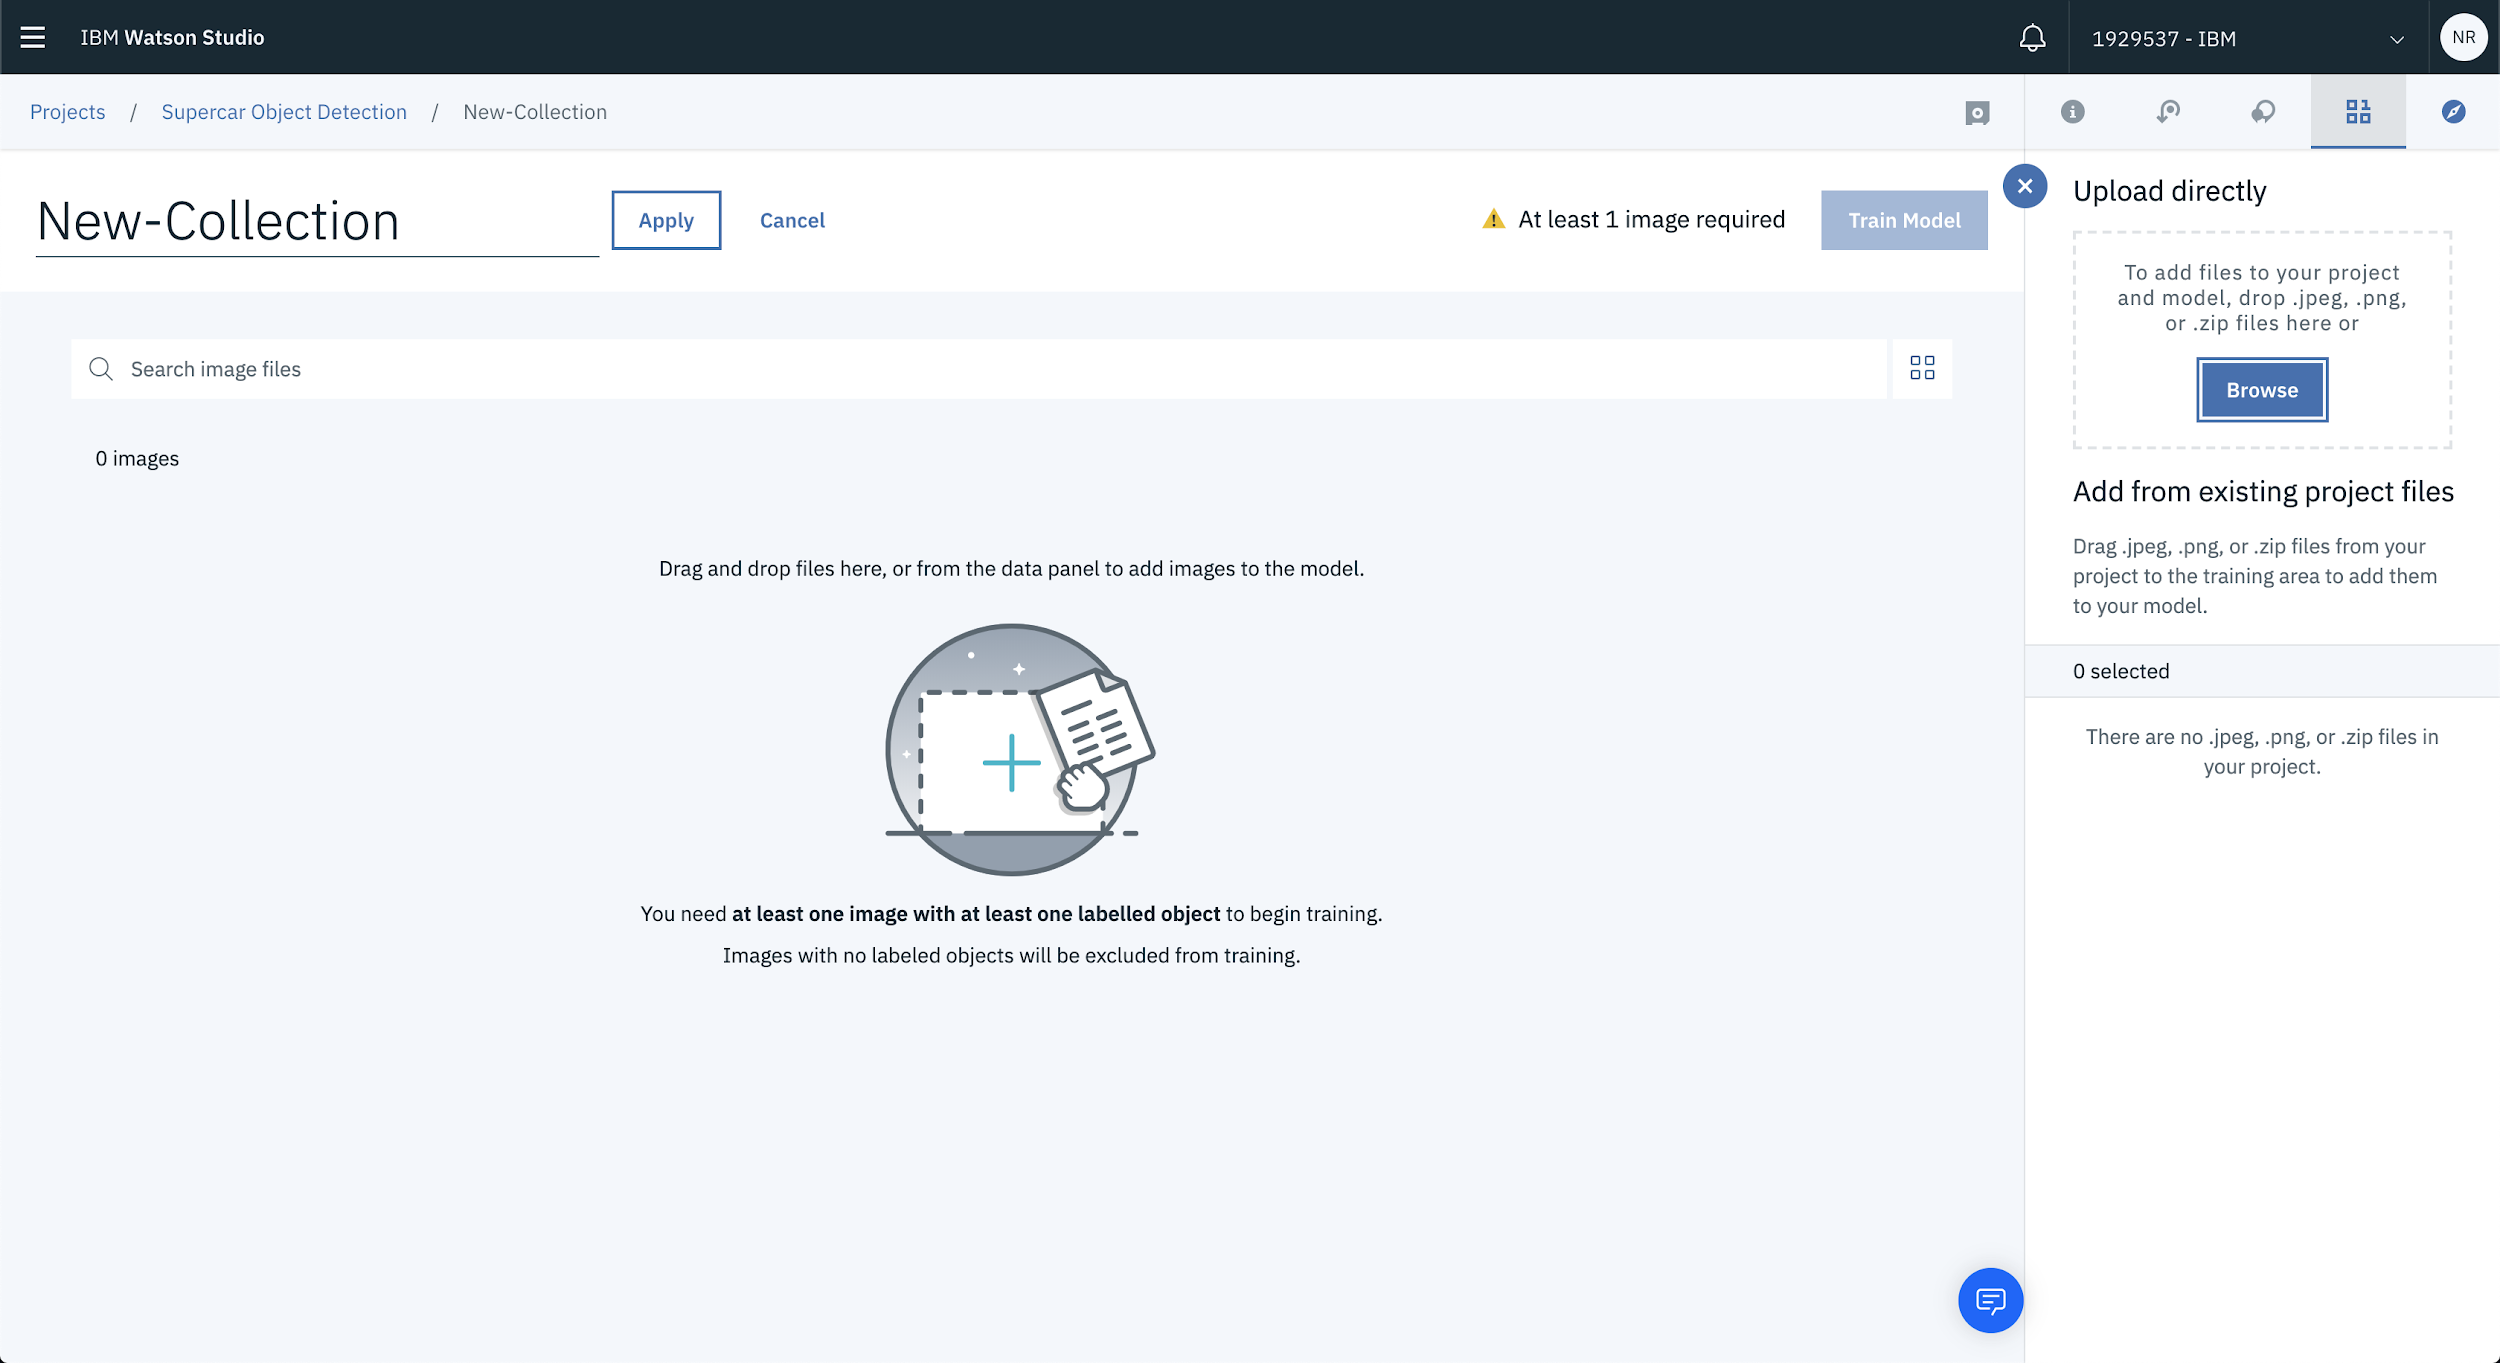
2. Load Up Your Images
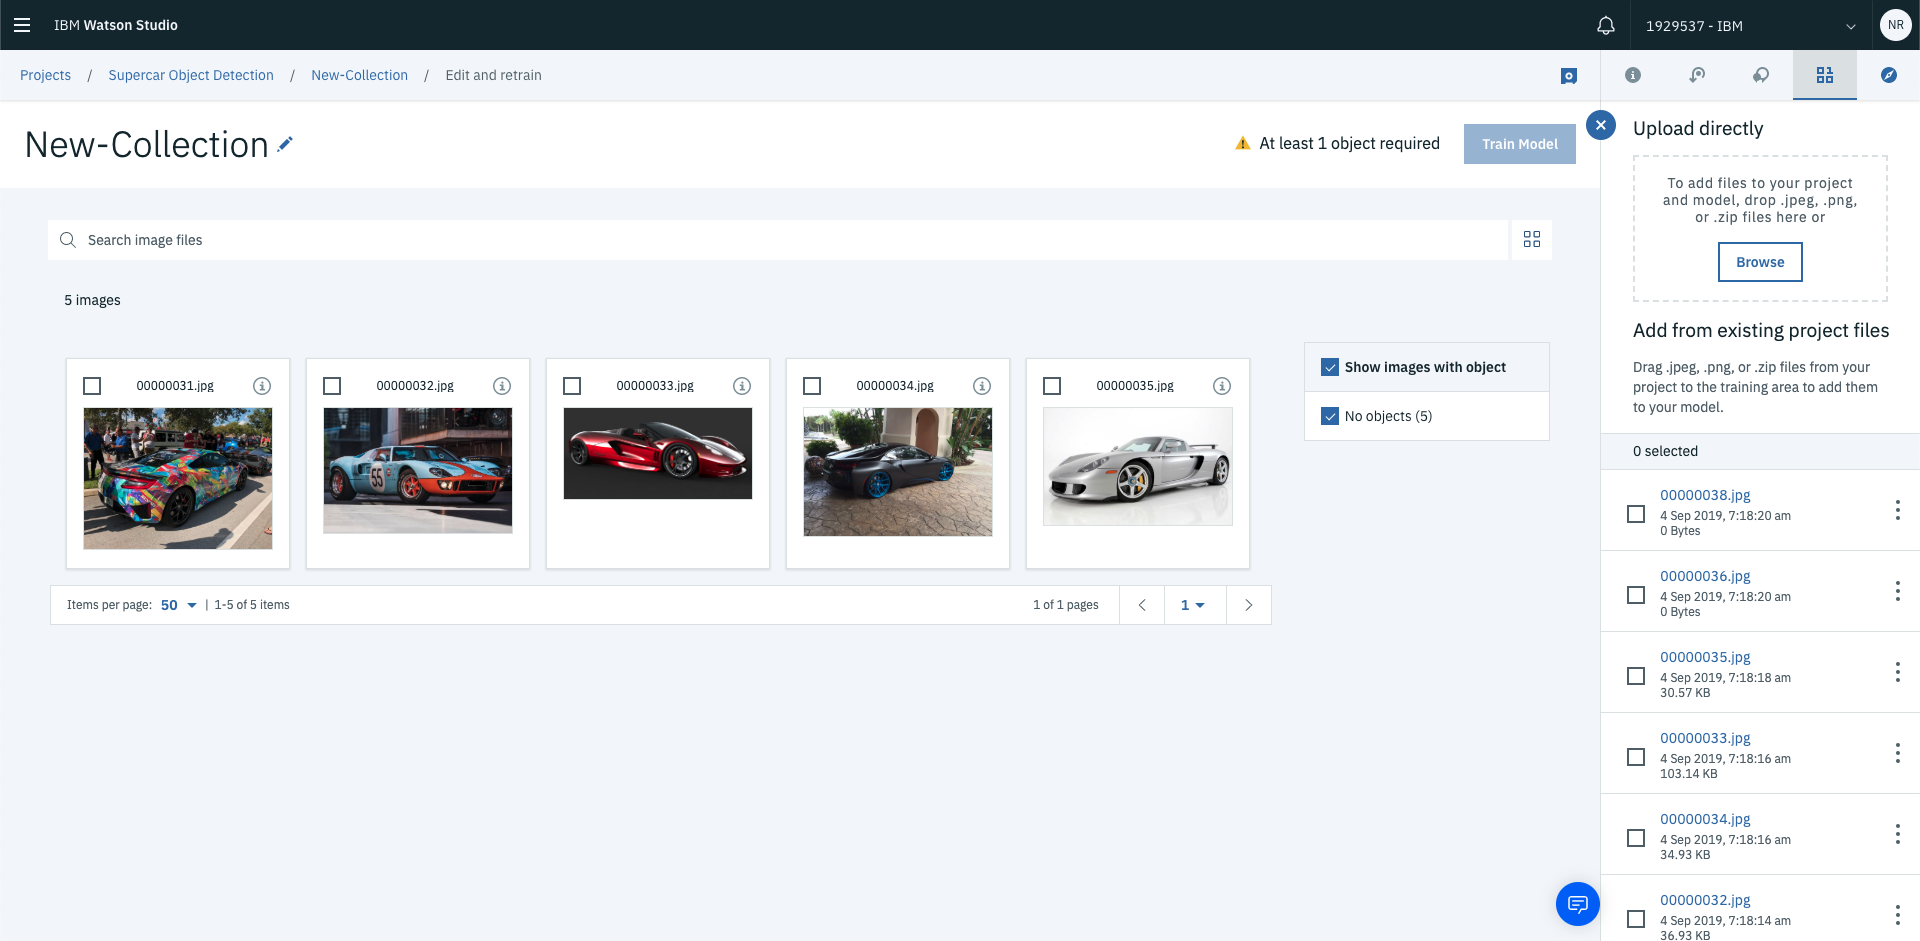
Alright, that’s the boring stuff out of the way. You can now get to loading and training our model. Once you’ve associated your Vision Recognition service you’ll be redirected to the Collections page where you’re able to load images to train your model on.
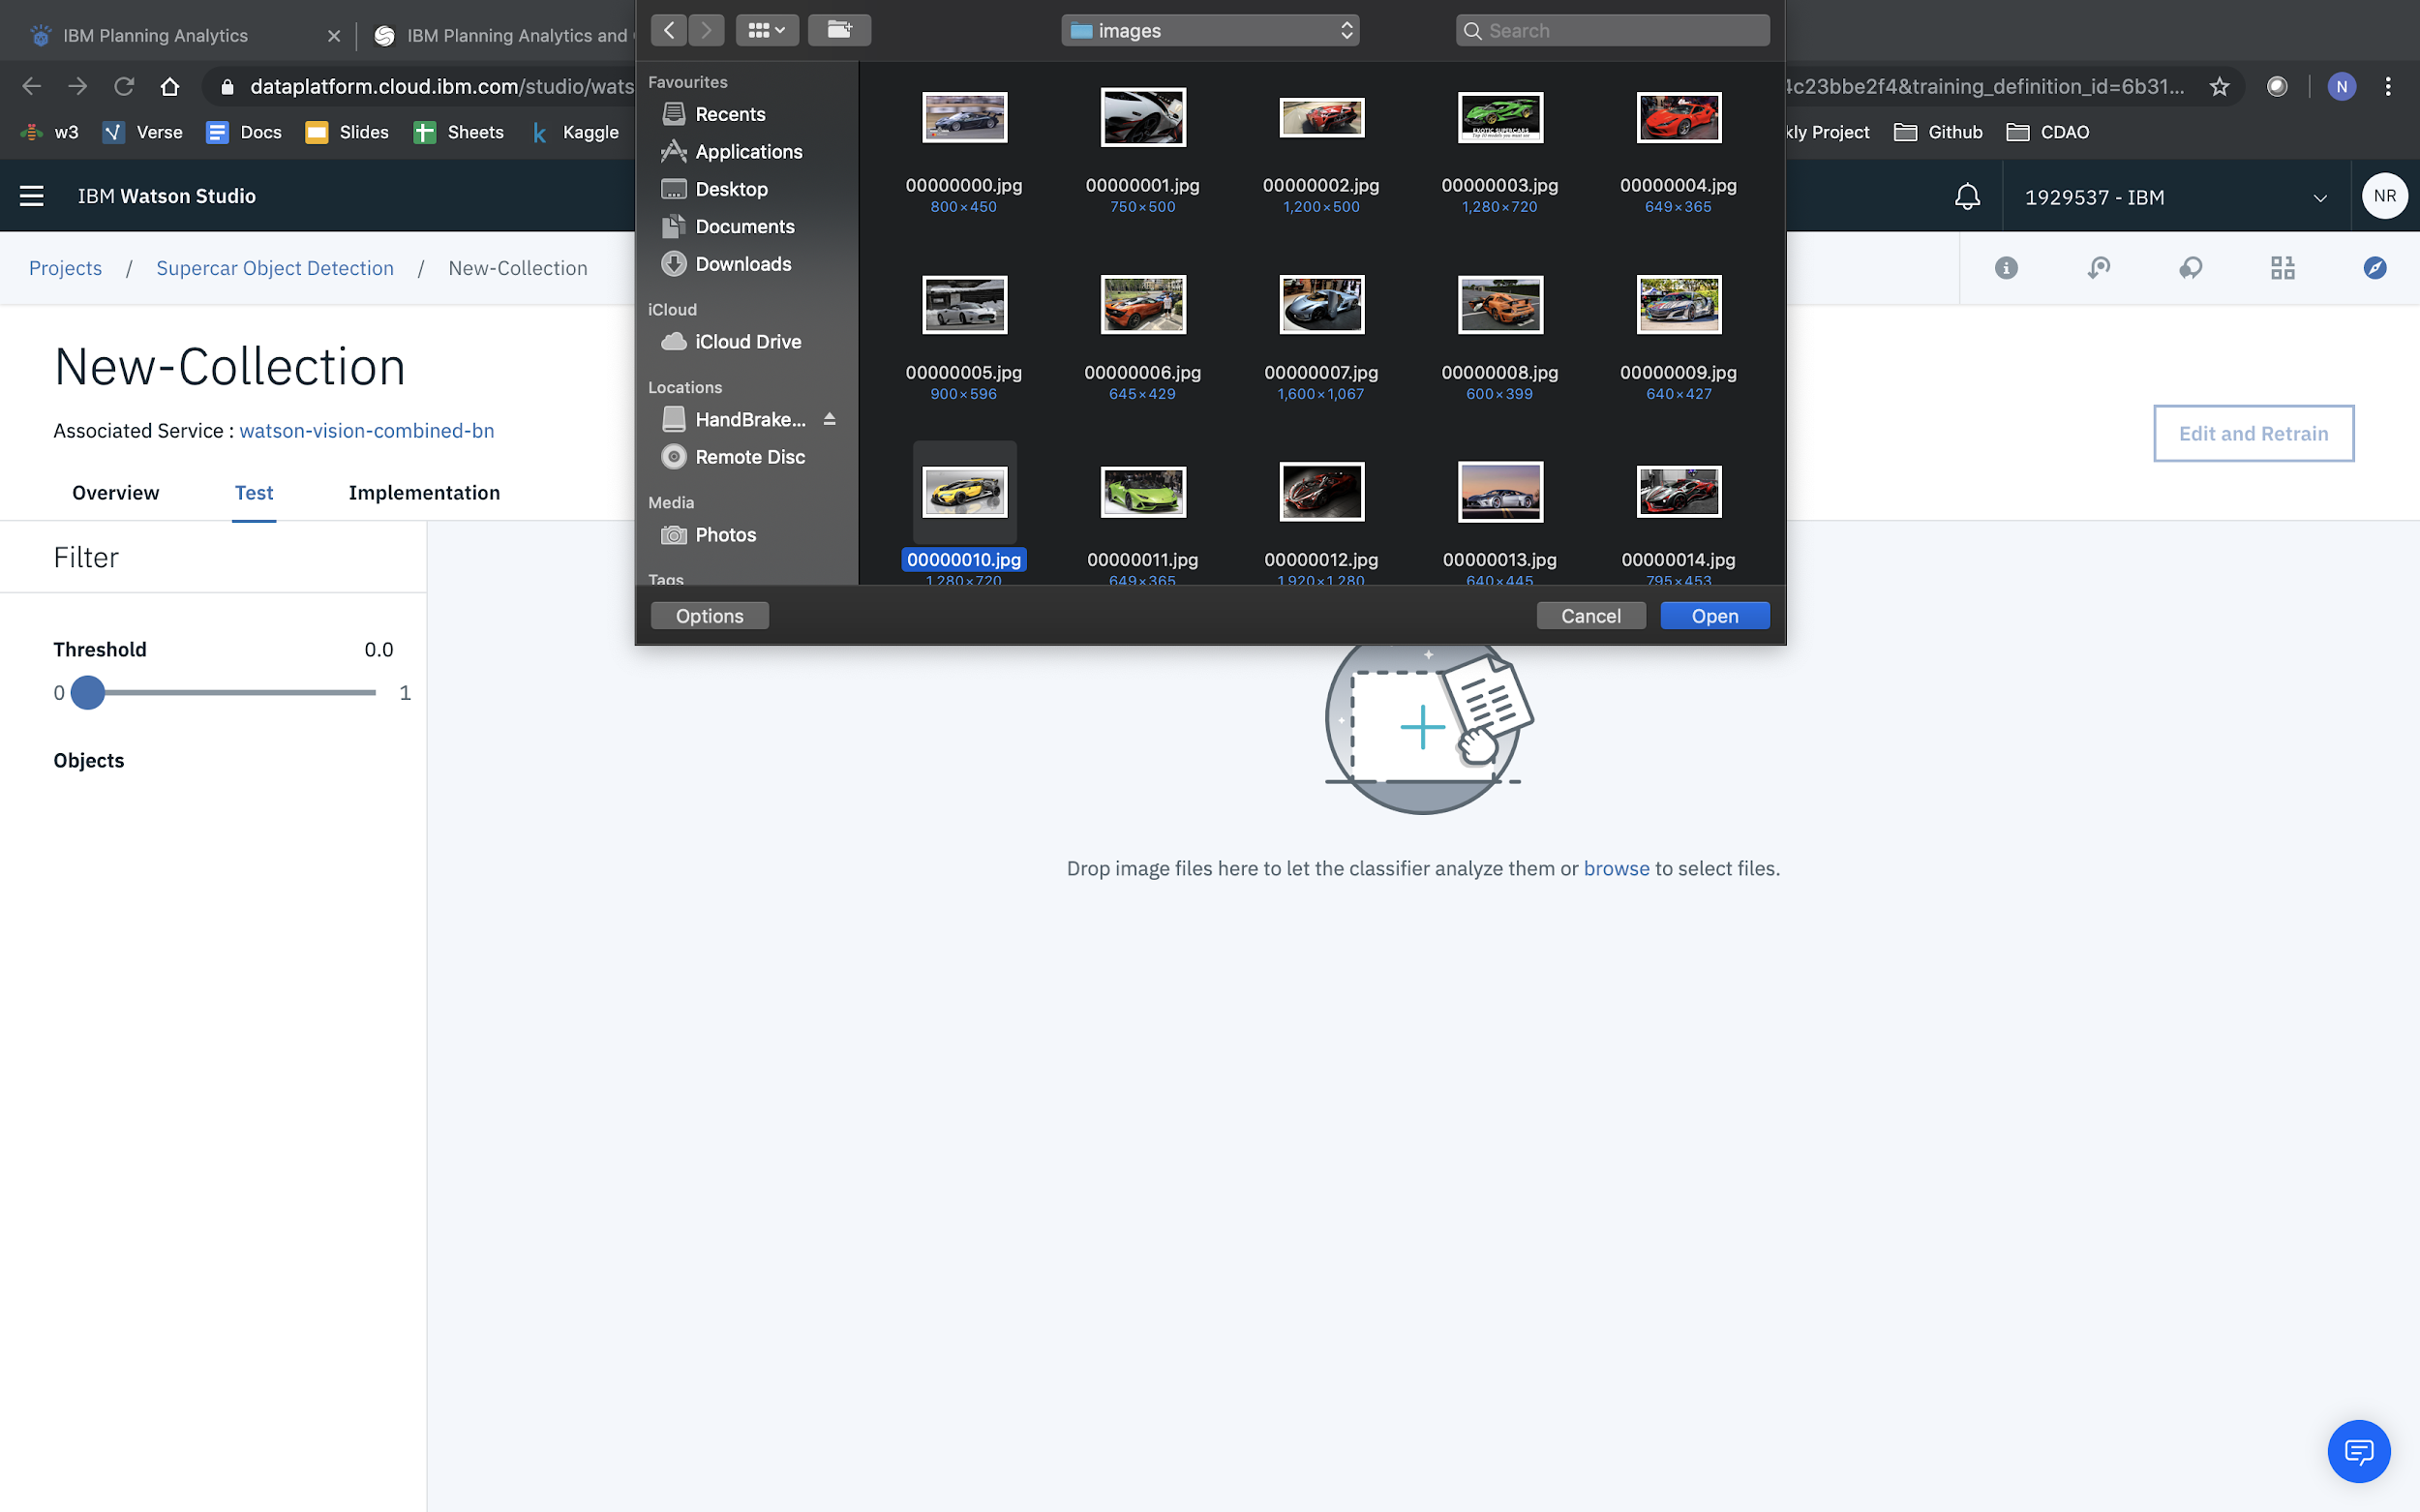
Click Browse from the right hand side of the page to start uploading images.
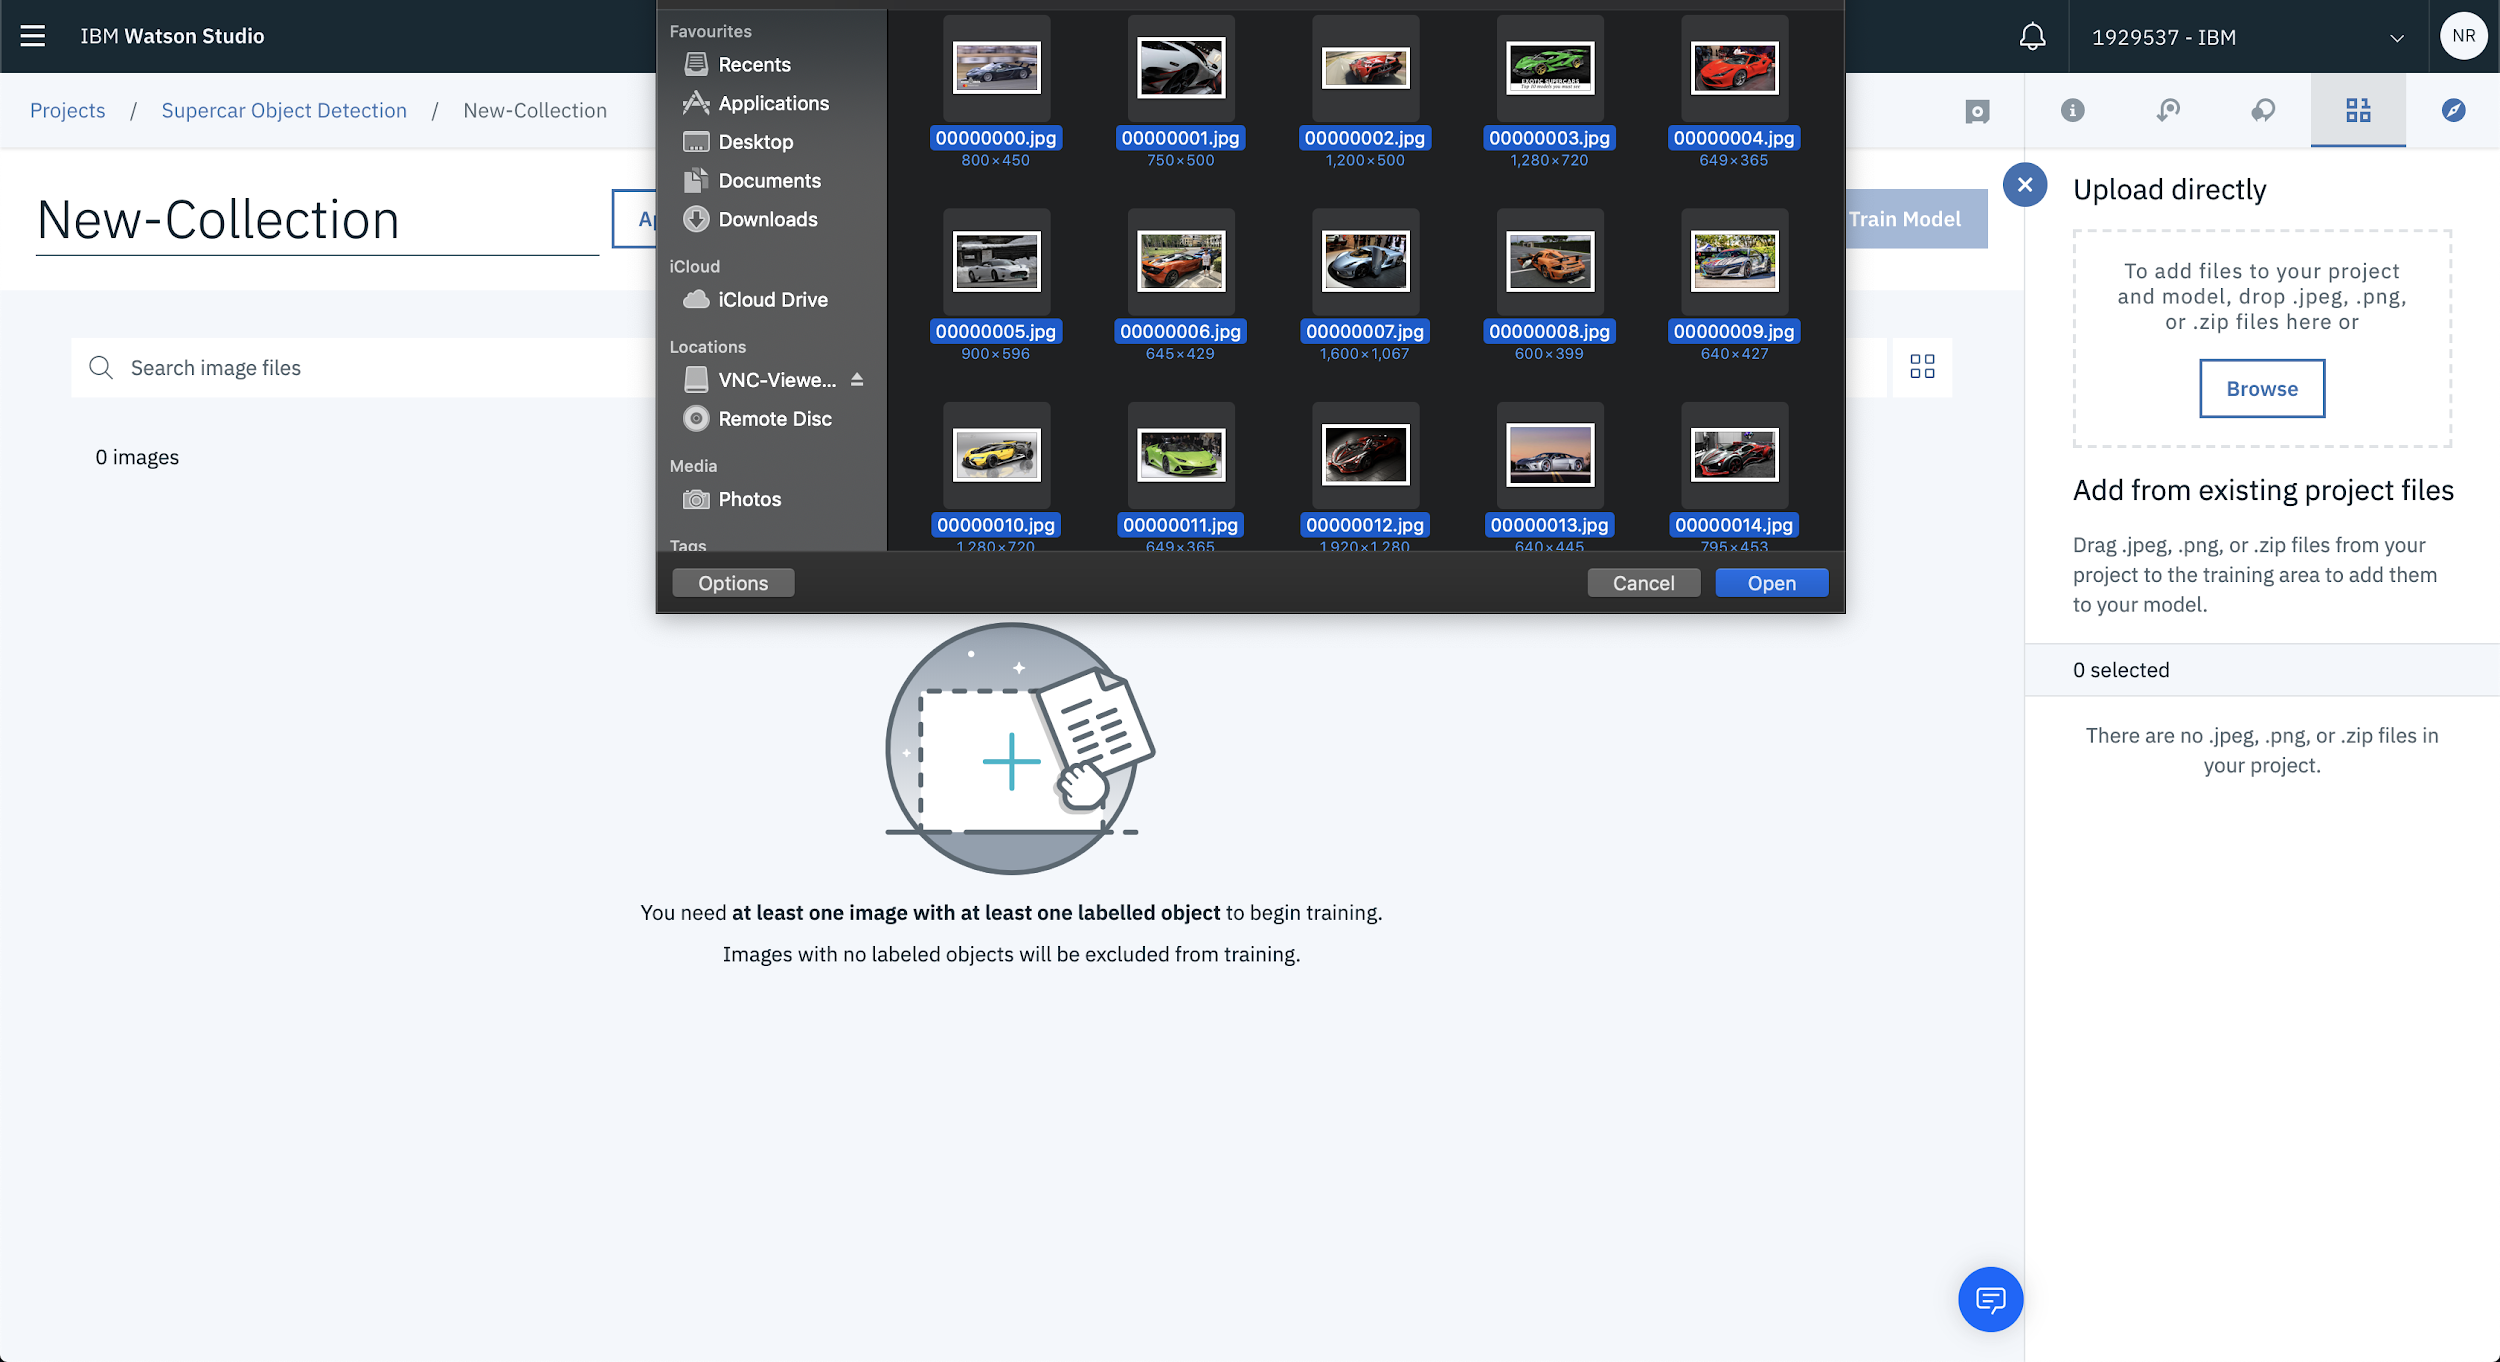
In this case there’s a bunch of supercar images that will be used to train the model. Choose whichever images you’d like to use to build your own model.
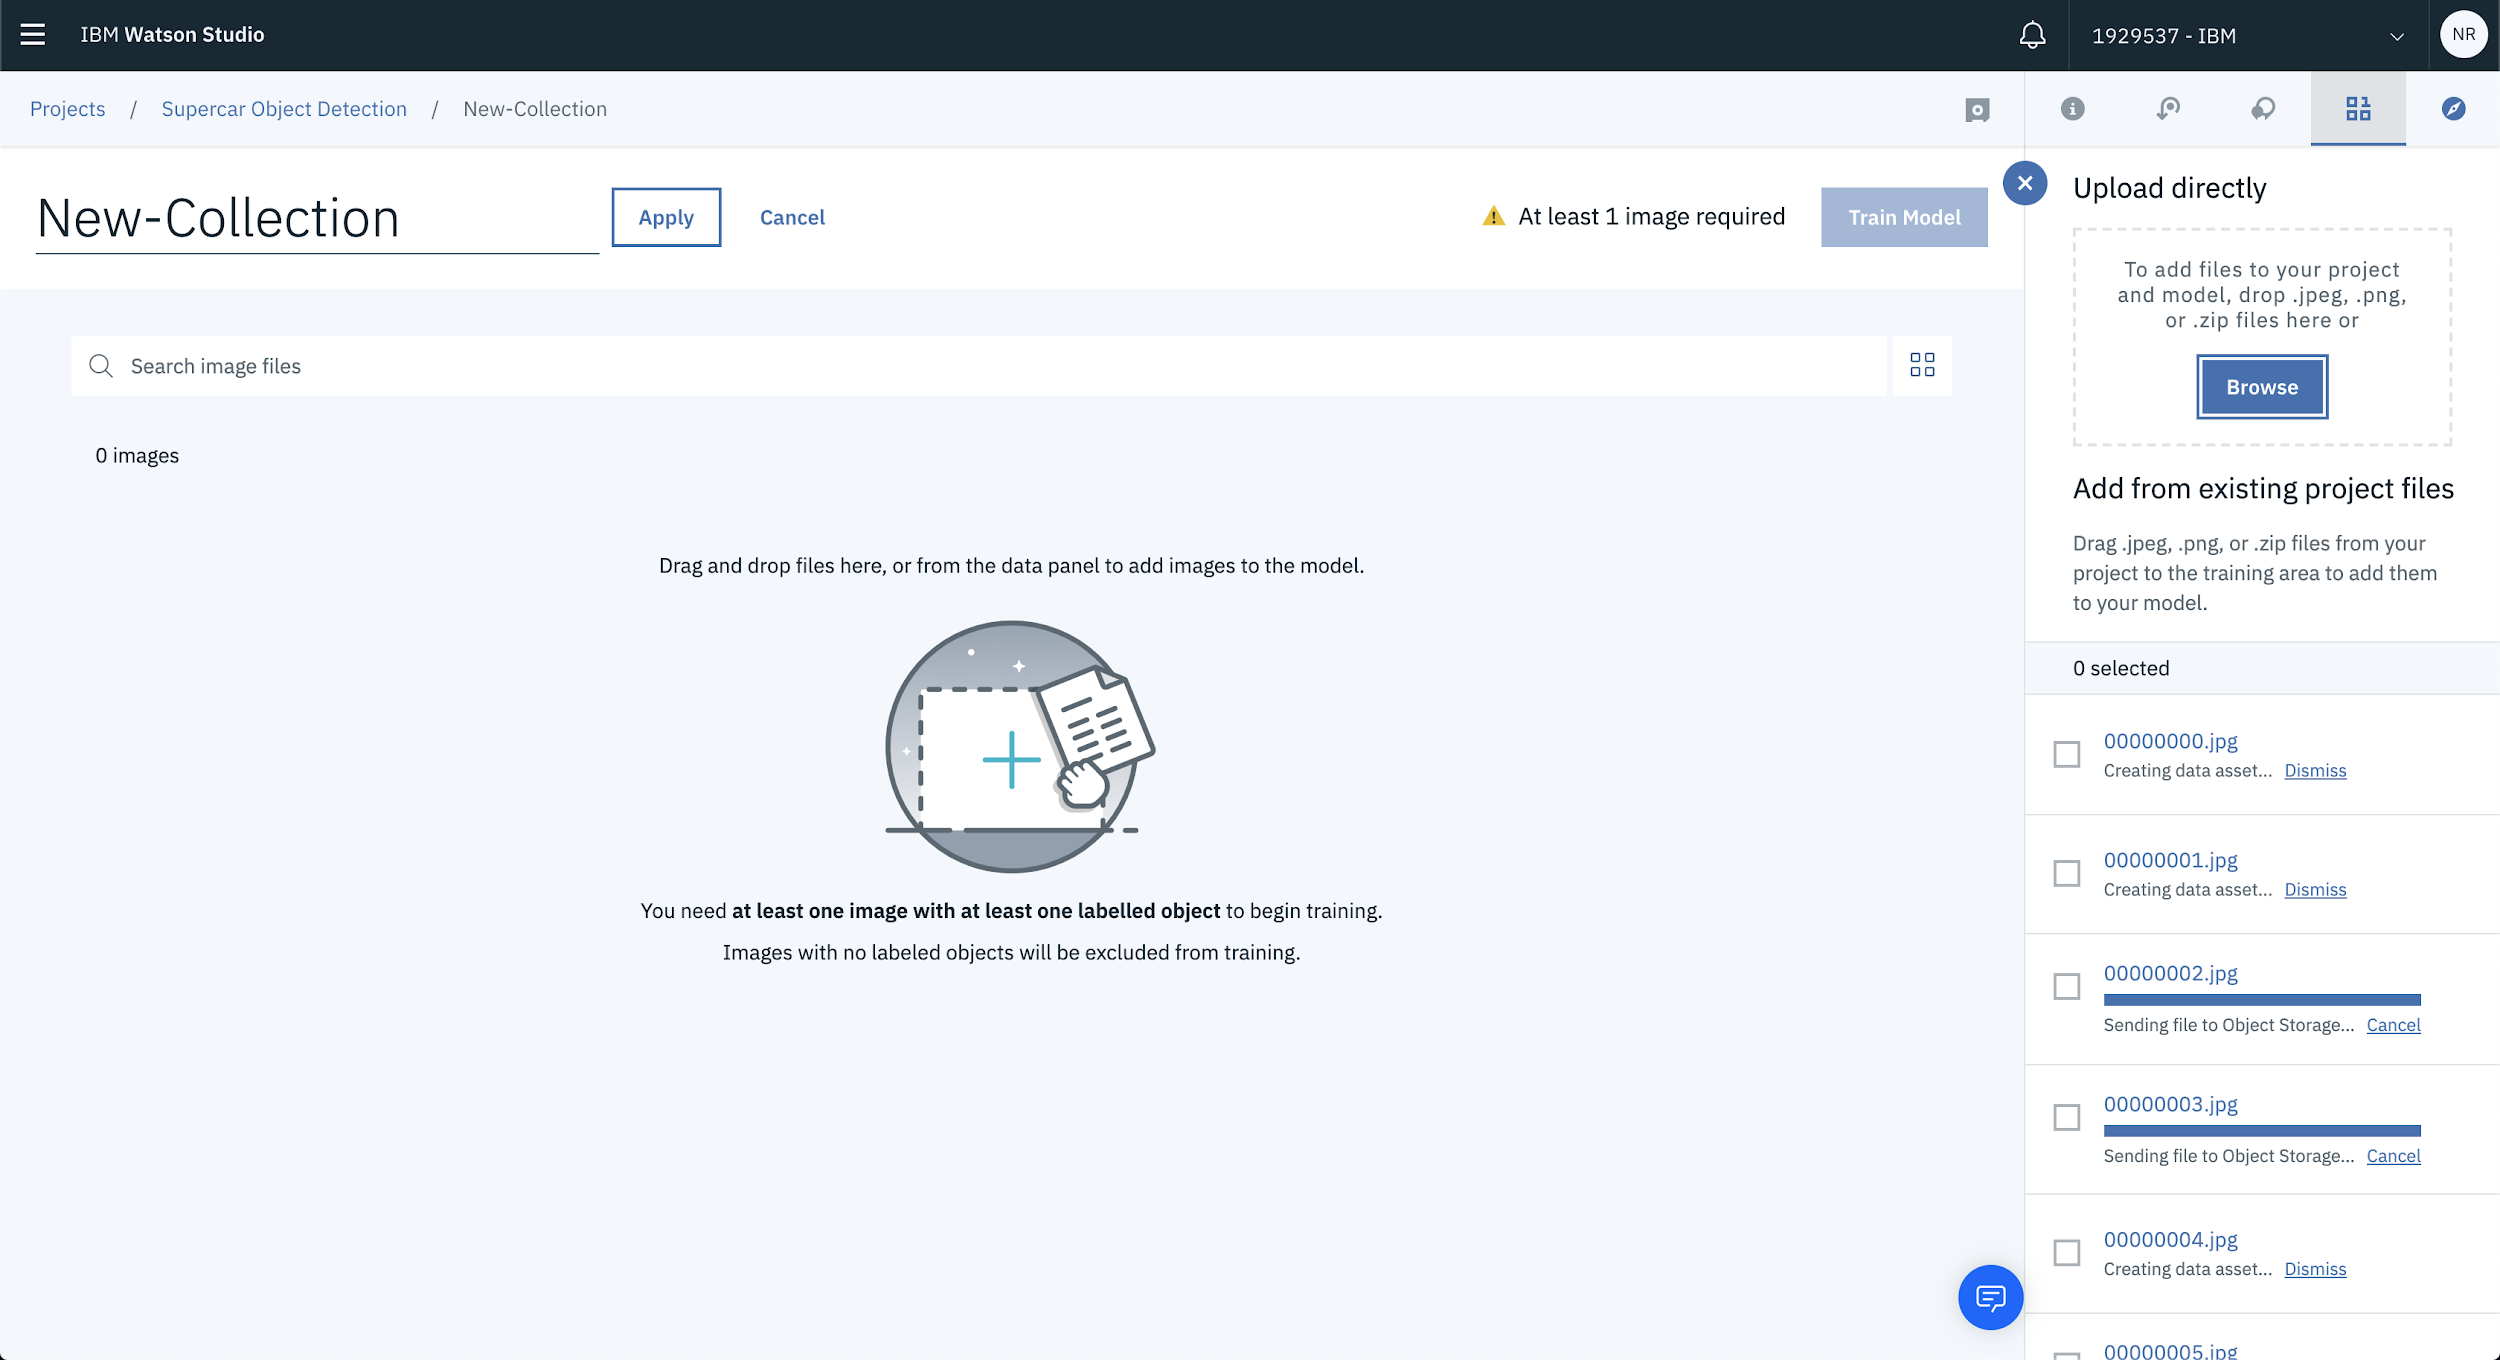
Once you’ve selected the images to upload, they’ll start processing and eventually will be loaded into the project.
Once that’s done, you can start labelling your images!
3. Label Your Objects
The next part of this journey requires you to label the objects within your images. This is actually pretty straight forward inside of Watson Studio. All you have to do is select the image and drag a square around the object you’re trying to train on.
To add images to your training data, select the checkbox next to each image you’d like to use as part of the training set then select Add to Model.

This will load the images into the collection in preparation for training.
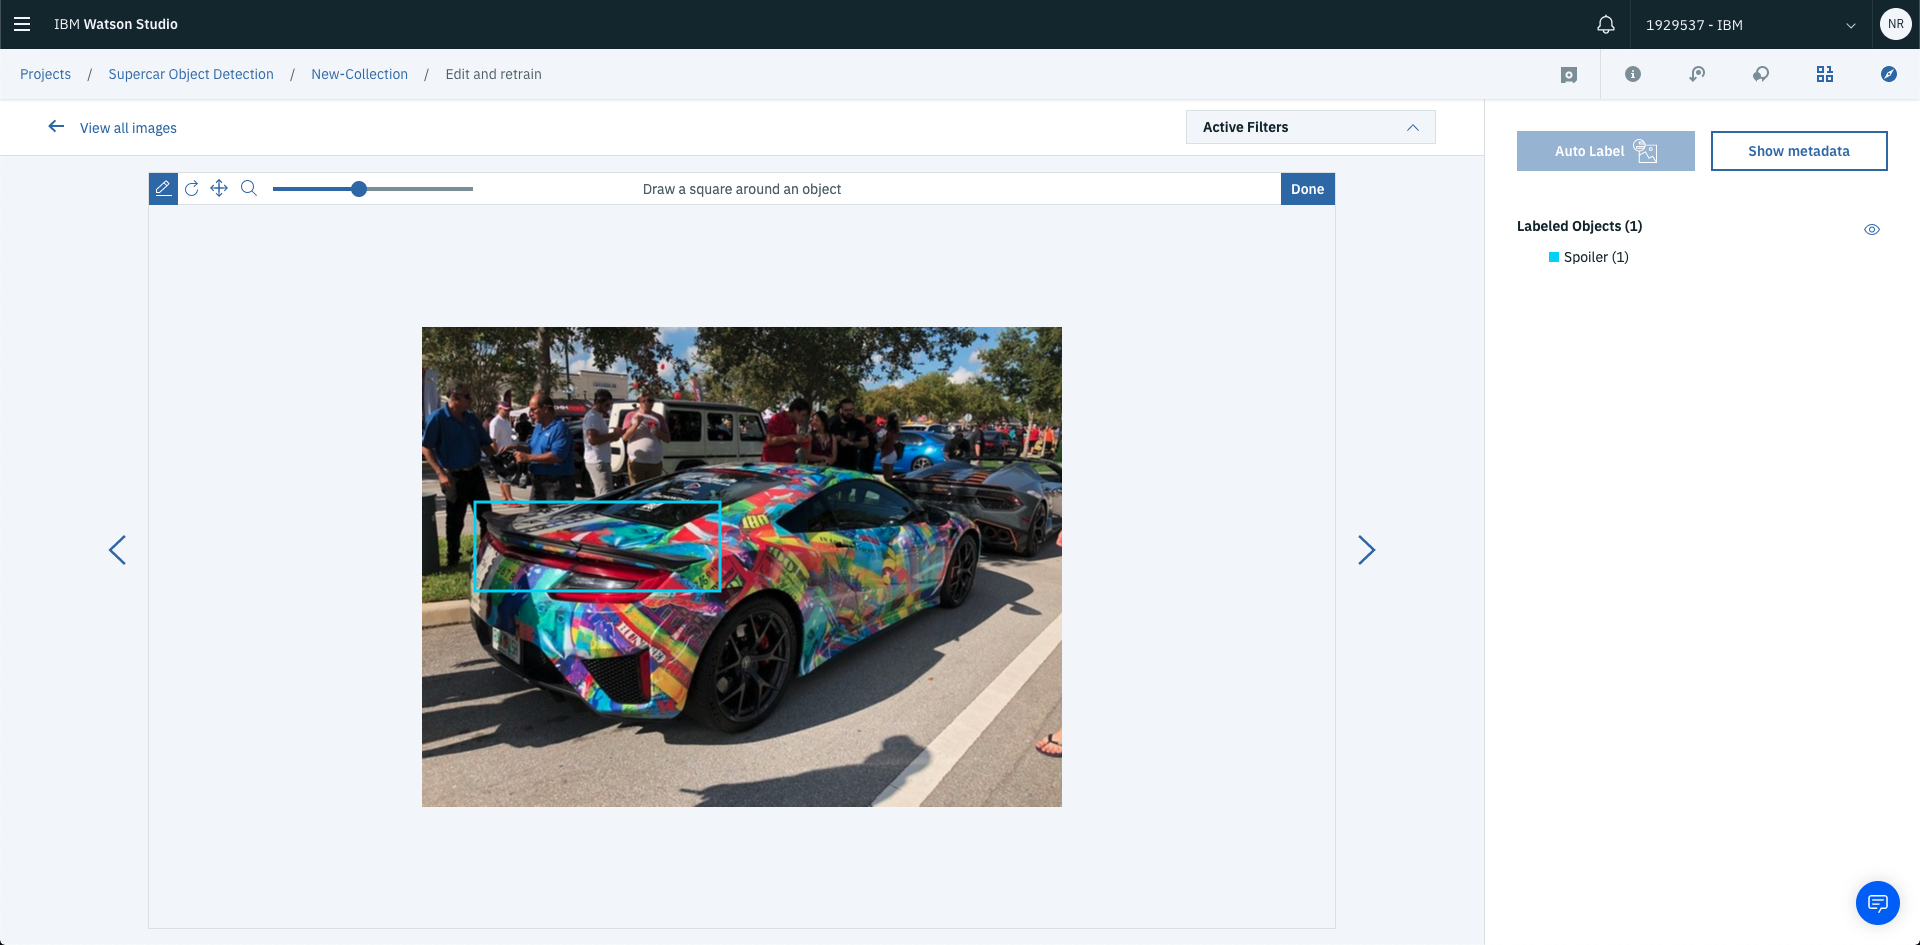
Once the image is loaded into the collection you’re able to start labelling it. Click into the image, then select Add new object.
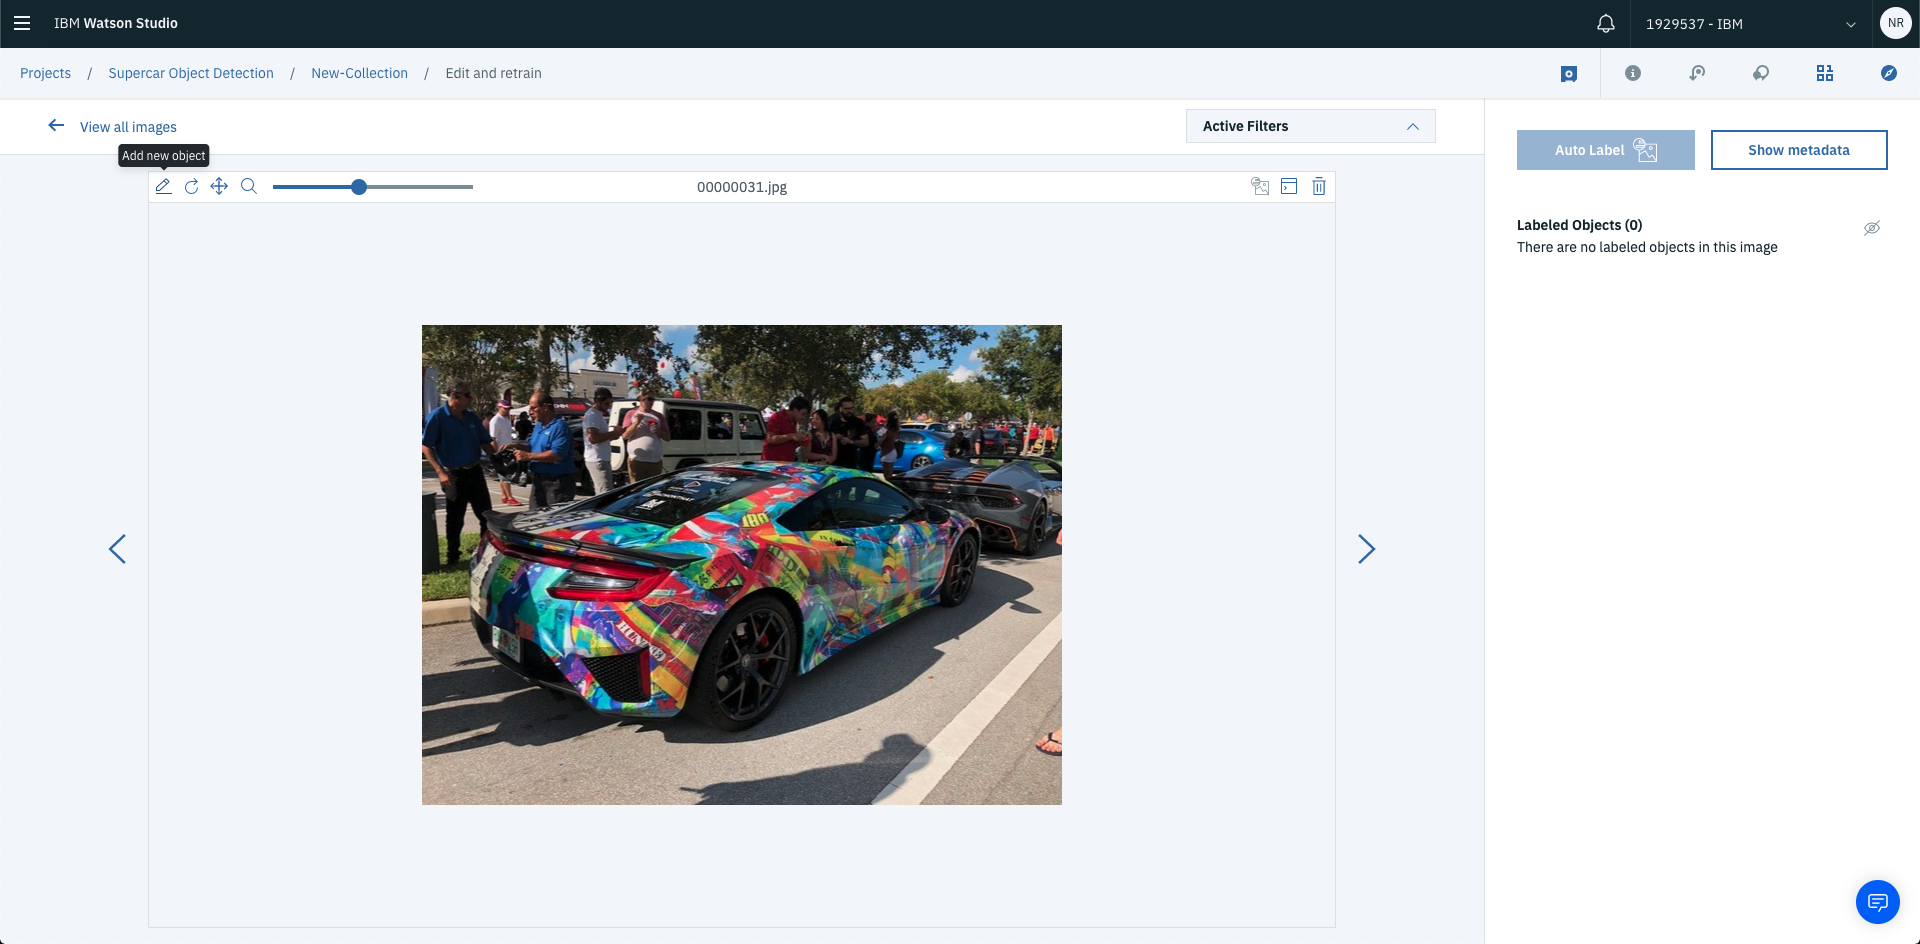
You’ll then be able to draw squares (aka labels) over the objects within the image. Once you’ve selected Add new object all you have to do is draw a square over the object you’re labelling. In this case, the object that’s being labelled is spoiler.
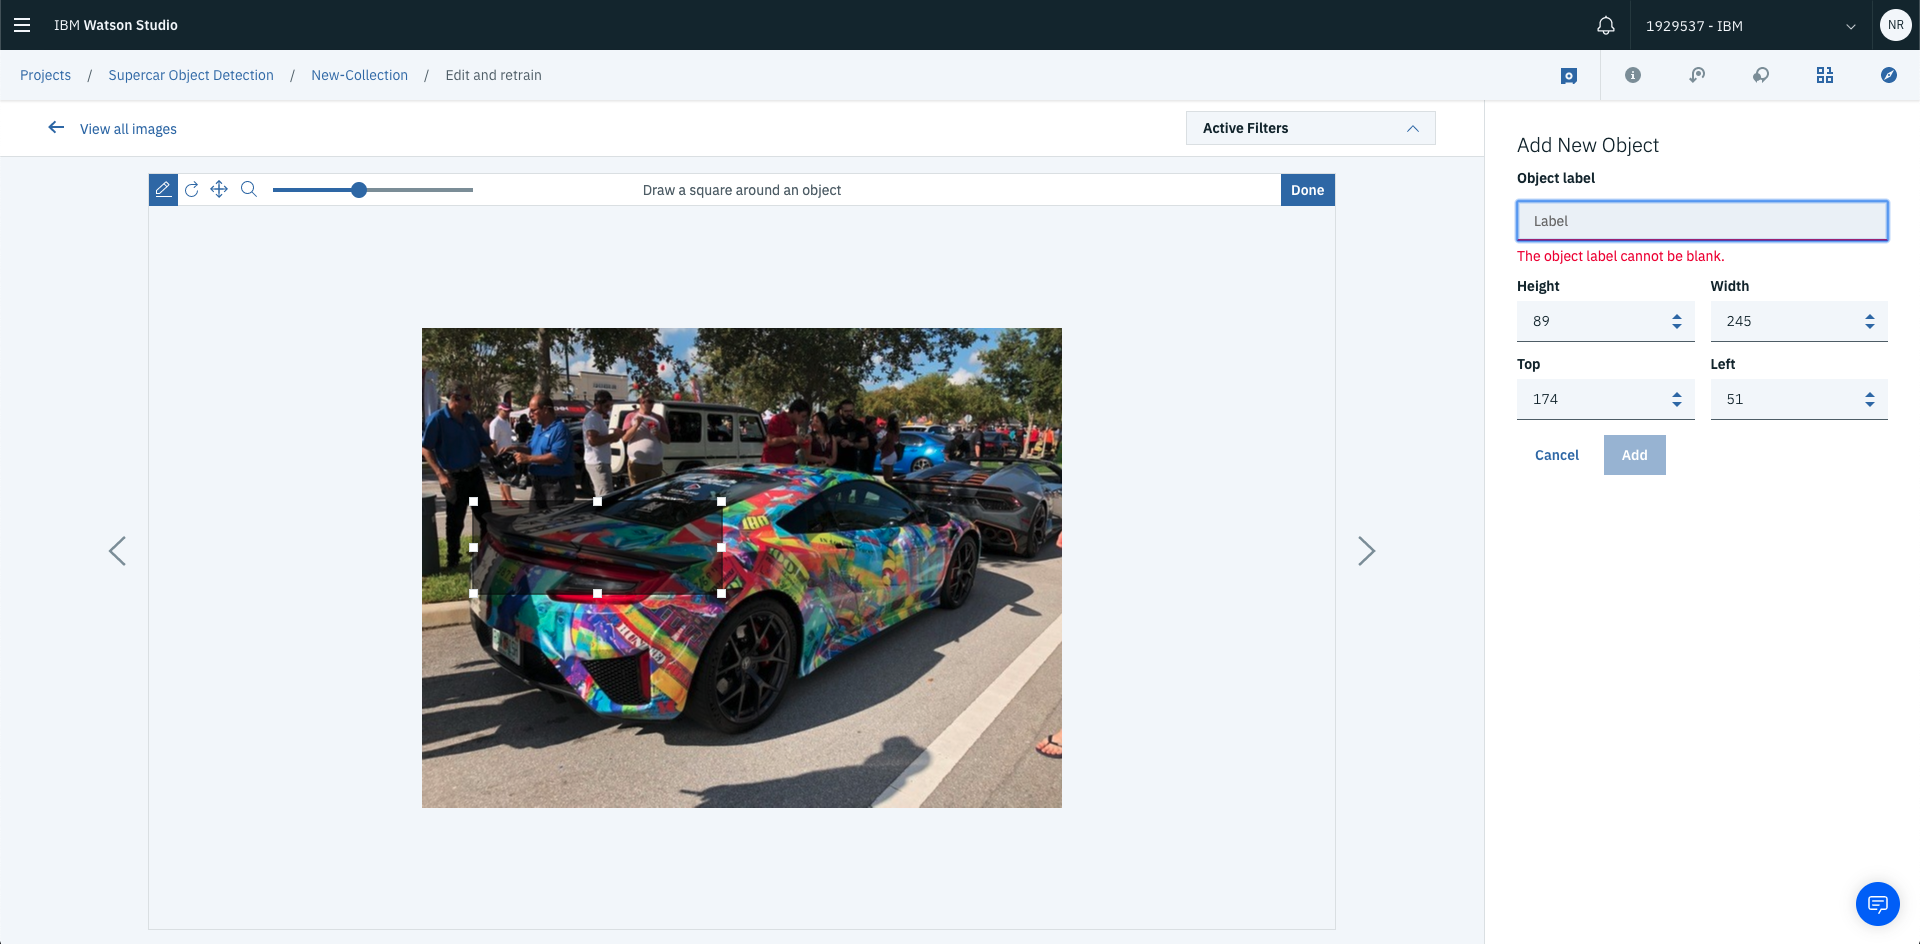
Once this has been done, write the name of the object you’re labelling. And hit Add.
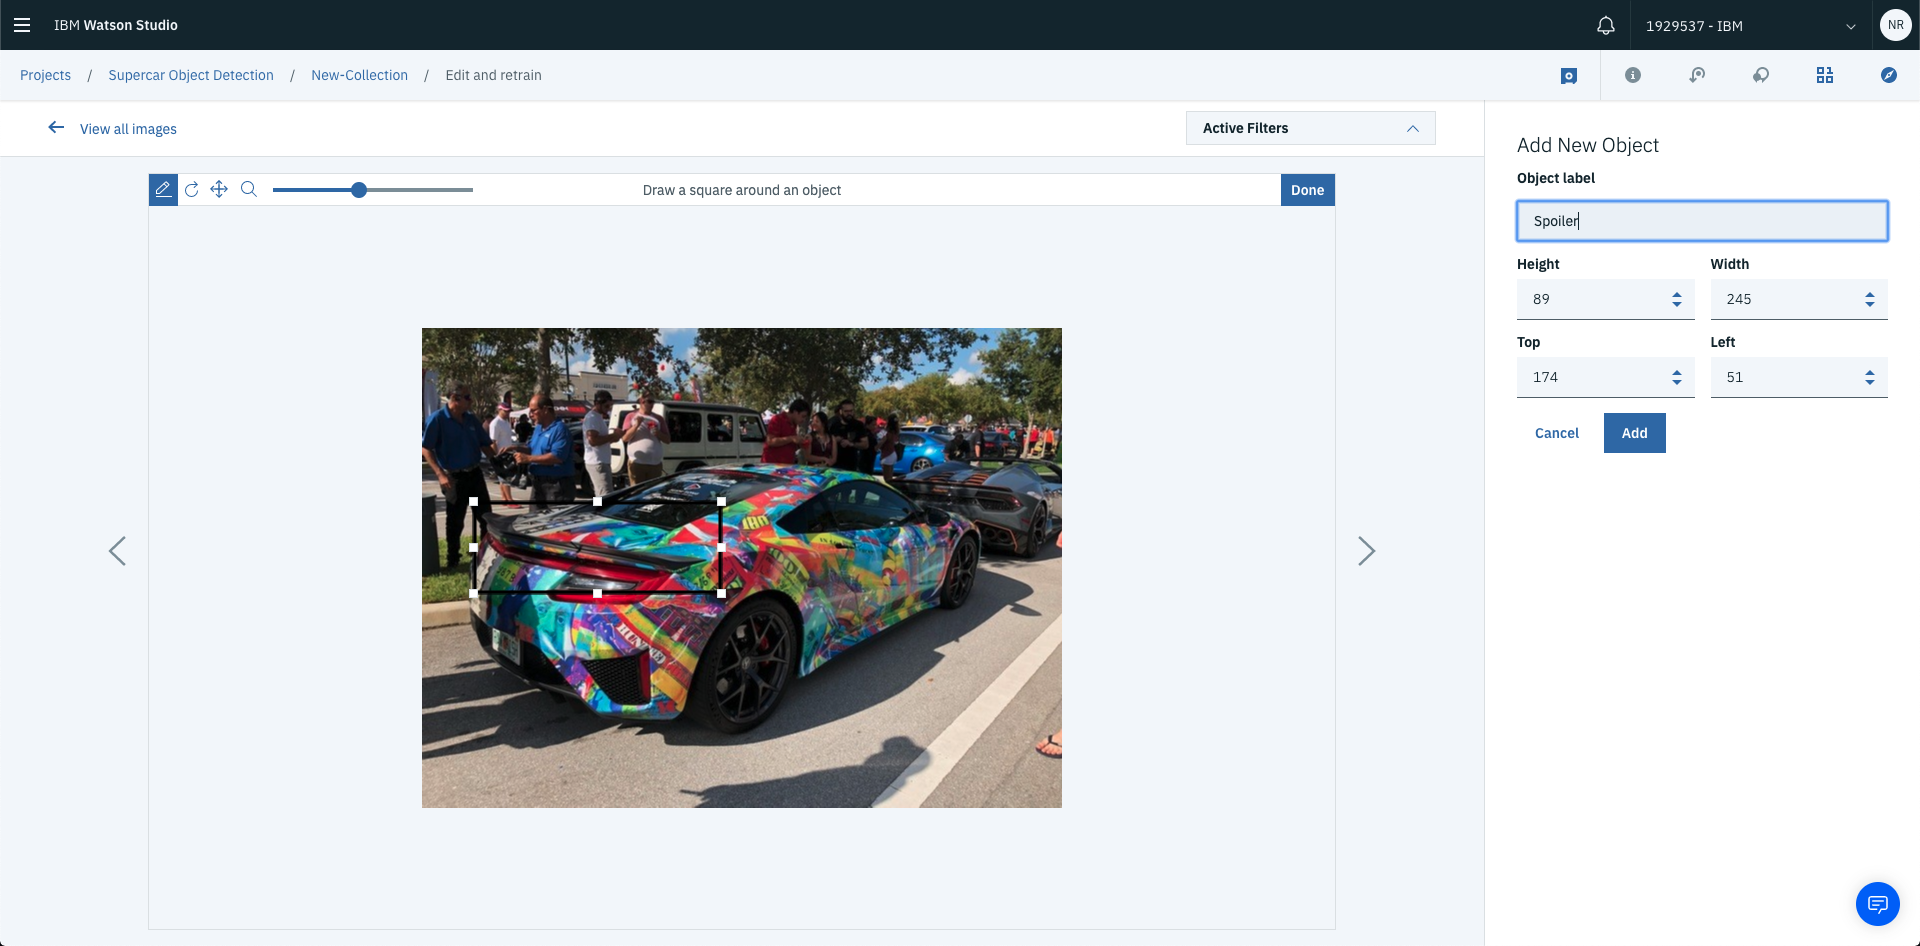
This will add a new labelled object to the image. The label will be visible on the right hand side of the page under labelled objects.
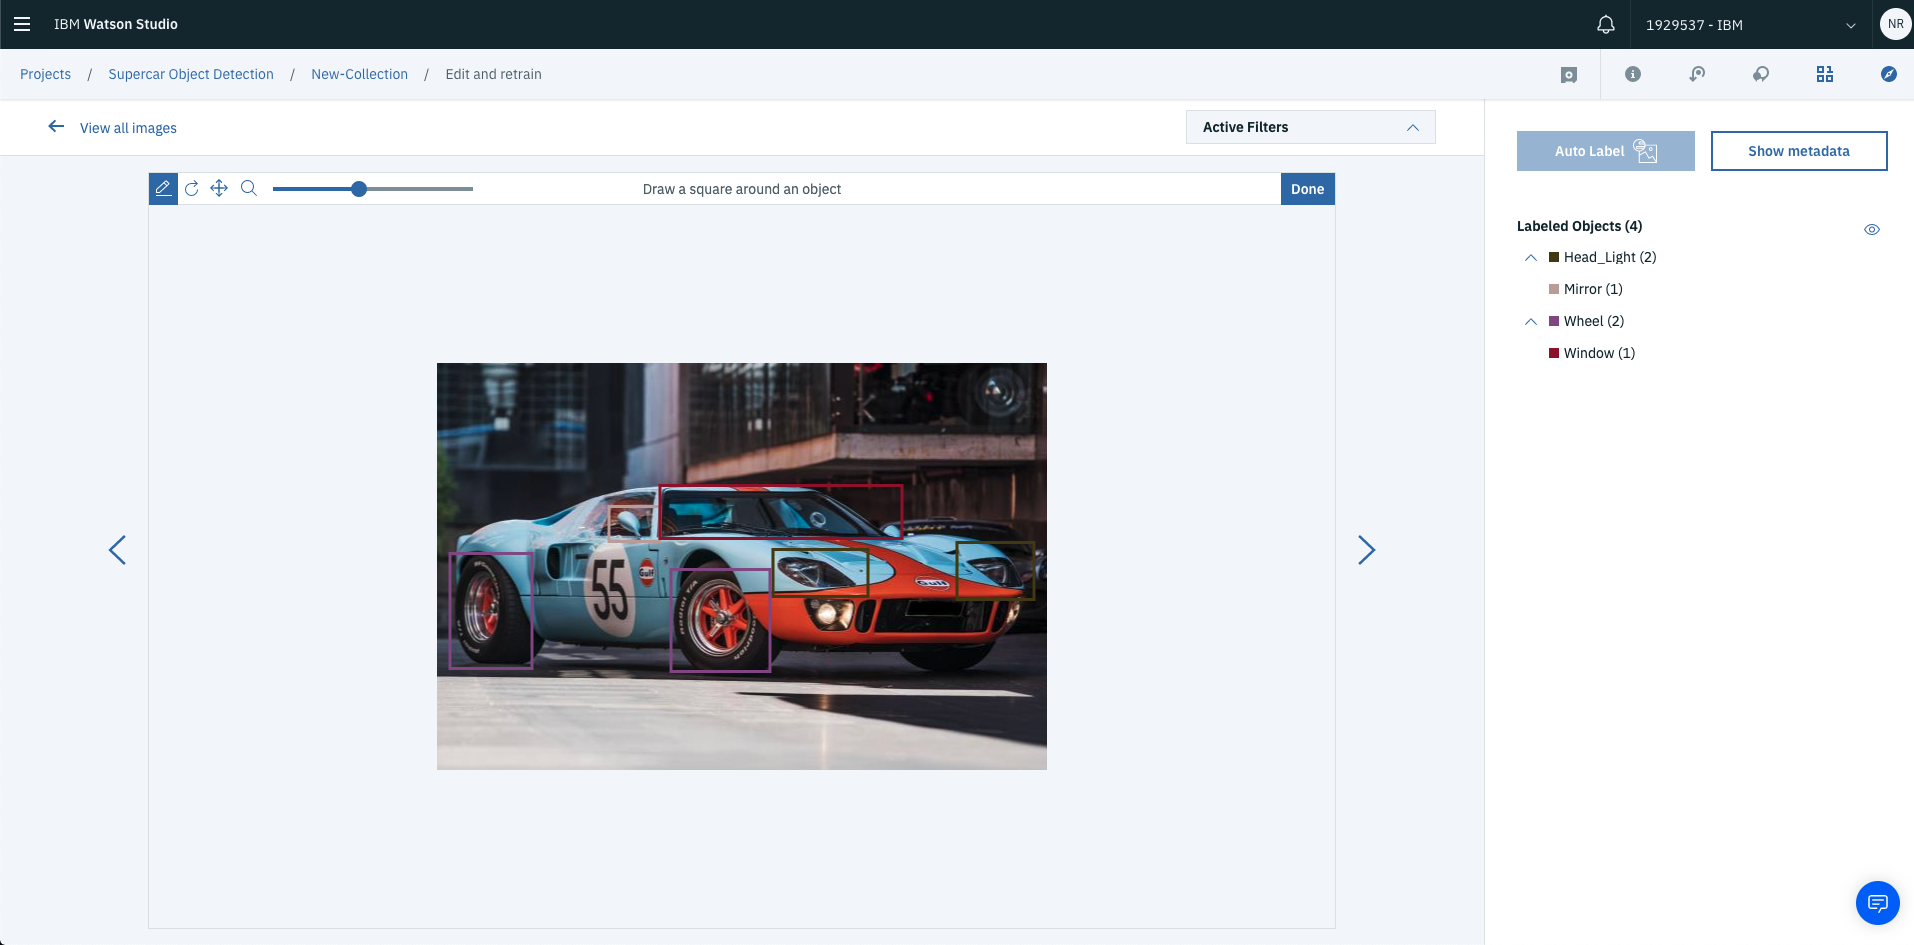
You can continue labelling objects. Once you’ve labelled all objects required. Select Done in the top right of the image labelled area.
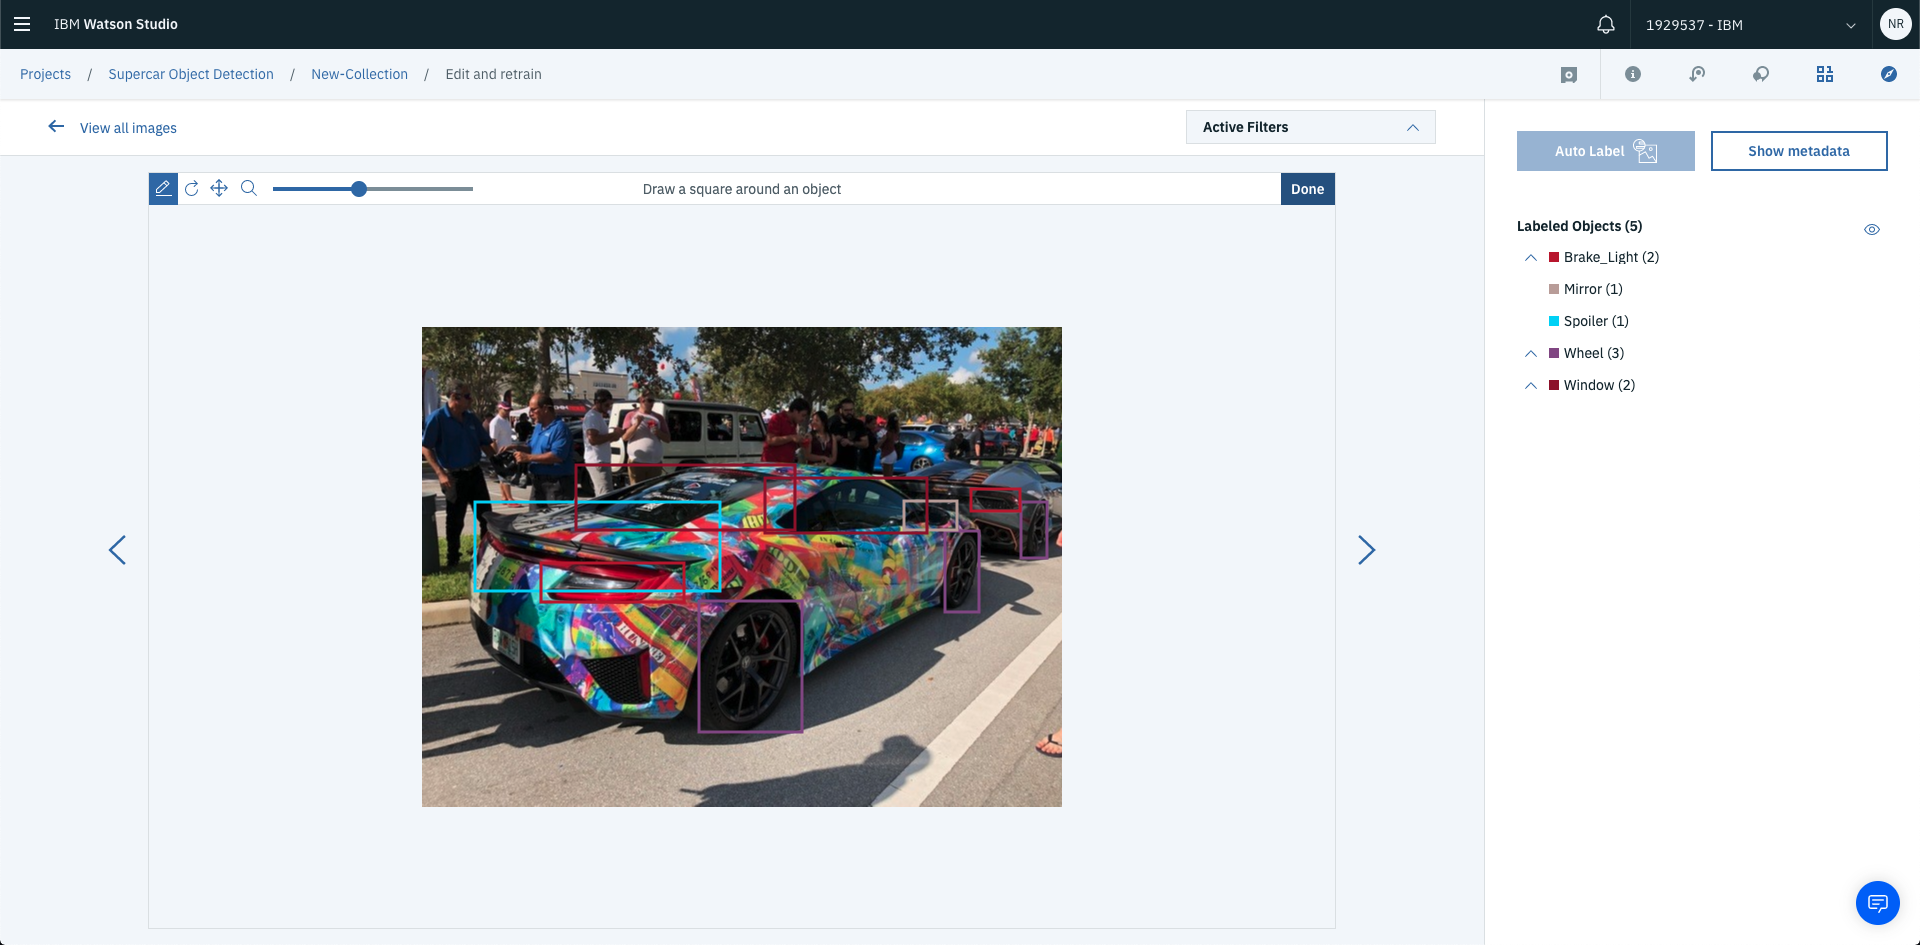
To label the next set of images just hit the left and right arrows next to the current image to start labelling process again on the next image.
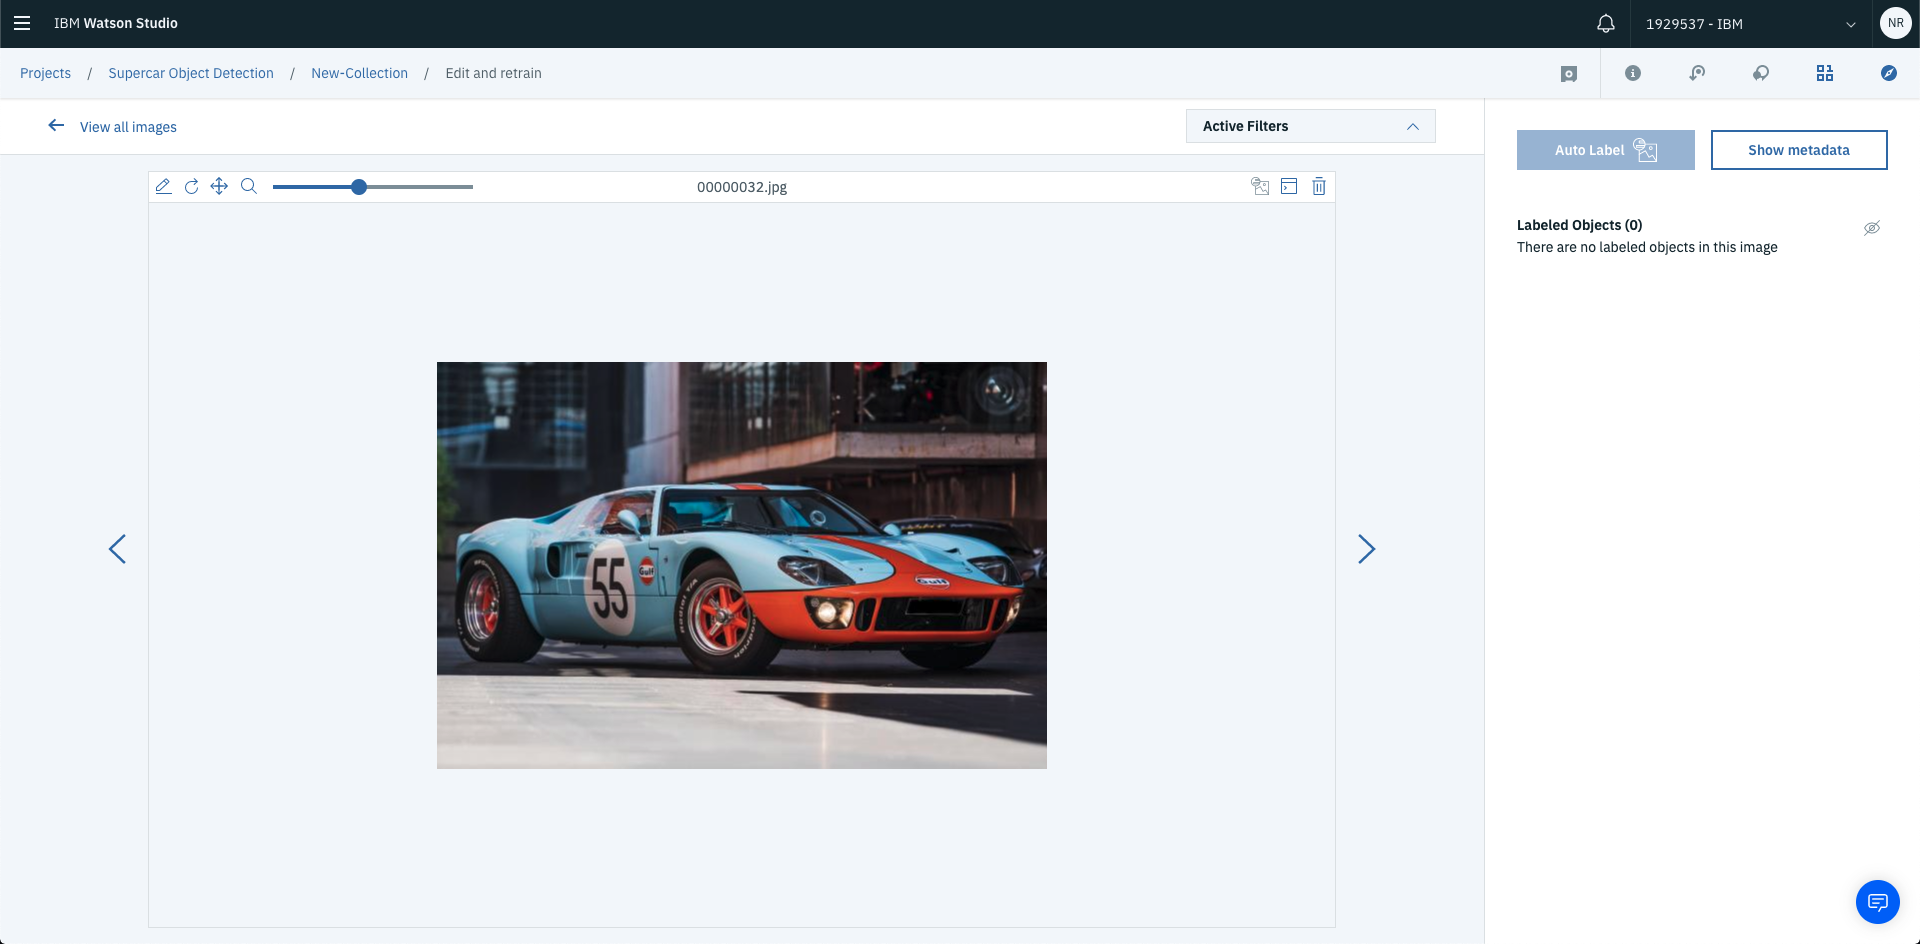
Anddd….you can label this image too!
Once you’ve labelled all your images, select View all images to see the results of your labelling process.
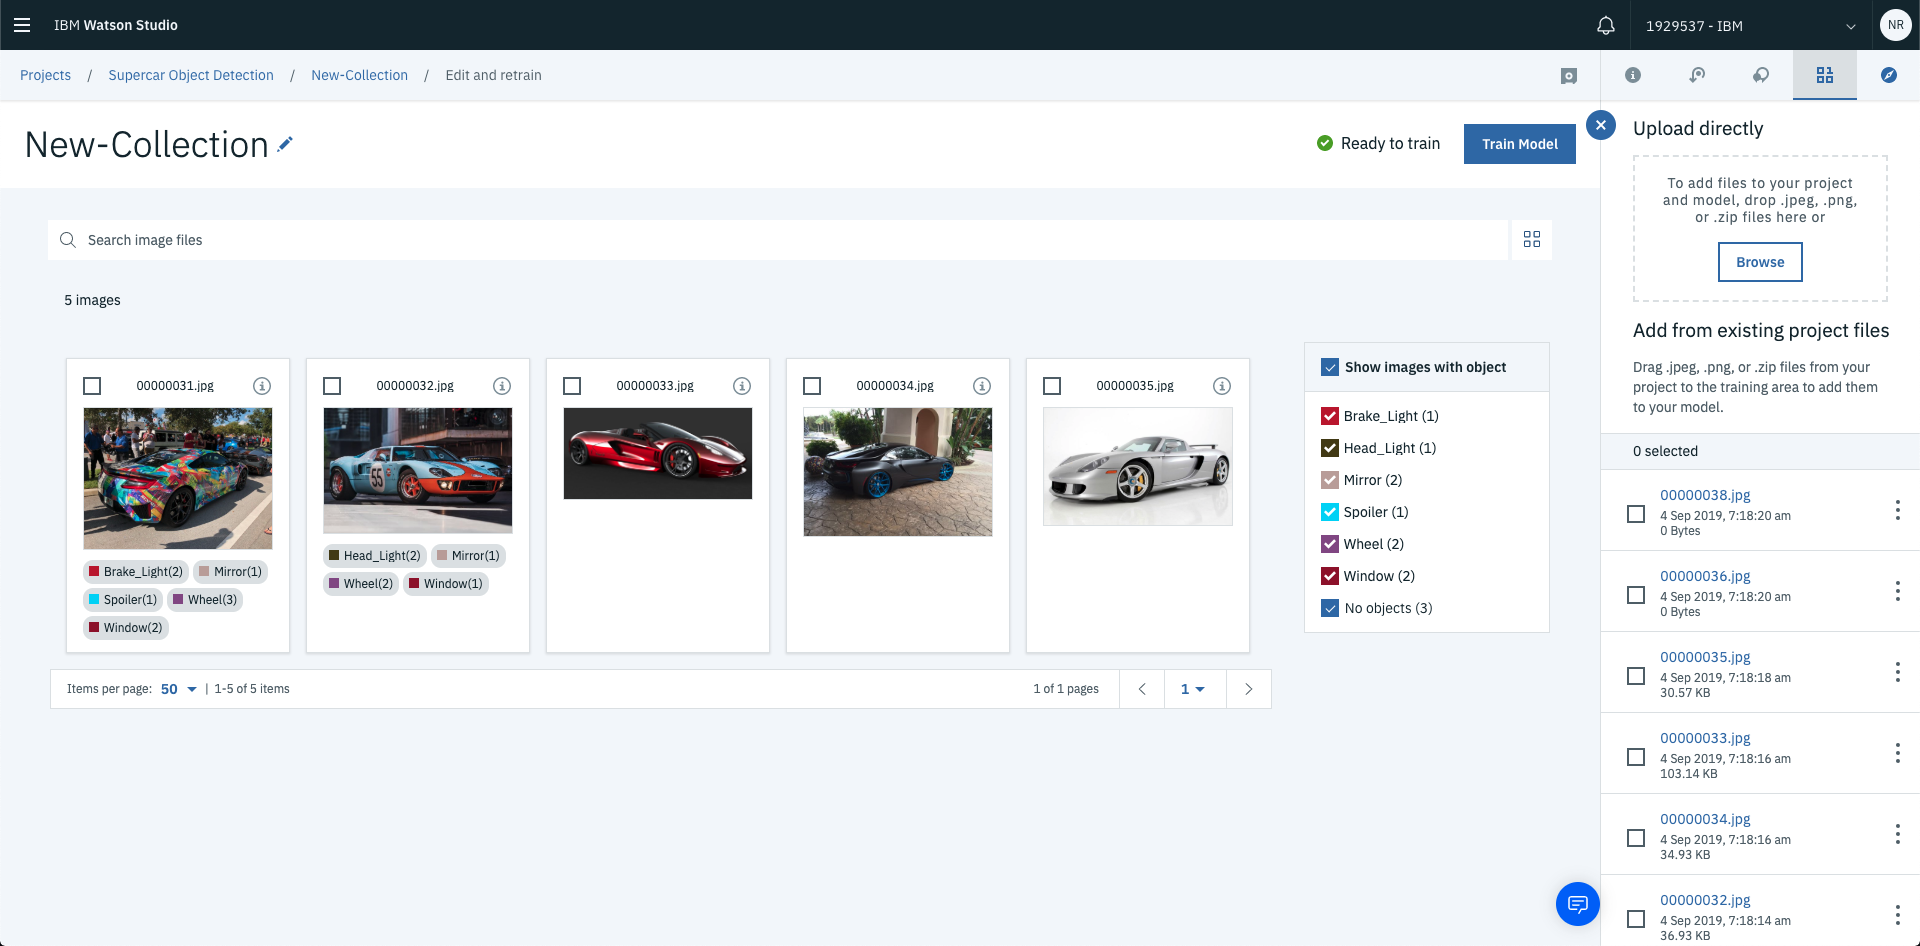
At this stage the deep learning model hasn’t been trained yet. To kick off this process select Train Model in the top right hand corner. This will commence the training process for your visual recognition model.
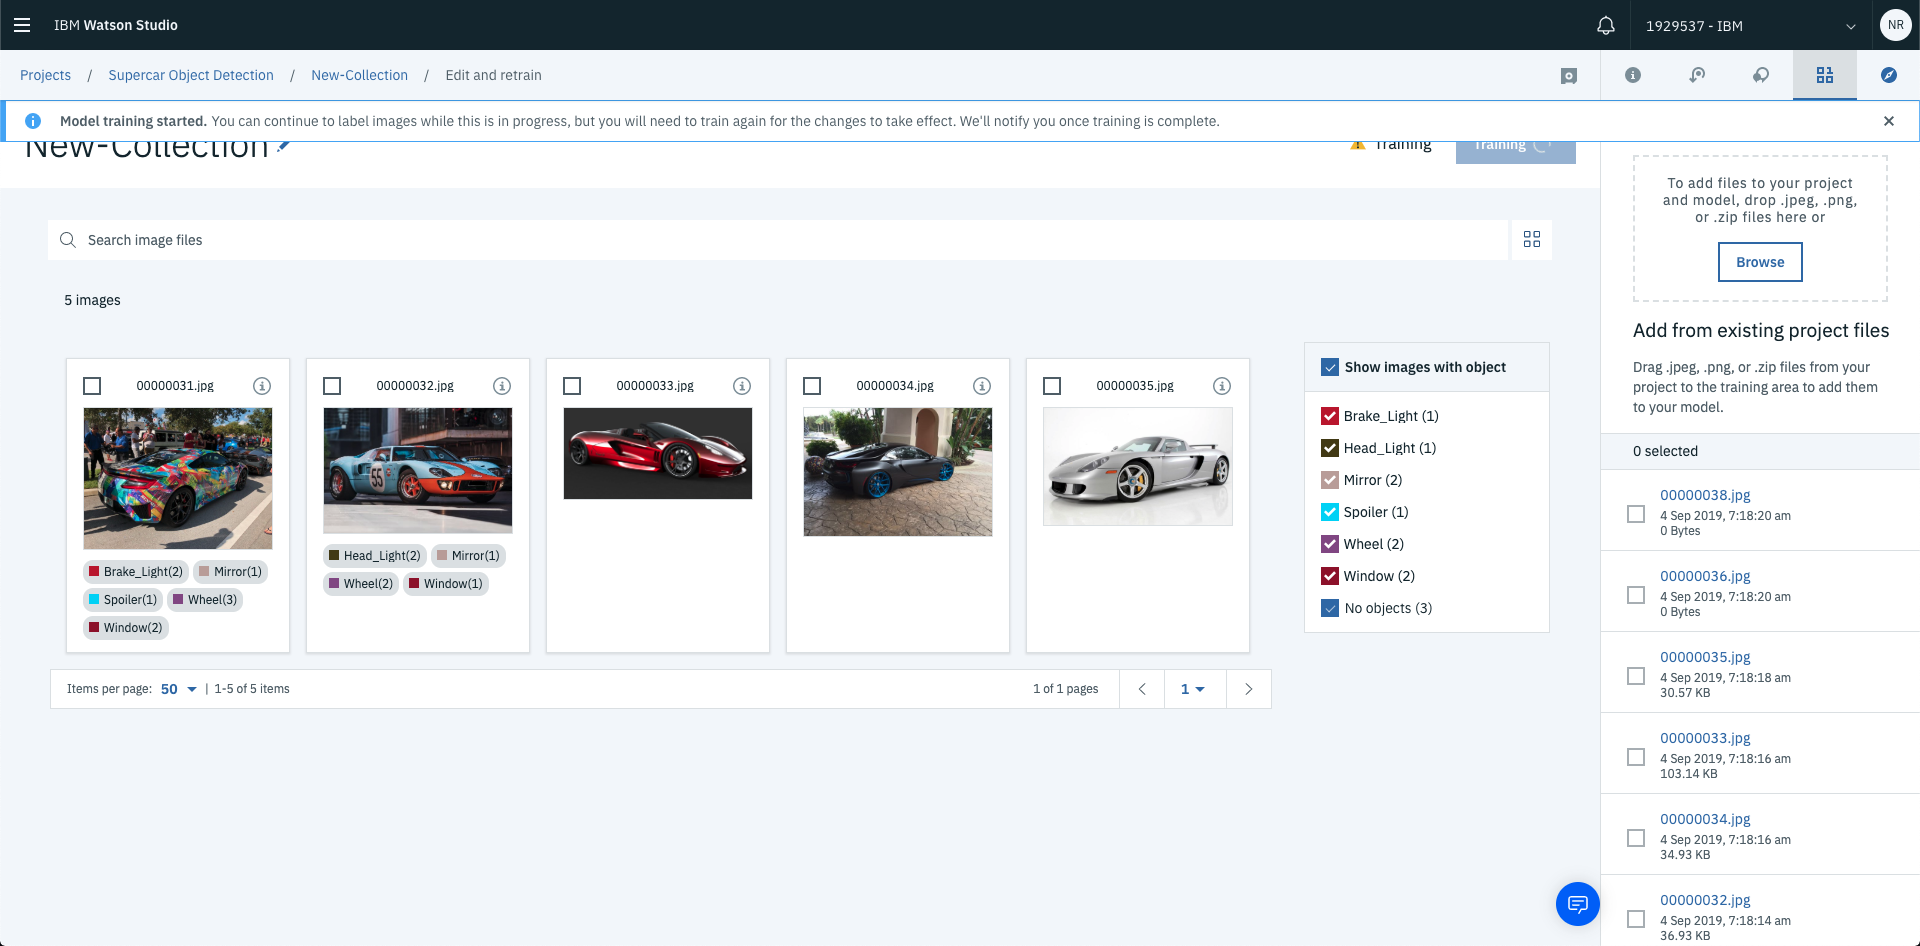
Once the training has finished, you’ll be able to test out your model with new images and view the results!
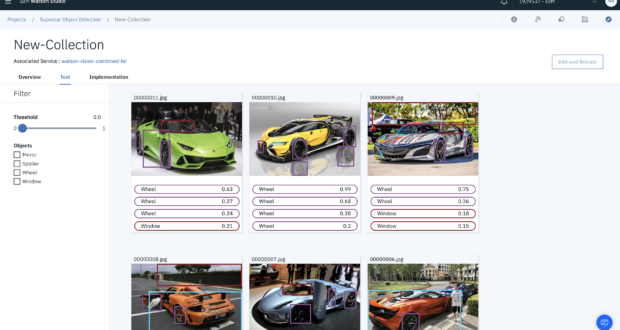
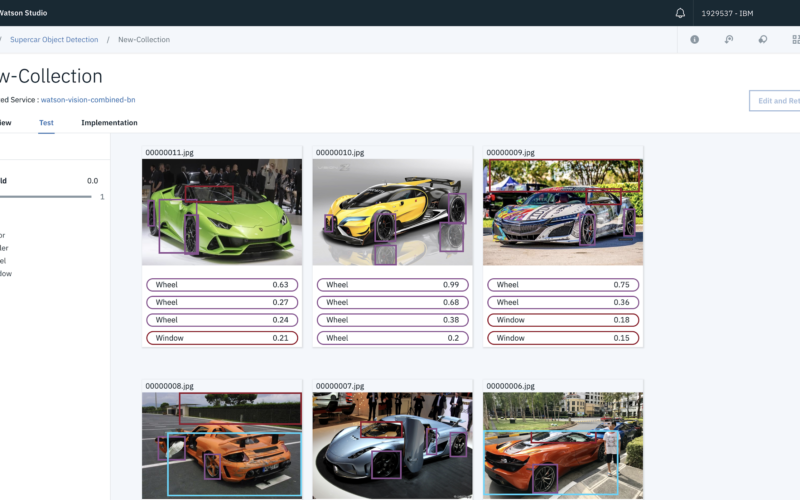
4. Testing Your Model
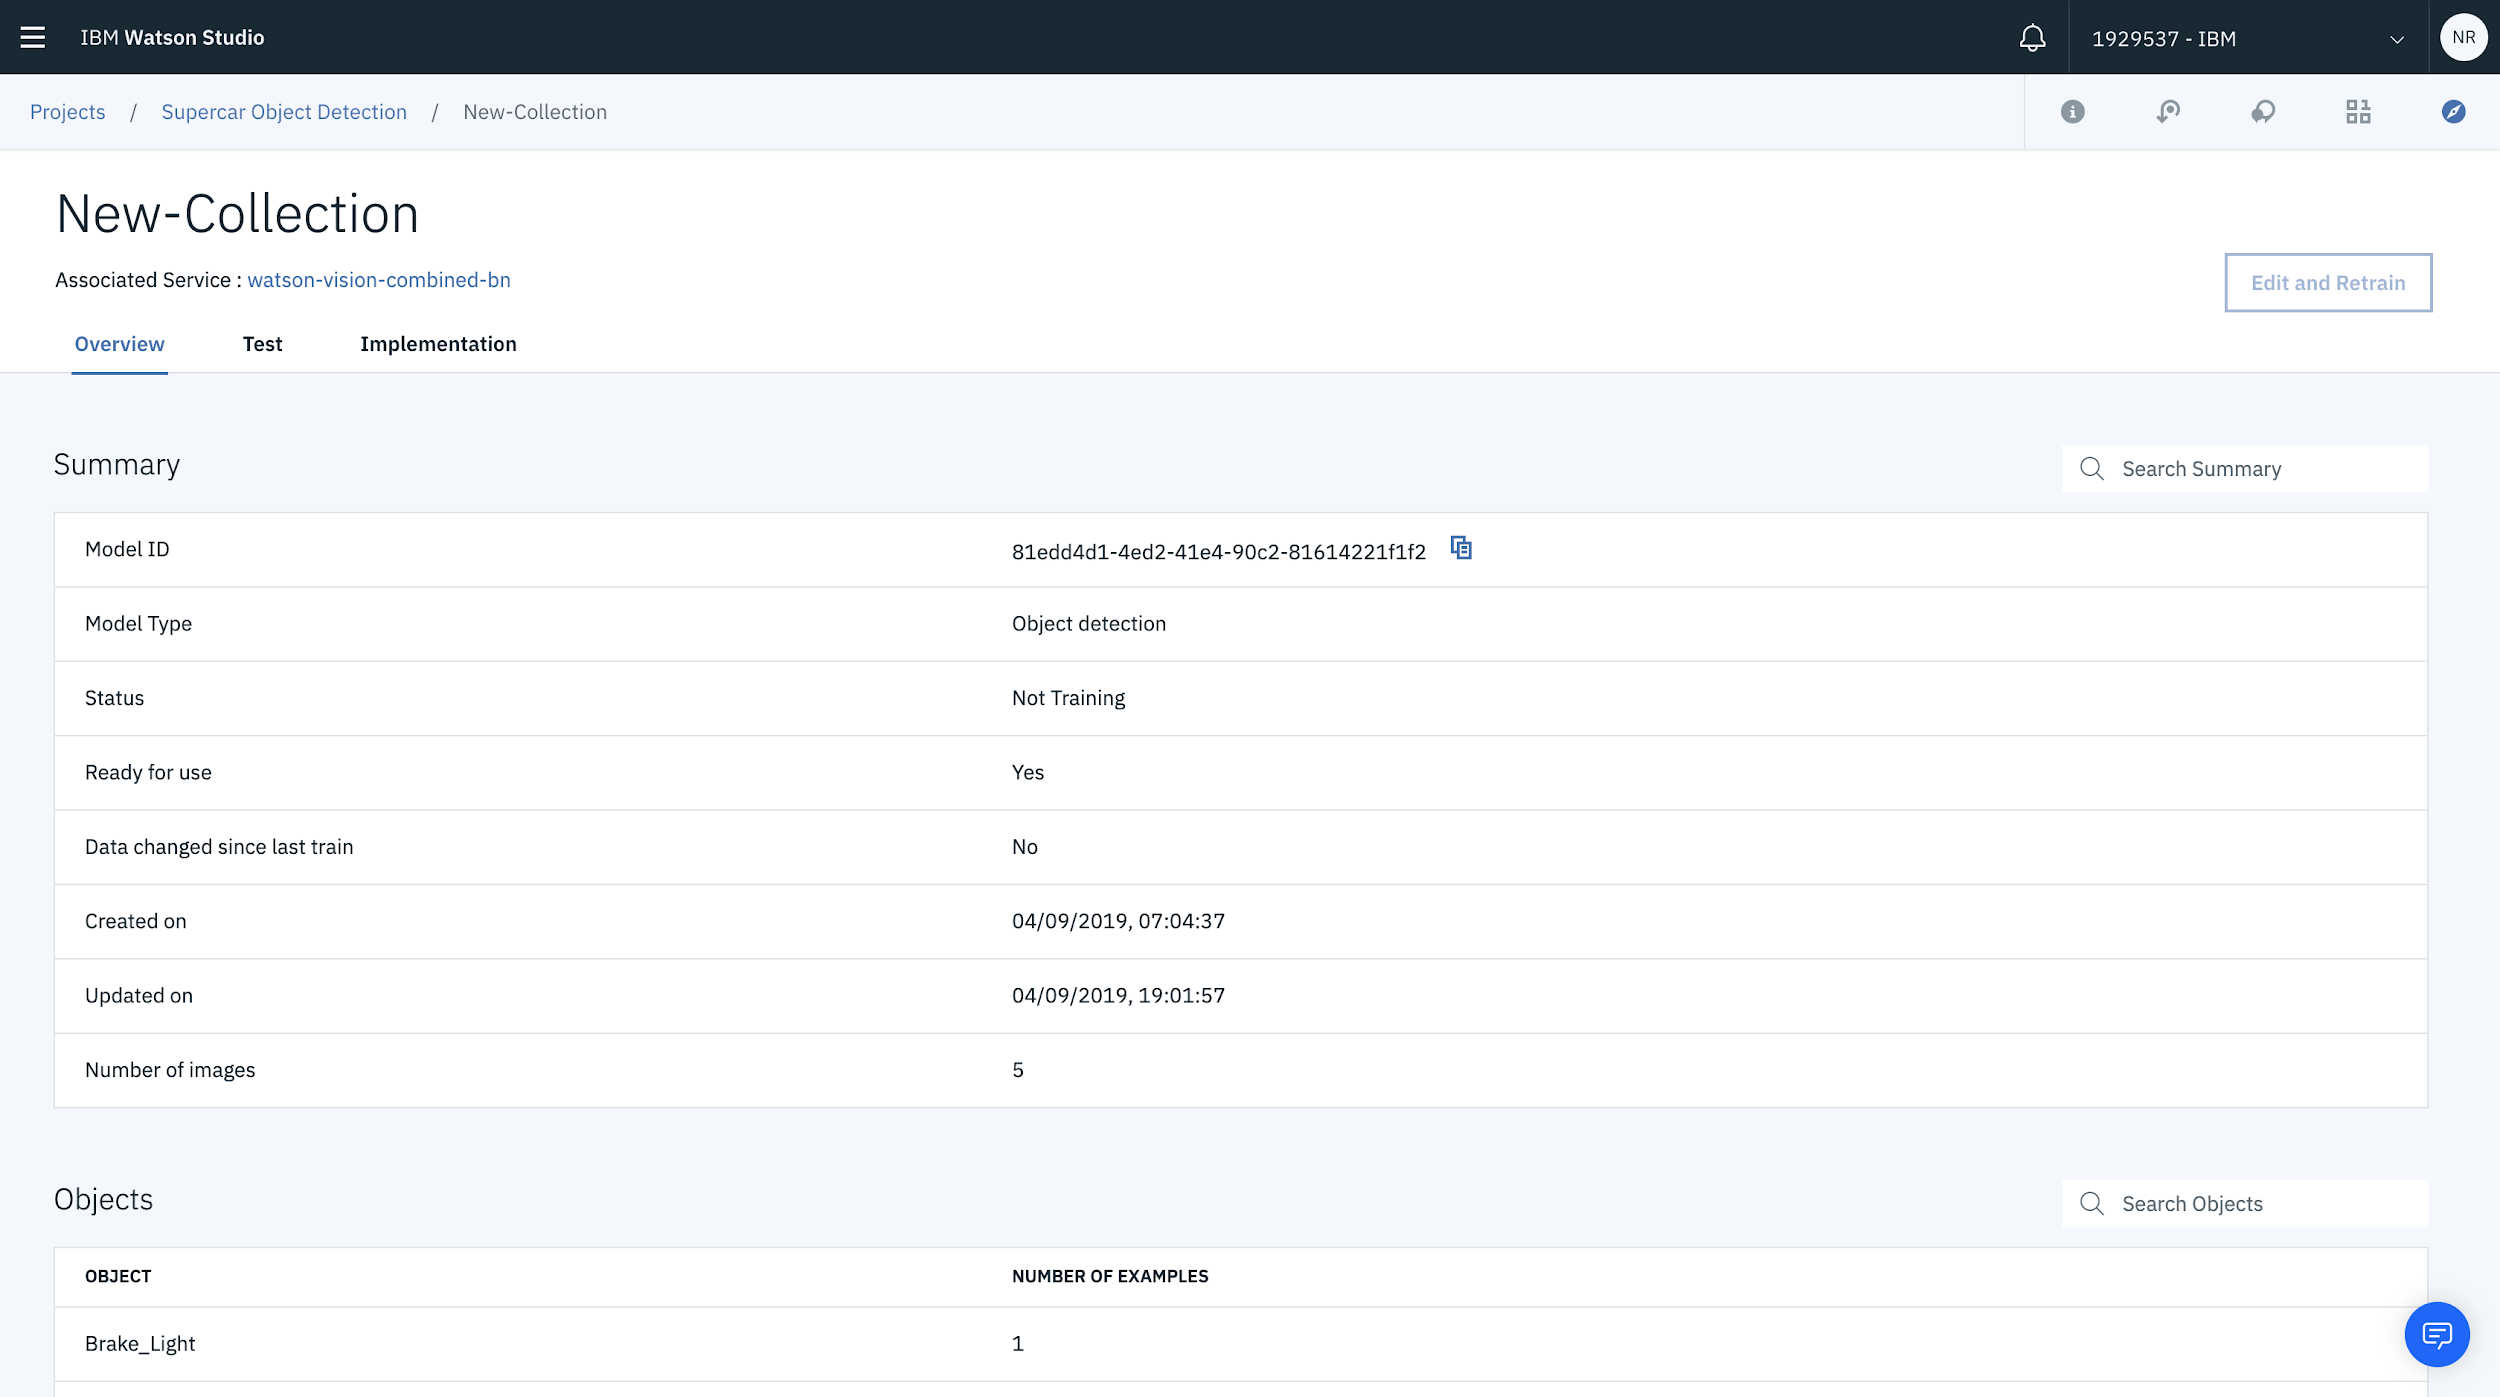
Now that you’ve labelled your images and trained the model you can then start the fun bit and commence testing your model. As soon as the model has finished training you’ll be redirected to an overview.
From here you can test out the model by selecting Test from the menu bar.
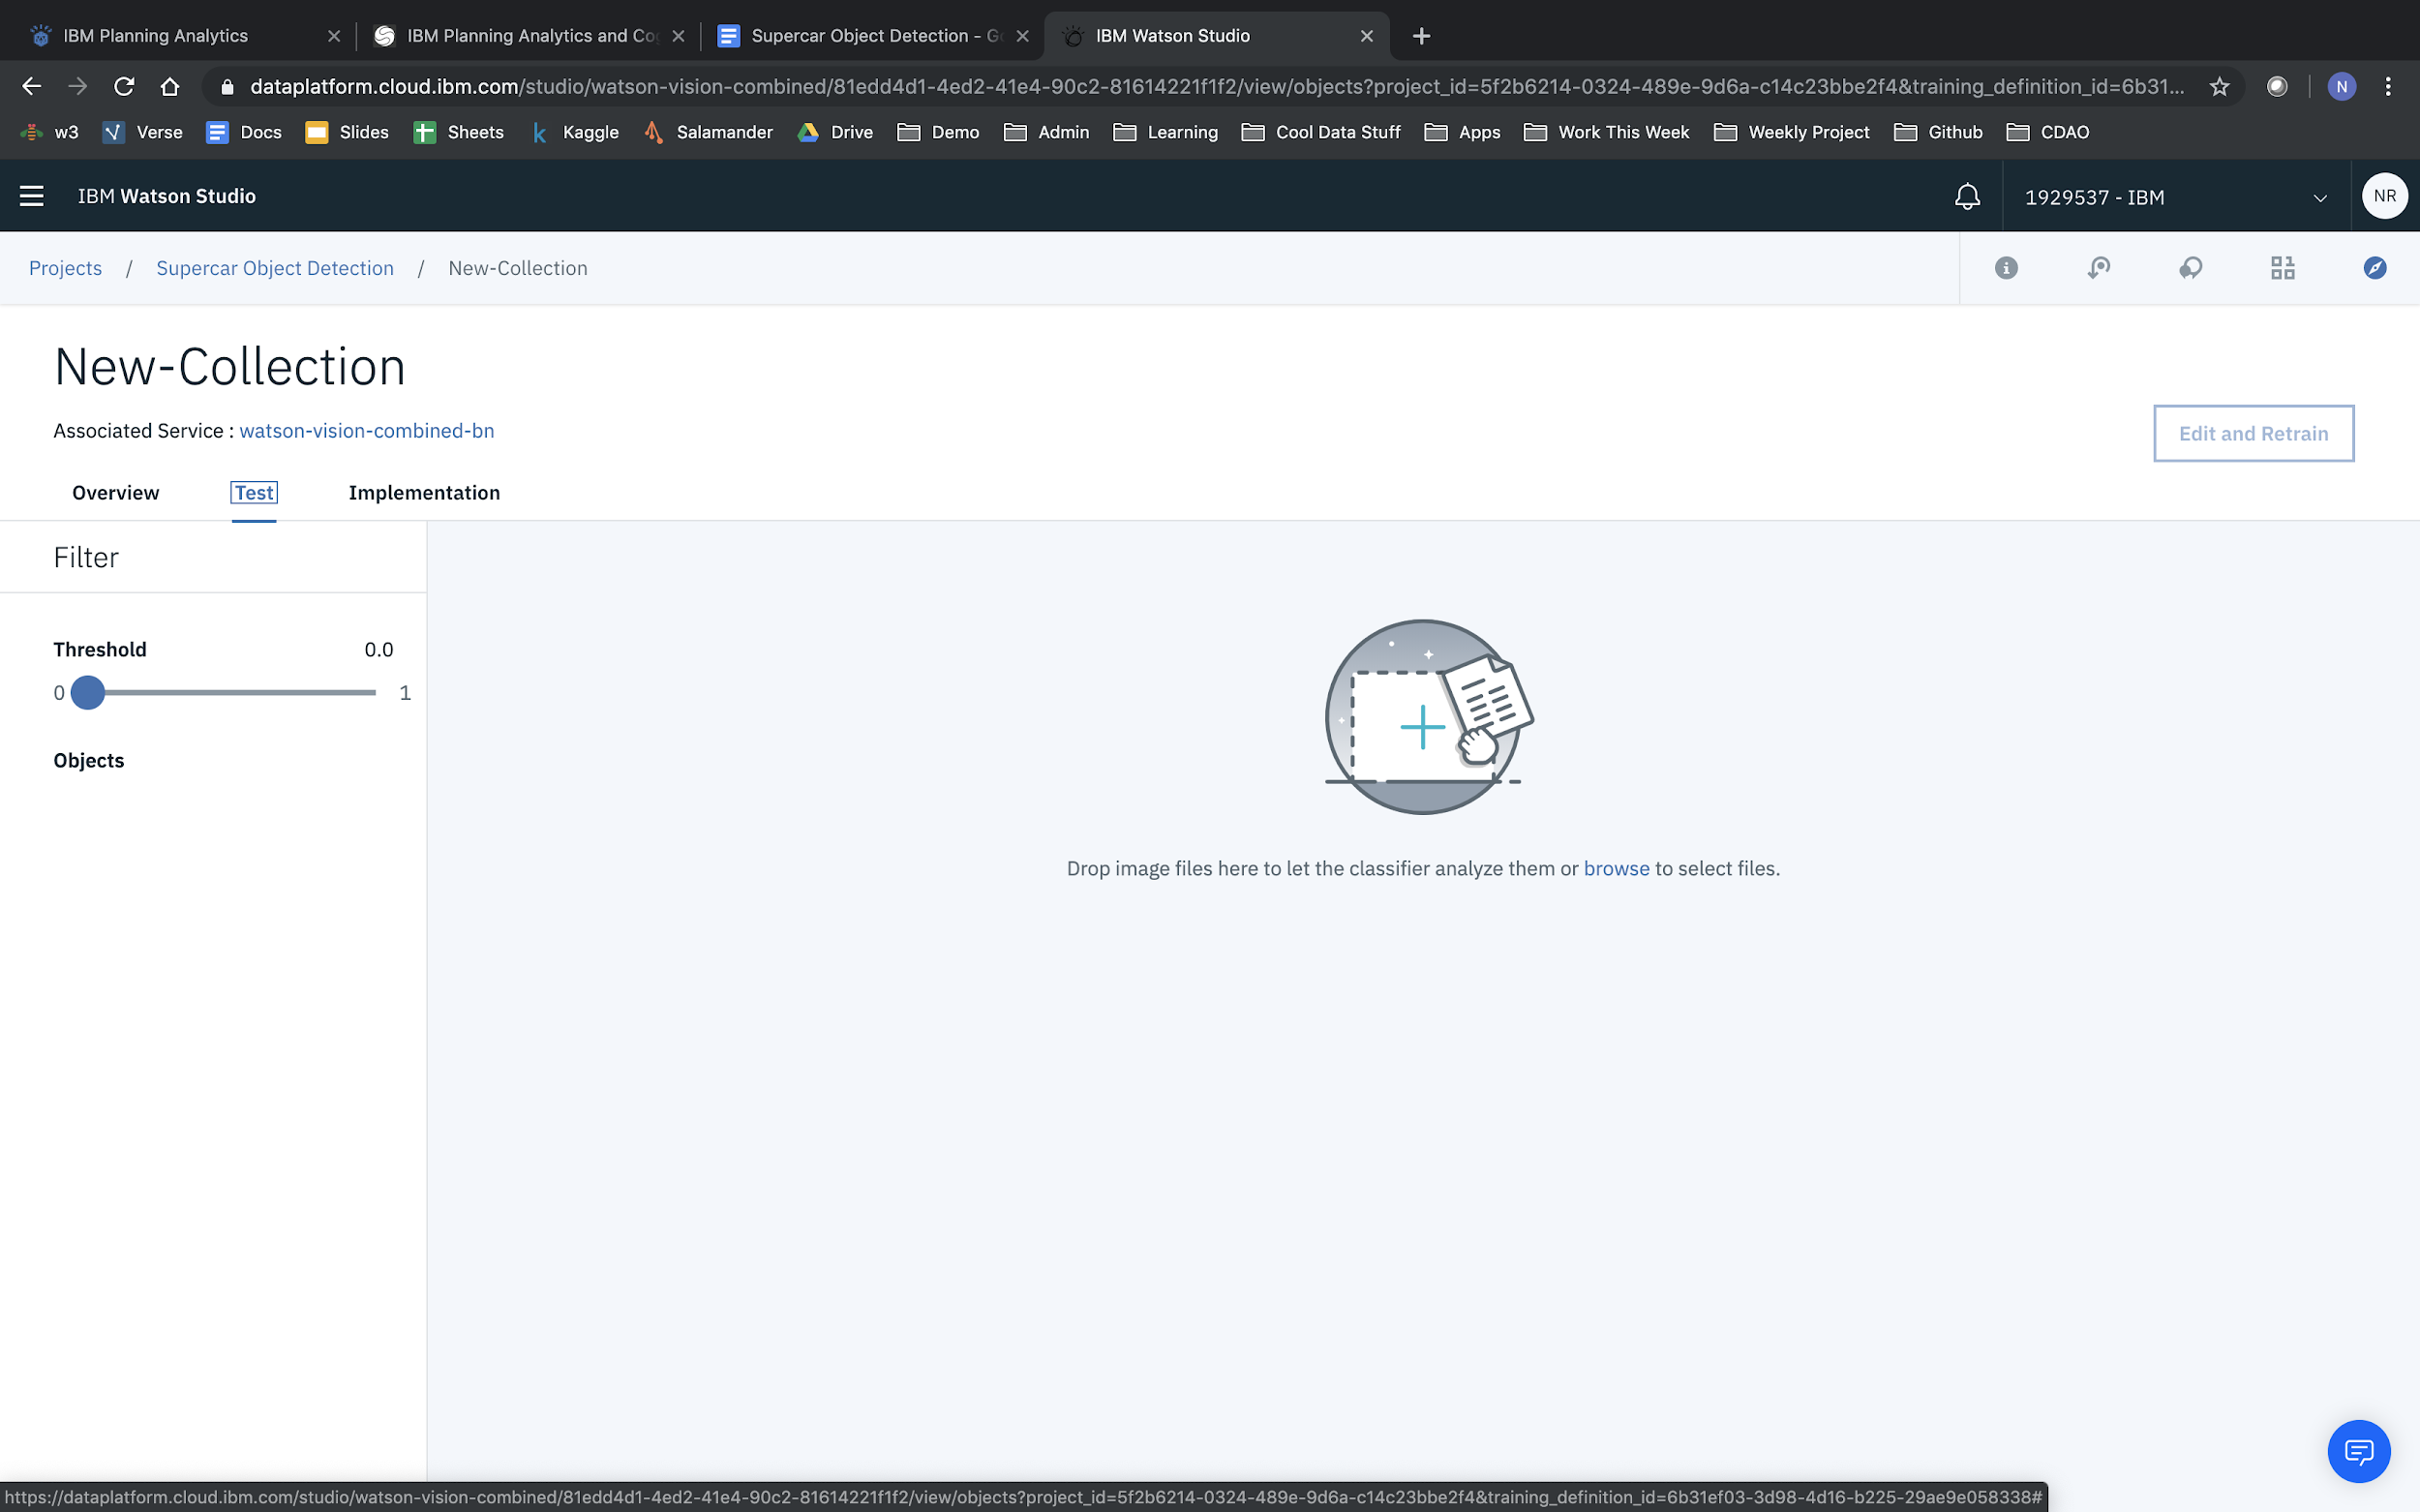
Then upload an image to test out your model.
The results of the detection will be visible once each image has been processed.
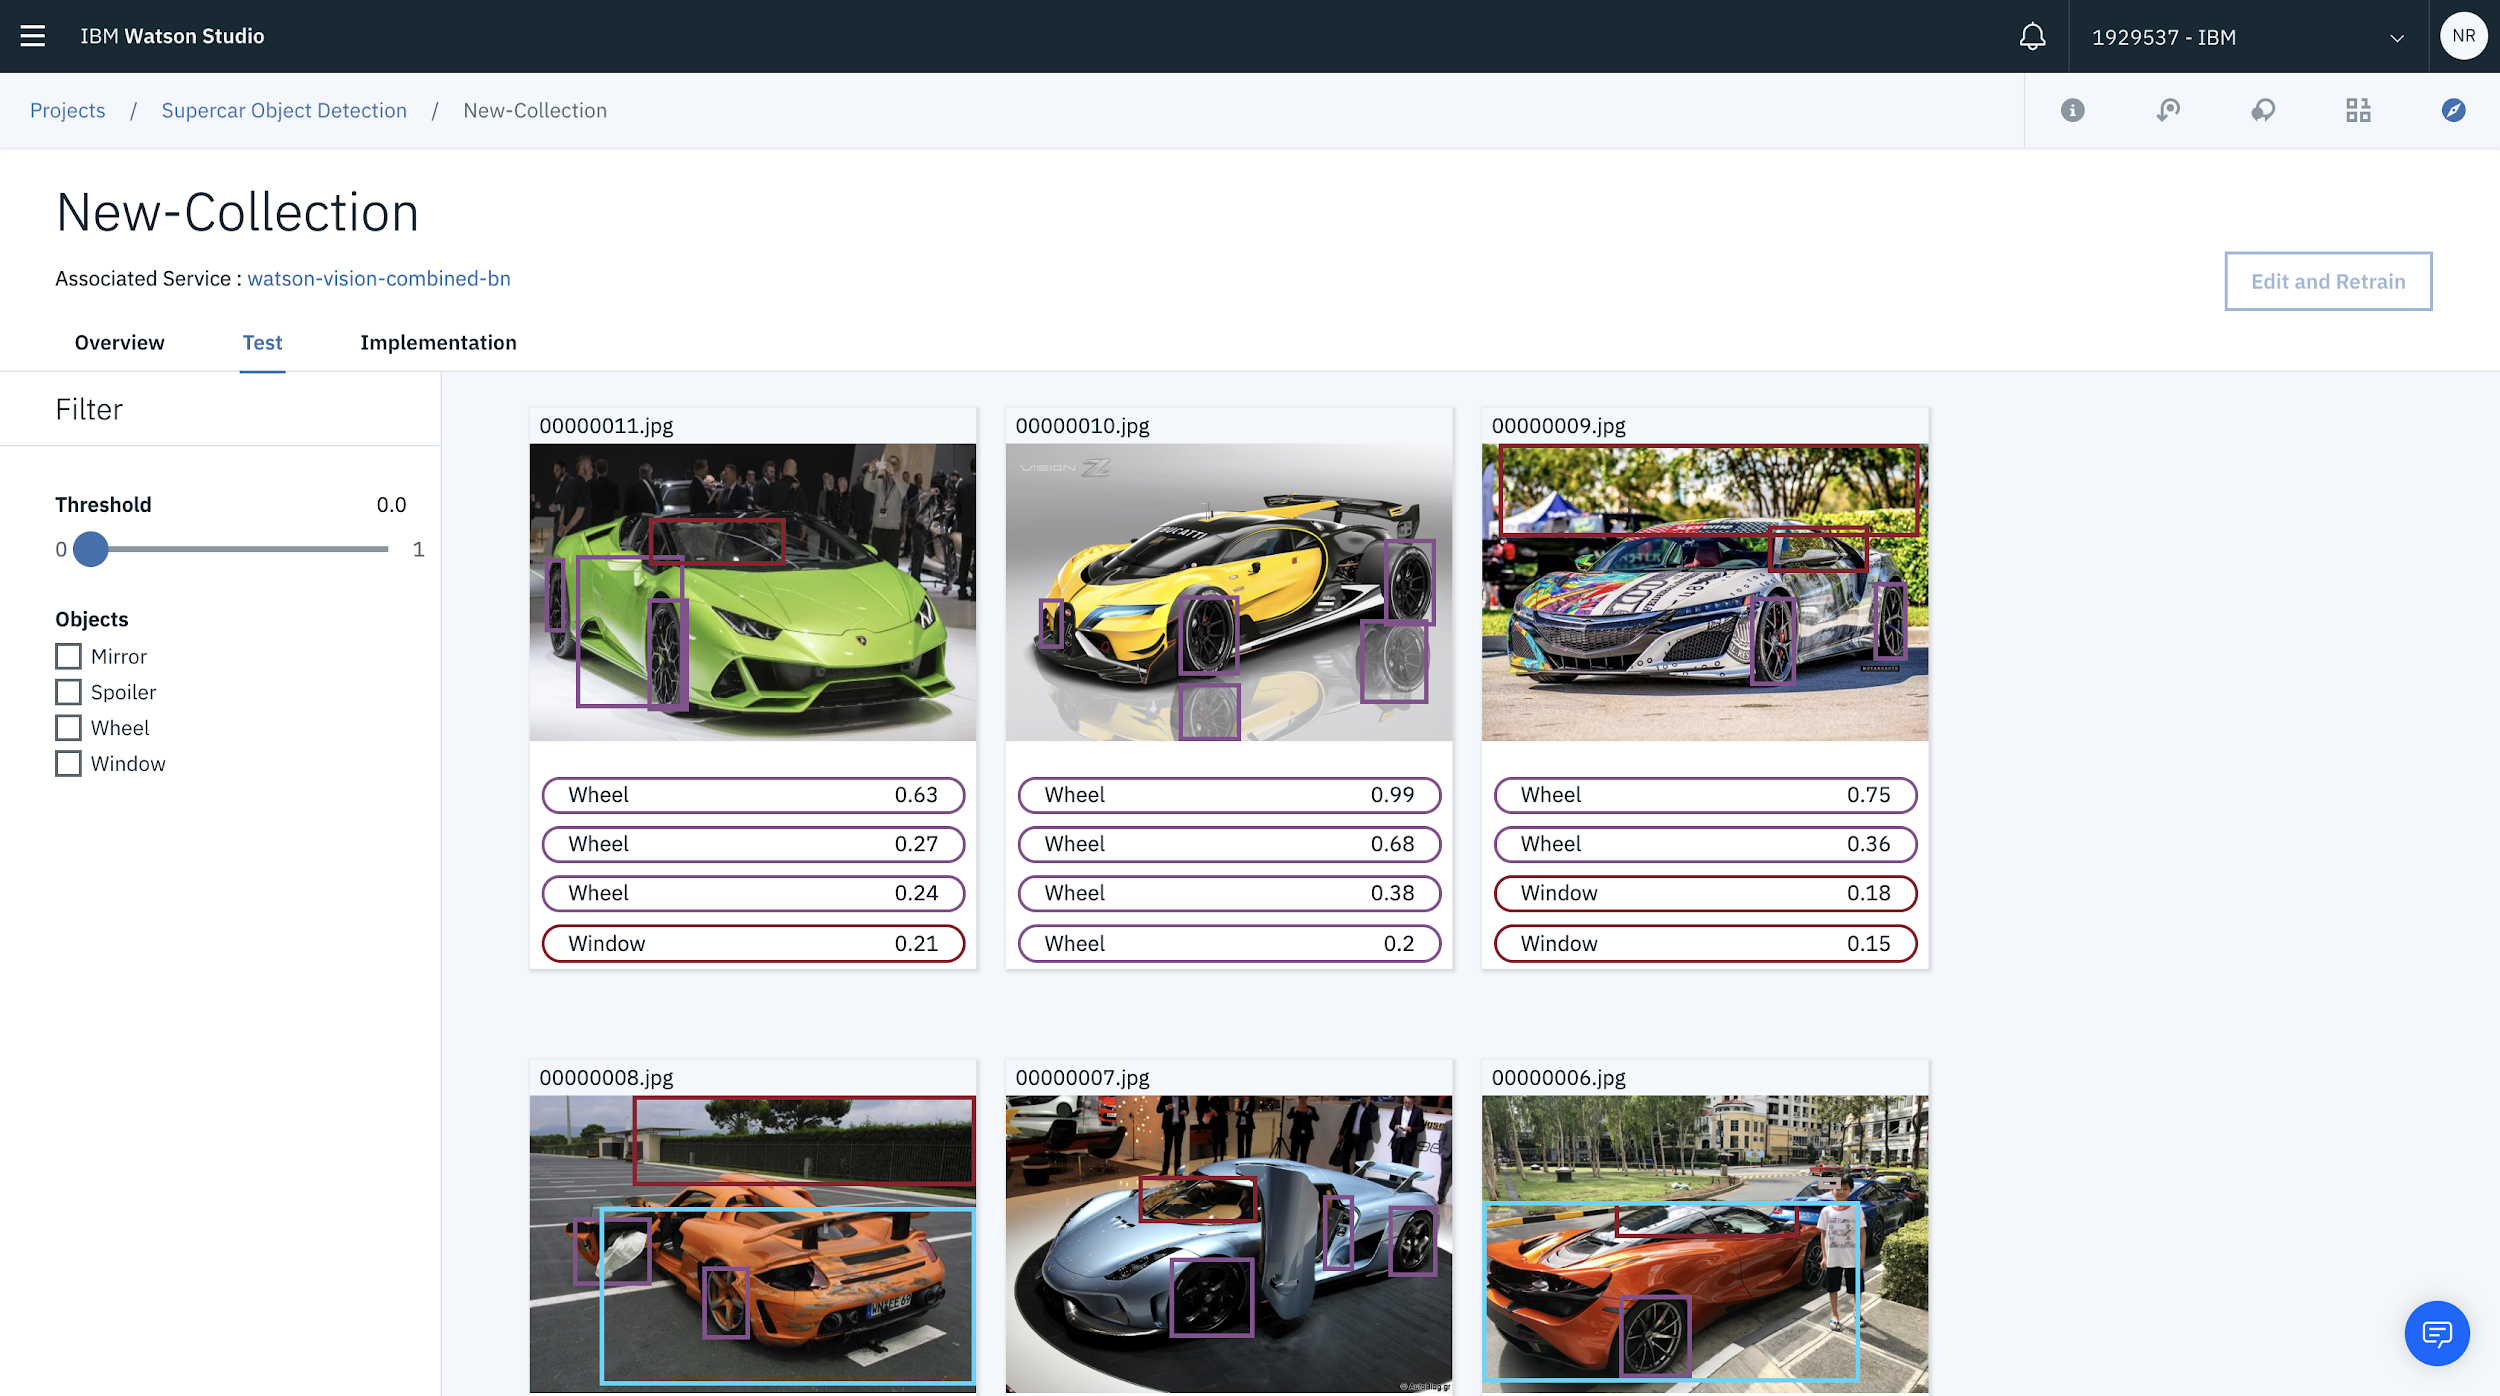
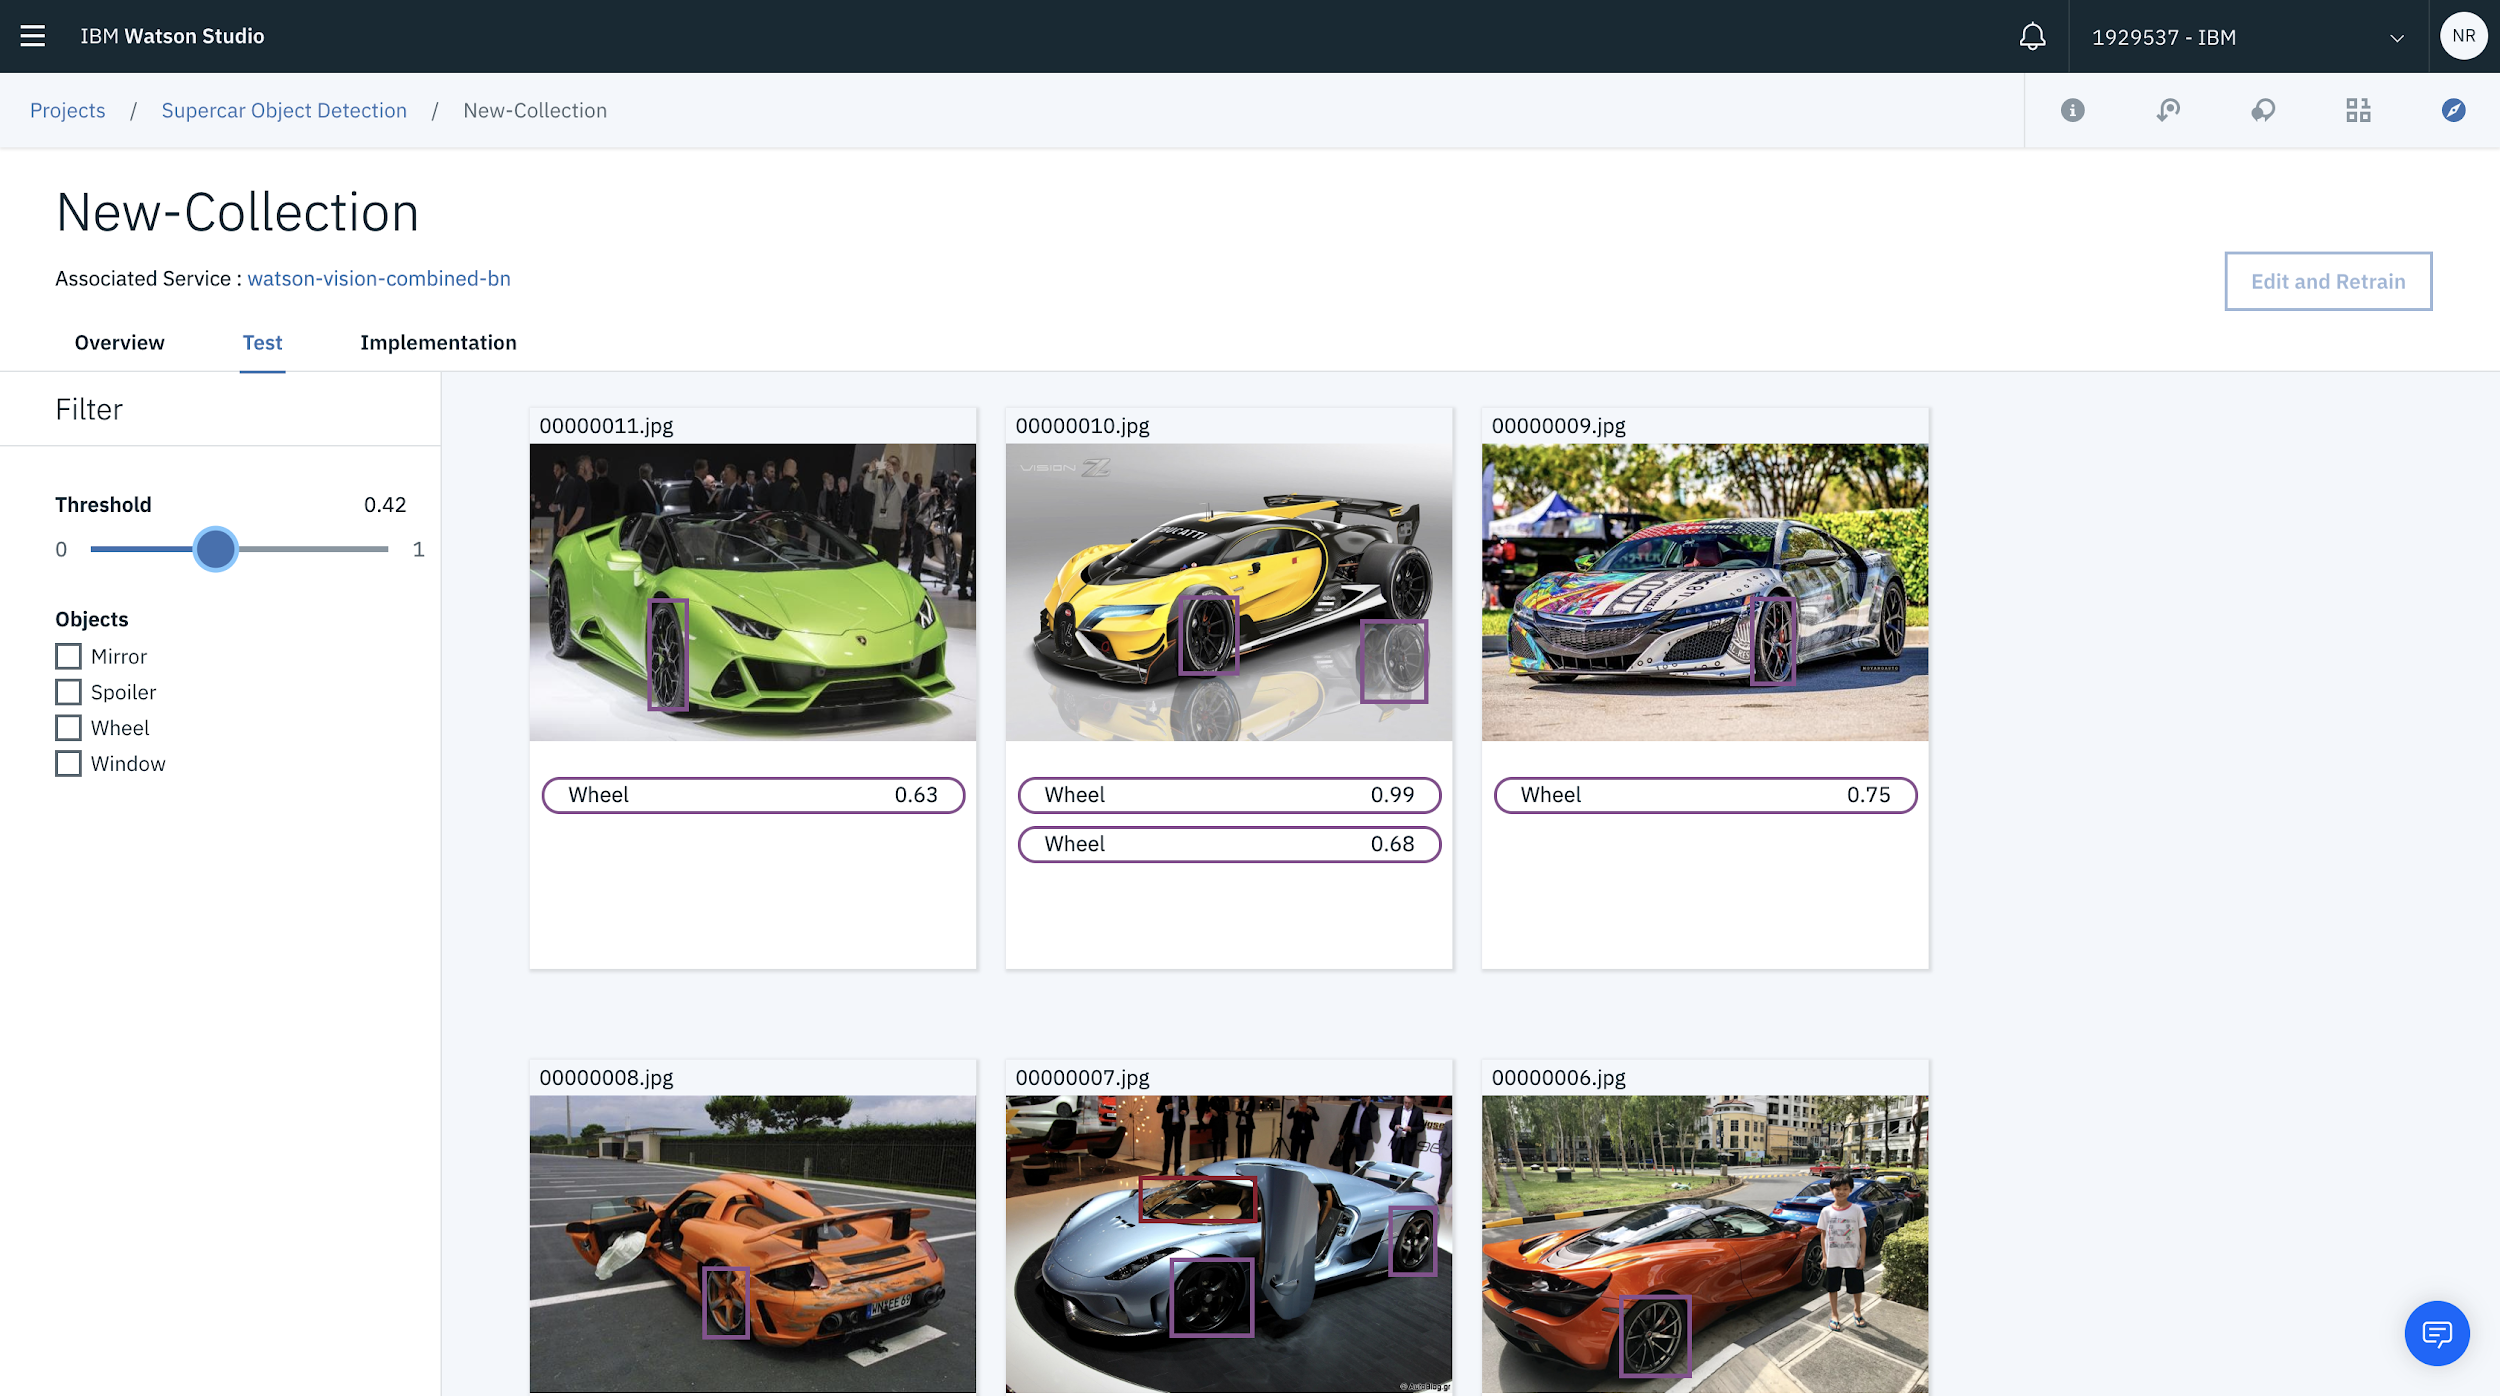
You can filter the tolerances by sliding the threshold slider on the right.
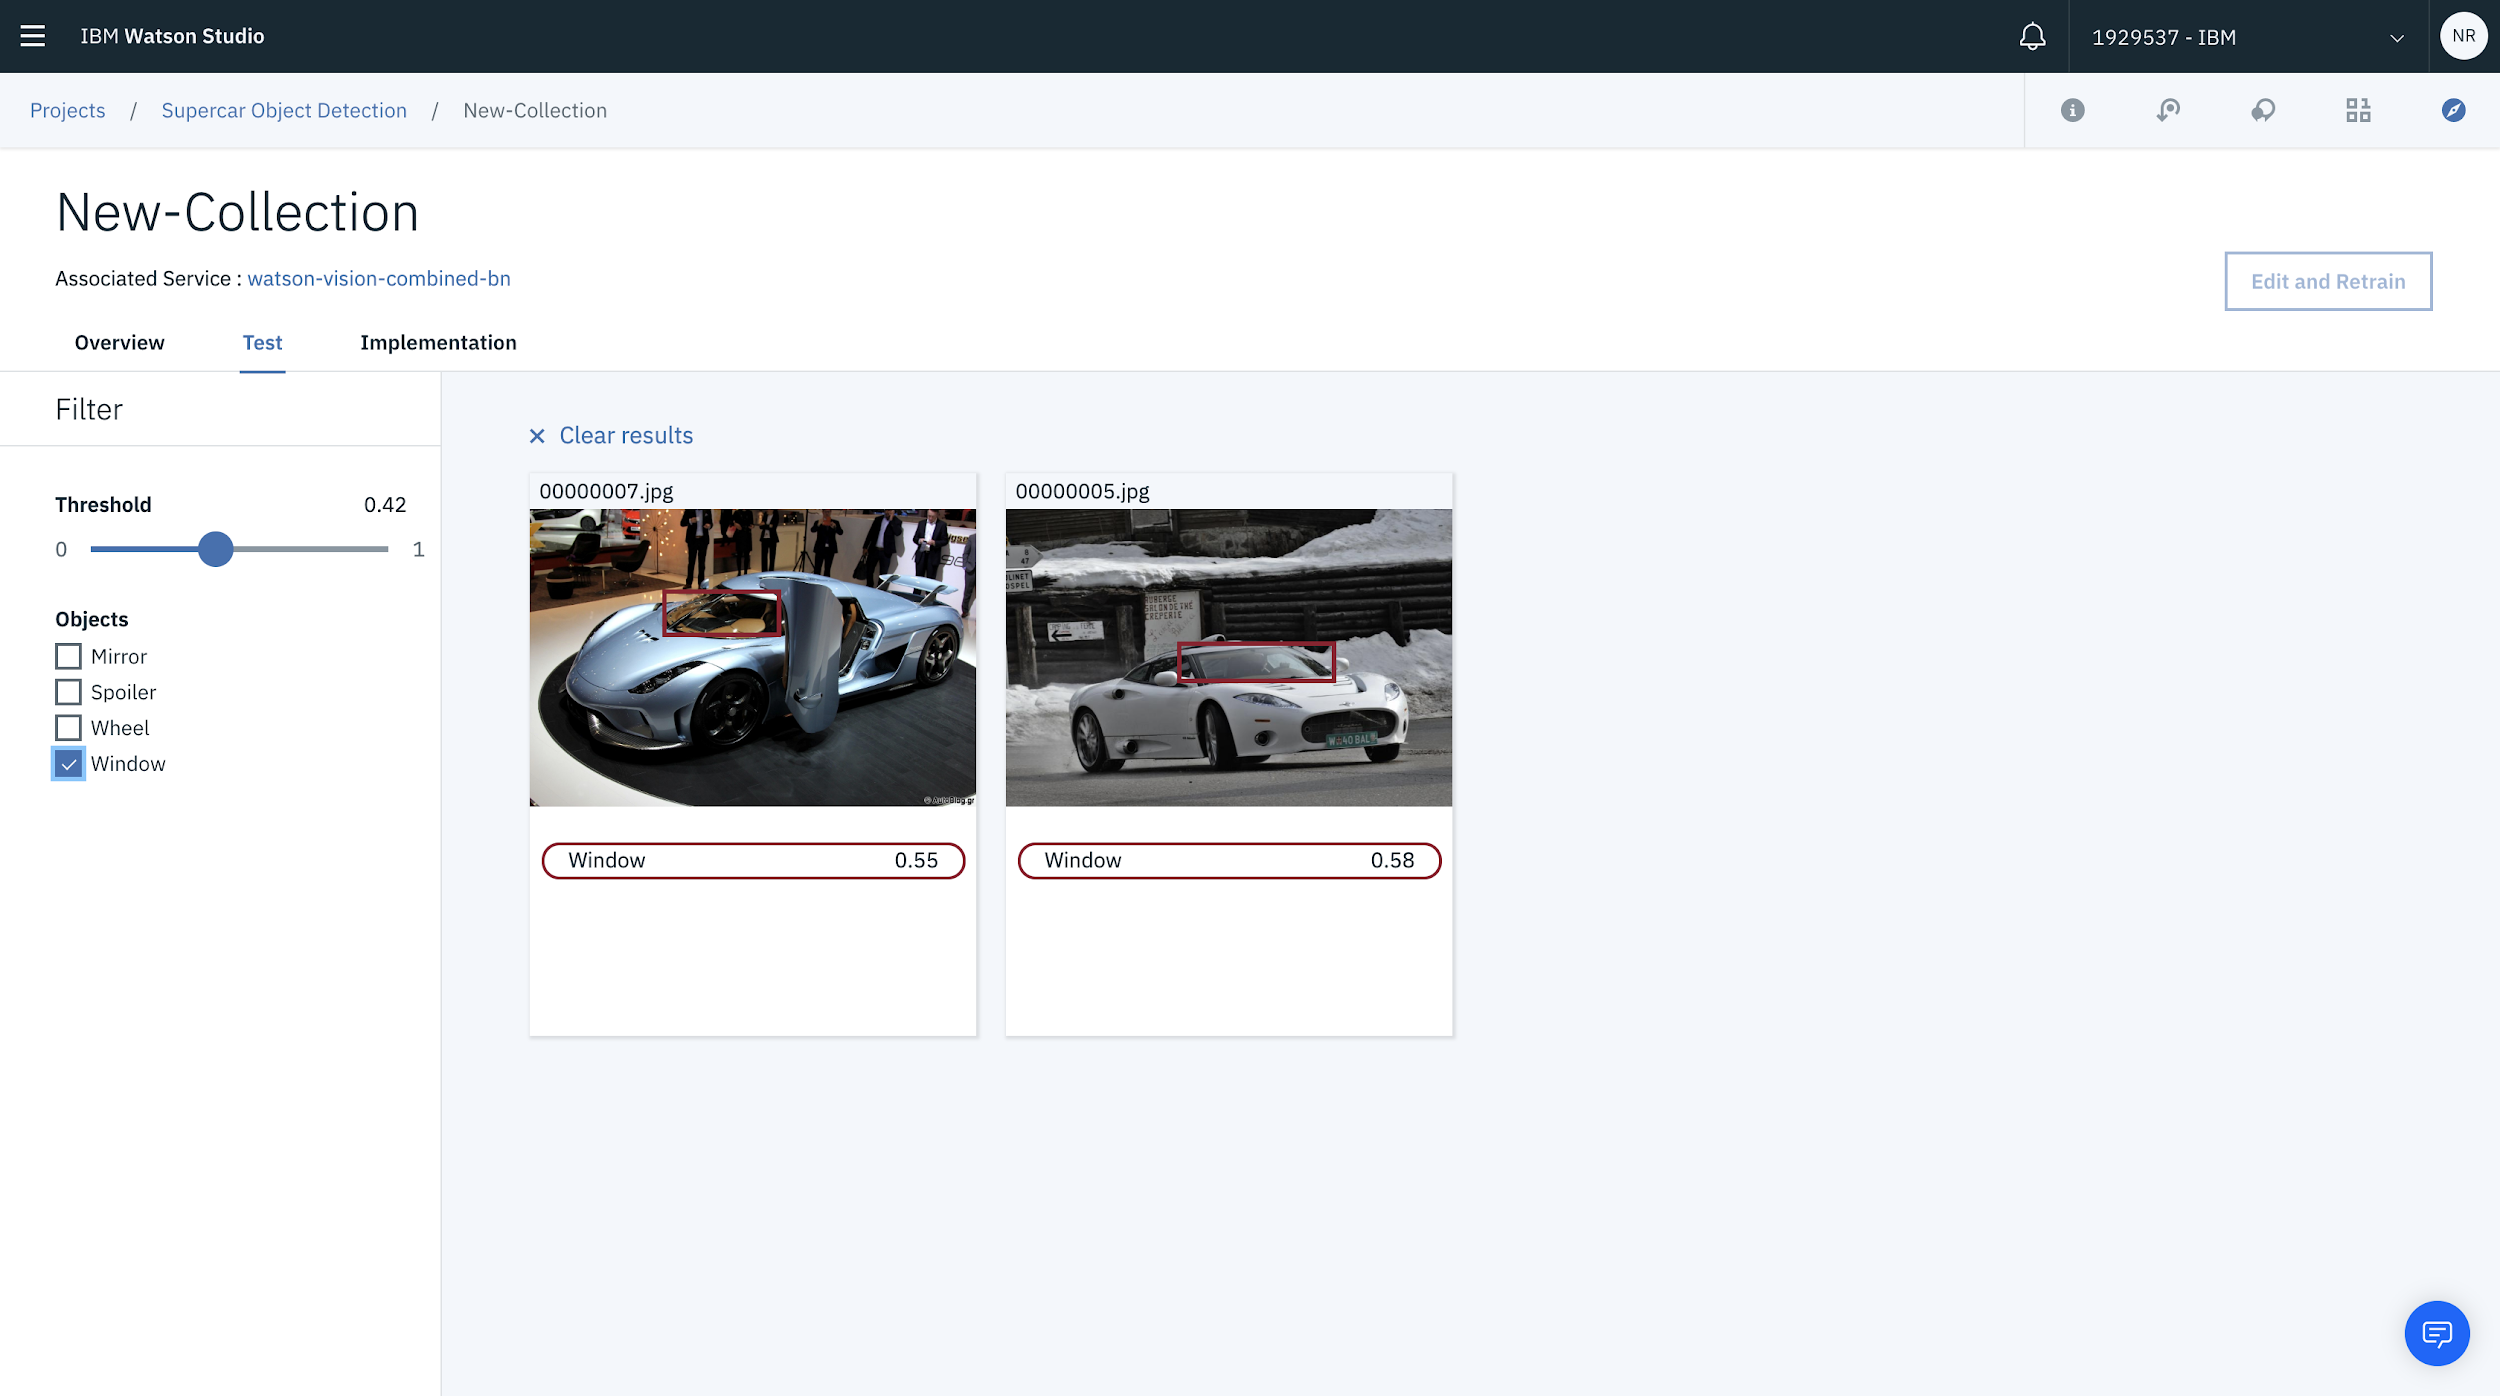
You can also filter the objects detected using the checkbox. In this case, you can filter on the images where a window has been detected.
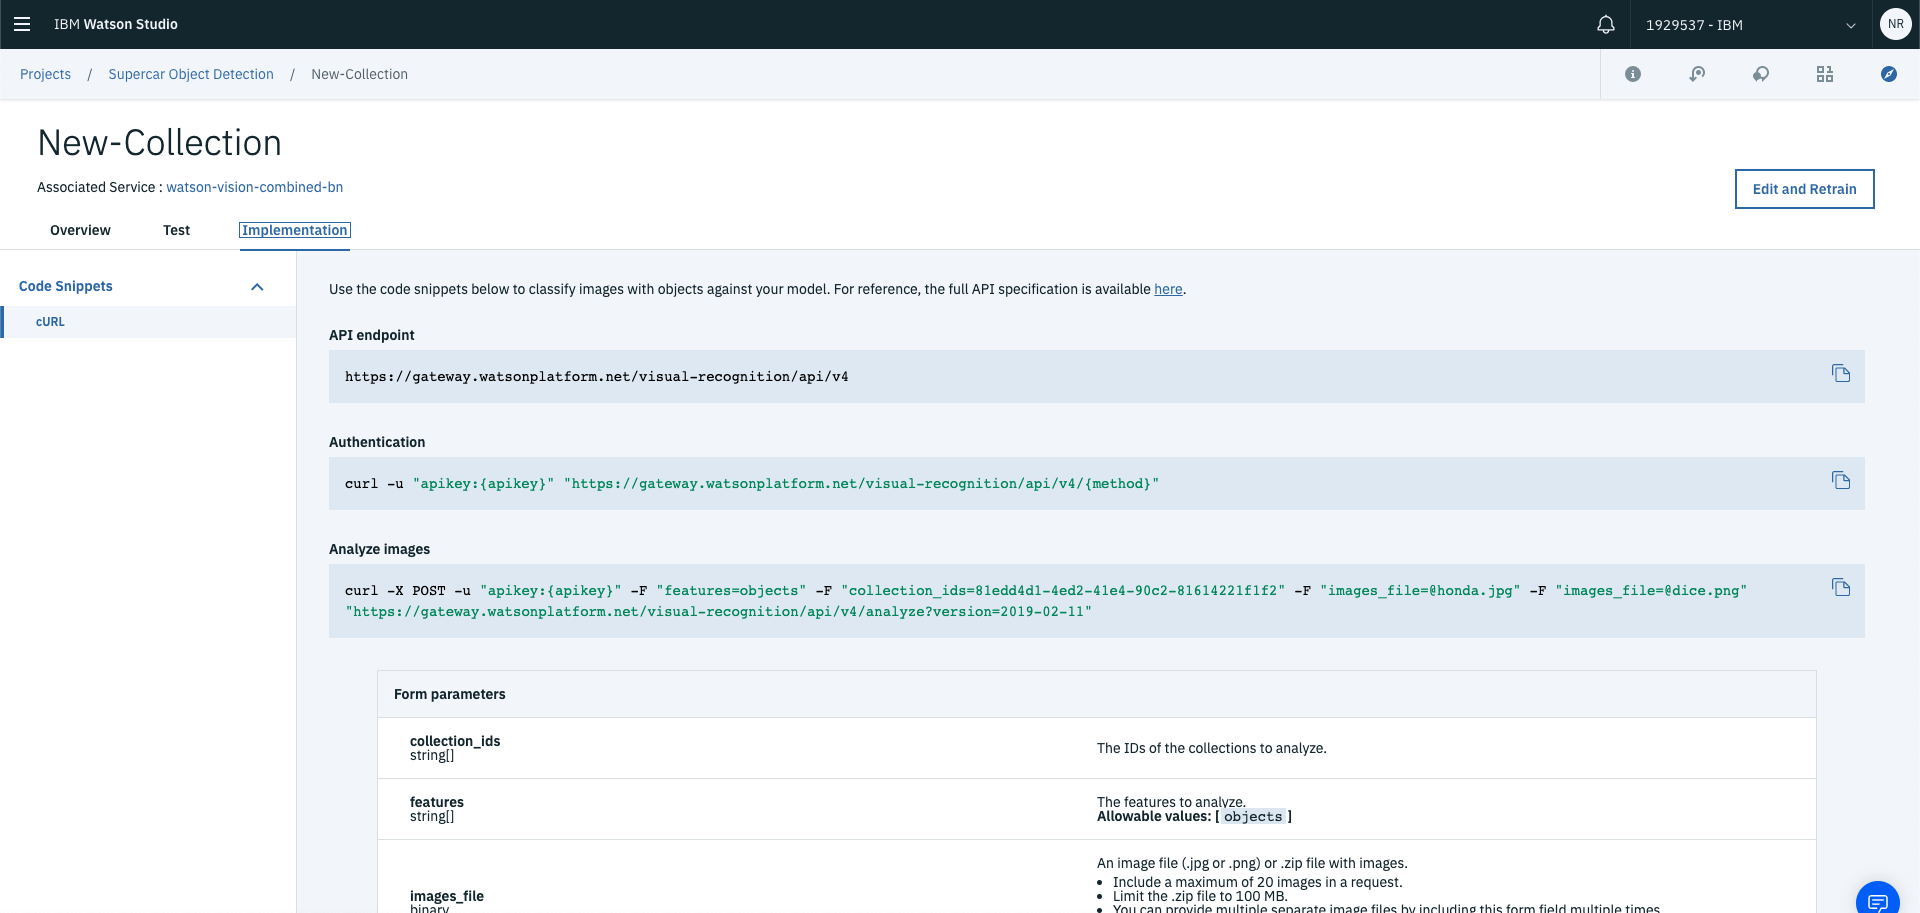
You can then use the trained model by selecting implementation and using the API request templates!
And that’s a wrap! You’ve now built your very own object detection model! Let me know how you went in the comments below!
What did you end up building?
What’s next?!
If you enjoyed this post or know someone that might enjoy it as well please please please…like it, share it and subscribe to my newsletter!
Here are some other awesome resources to get you started: