That rusty lightbulb swings over your head…again. You feel a bead of sweat trickle down your forehead. You’ve been here for hours. This ‘bruce-willis’ lookalike detective has been drilling you for hours. All you have to do is answer one freaking question and your out. But you’re just not sure. He asks once again….
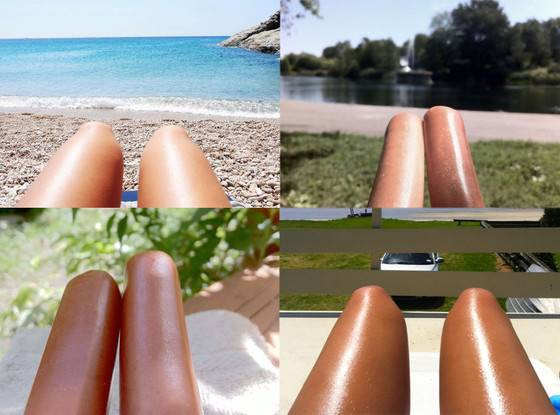
“Hot dog or legs?”
If only you had something to help…
Something that could eliminate the guesswork…
Something…
Like an image classifier
Well you’re in luck, that’s what we’re about to learn how to build…a hot dogs or legs classifier. I kid. I kid. But we are going to be taking a look at image classifiers in this post.
All jokes aside, image recognition is ridiculously powerful and it’s being embedded in a heap of new fields including Uber’s new self driving trucks, product usage analytics and satellite imagery processing. All the more reason to learn how to unlock its value.
This post goes through how to use the IBM Watson Visual Recognition service to classify general images as well as how to train your own model to classify custom categories. Let’s kick it off.
Step 1 – Get an IBM Account
Before cracking on with actually building a classifier the first thing you’ll need is an IBMid. Why?
Well, you’re going to be using the Watson Visual Recognition API to train and test your classifier. These credentials allow you to access the free tier of IBM AI products through the IBM Cloud platform (side note: this was previously called IBM Bluemix).
If you don’t have an IBMid already head on over to the link below and sign up for one. Once you’ve got an account setup, take note of your credentials as you’ll need them in the next step!

Step 2 – Create a Service
Booyah, we’re on a roll. The next step is to spin up a service on IBM Cloud which will allow you to access the Visual Recognition API. This can all be done through the IBM Cloud console. Start by heading over to the
From there, go to AI
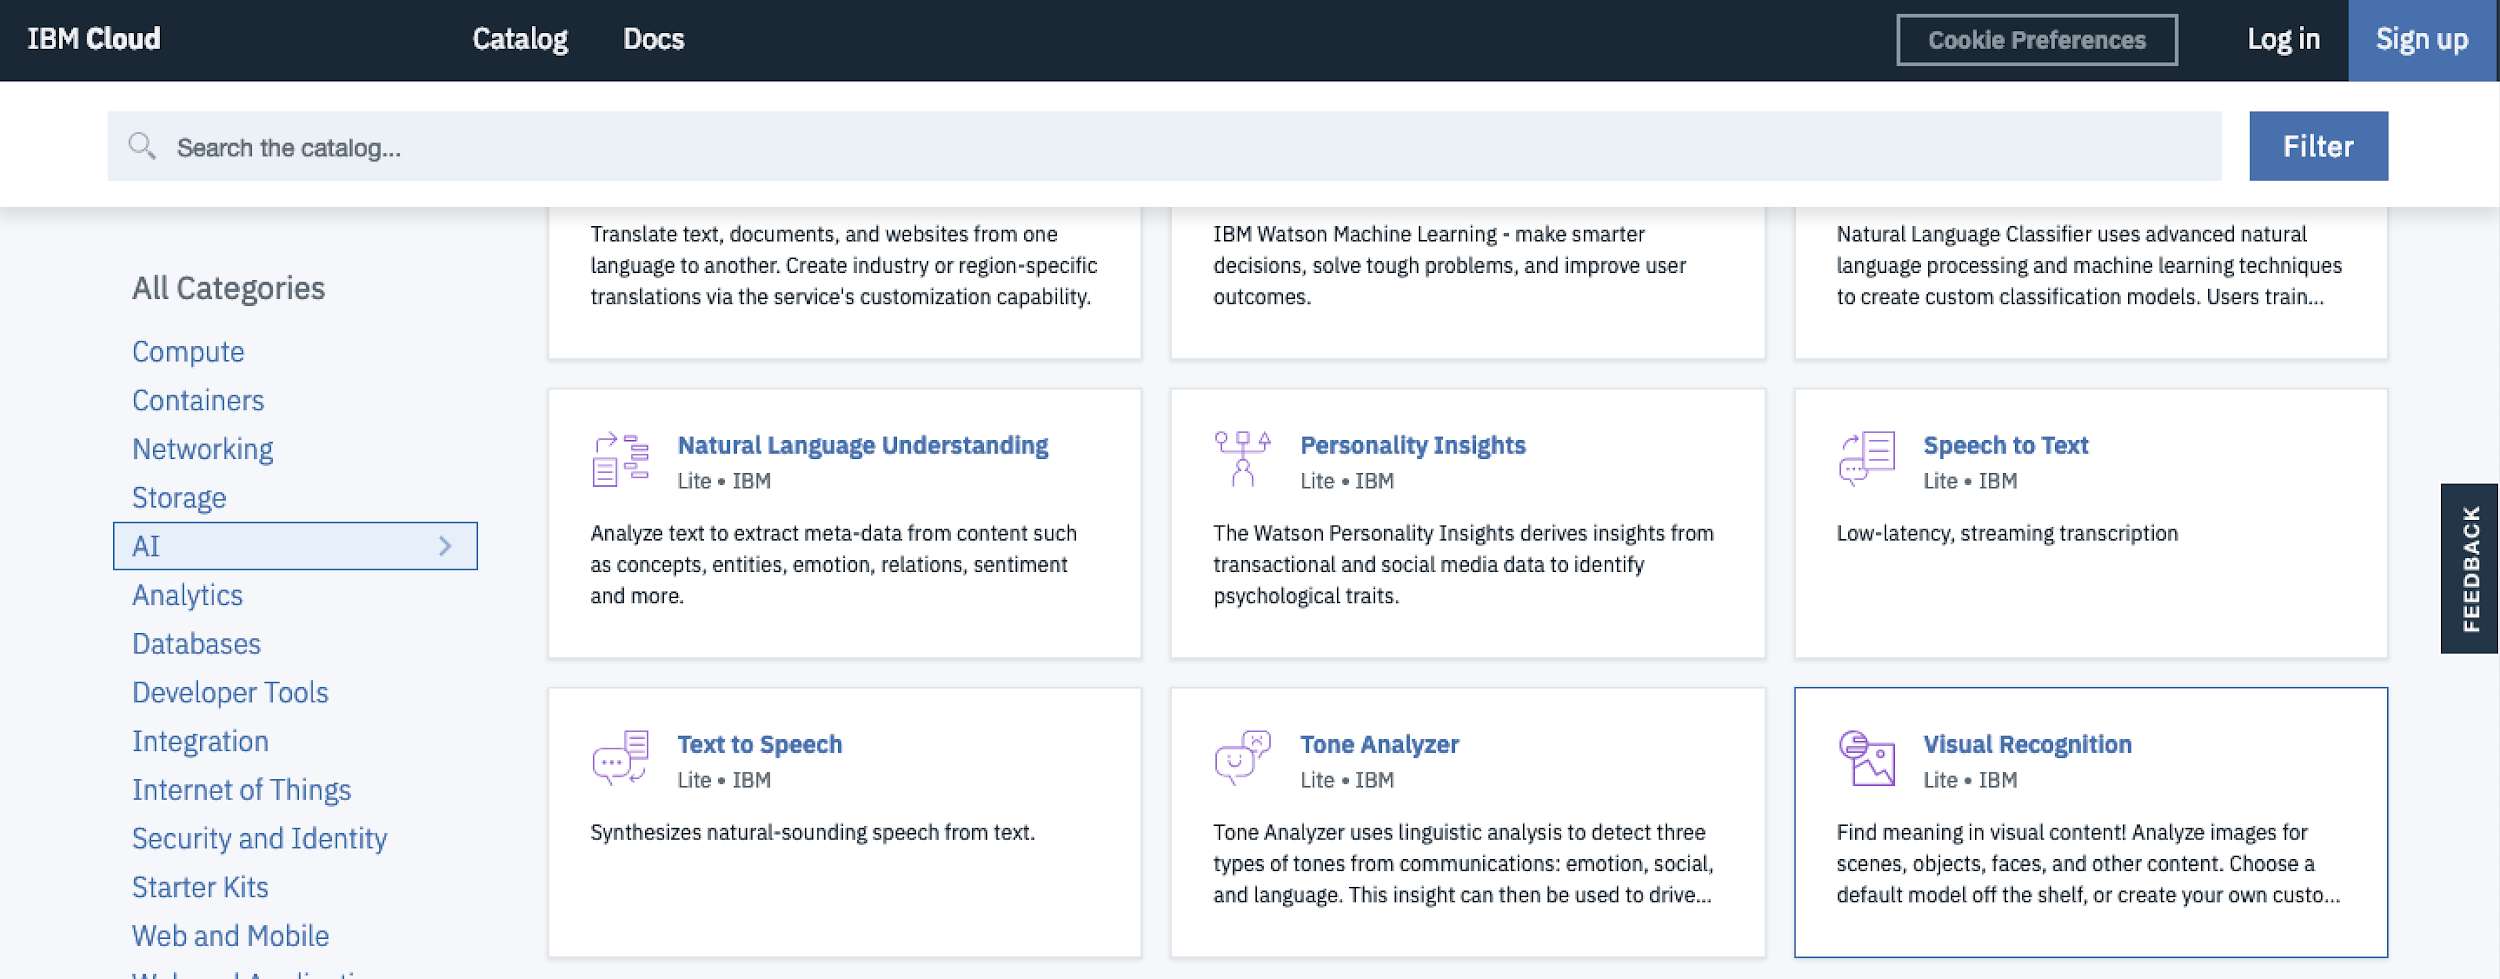
Here you’ll be asked to name your service, select a region and select a resource group. These can be left with their defaults.
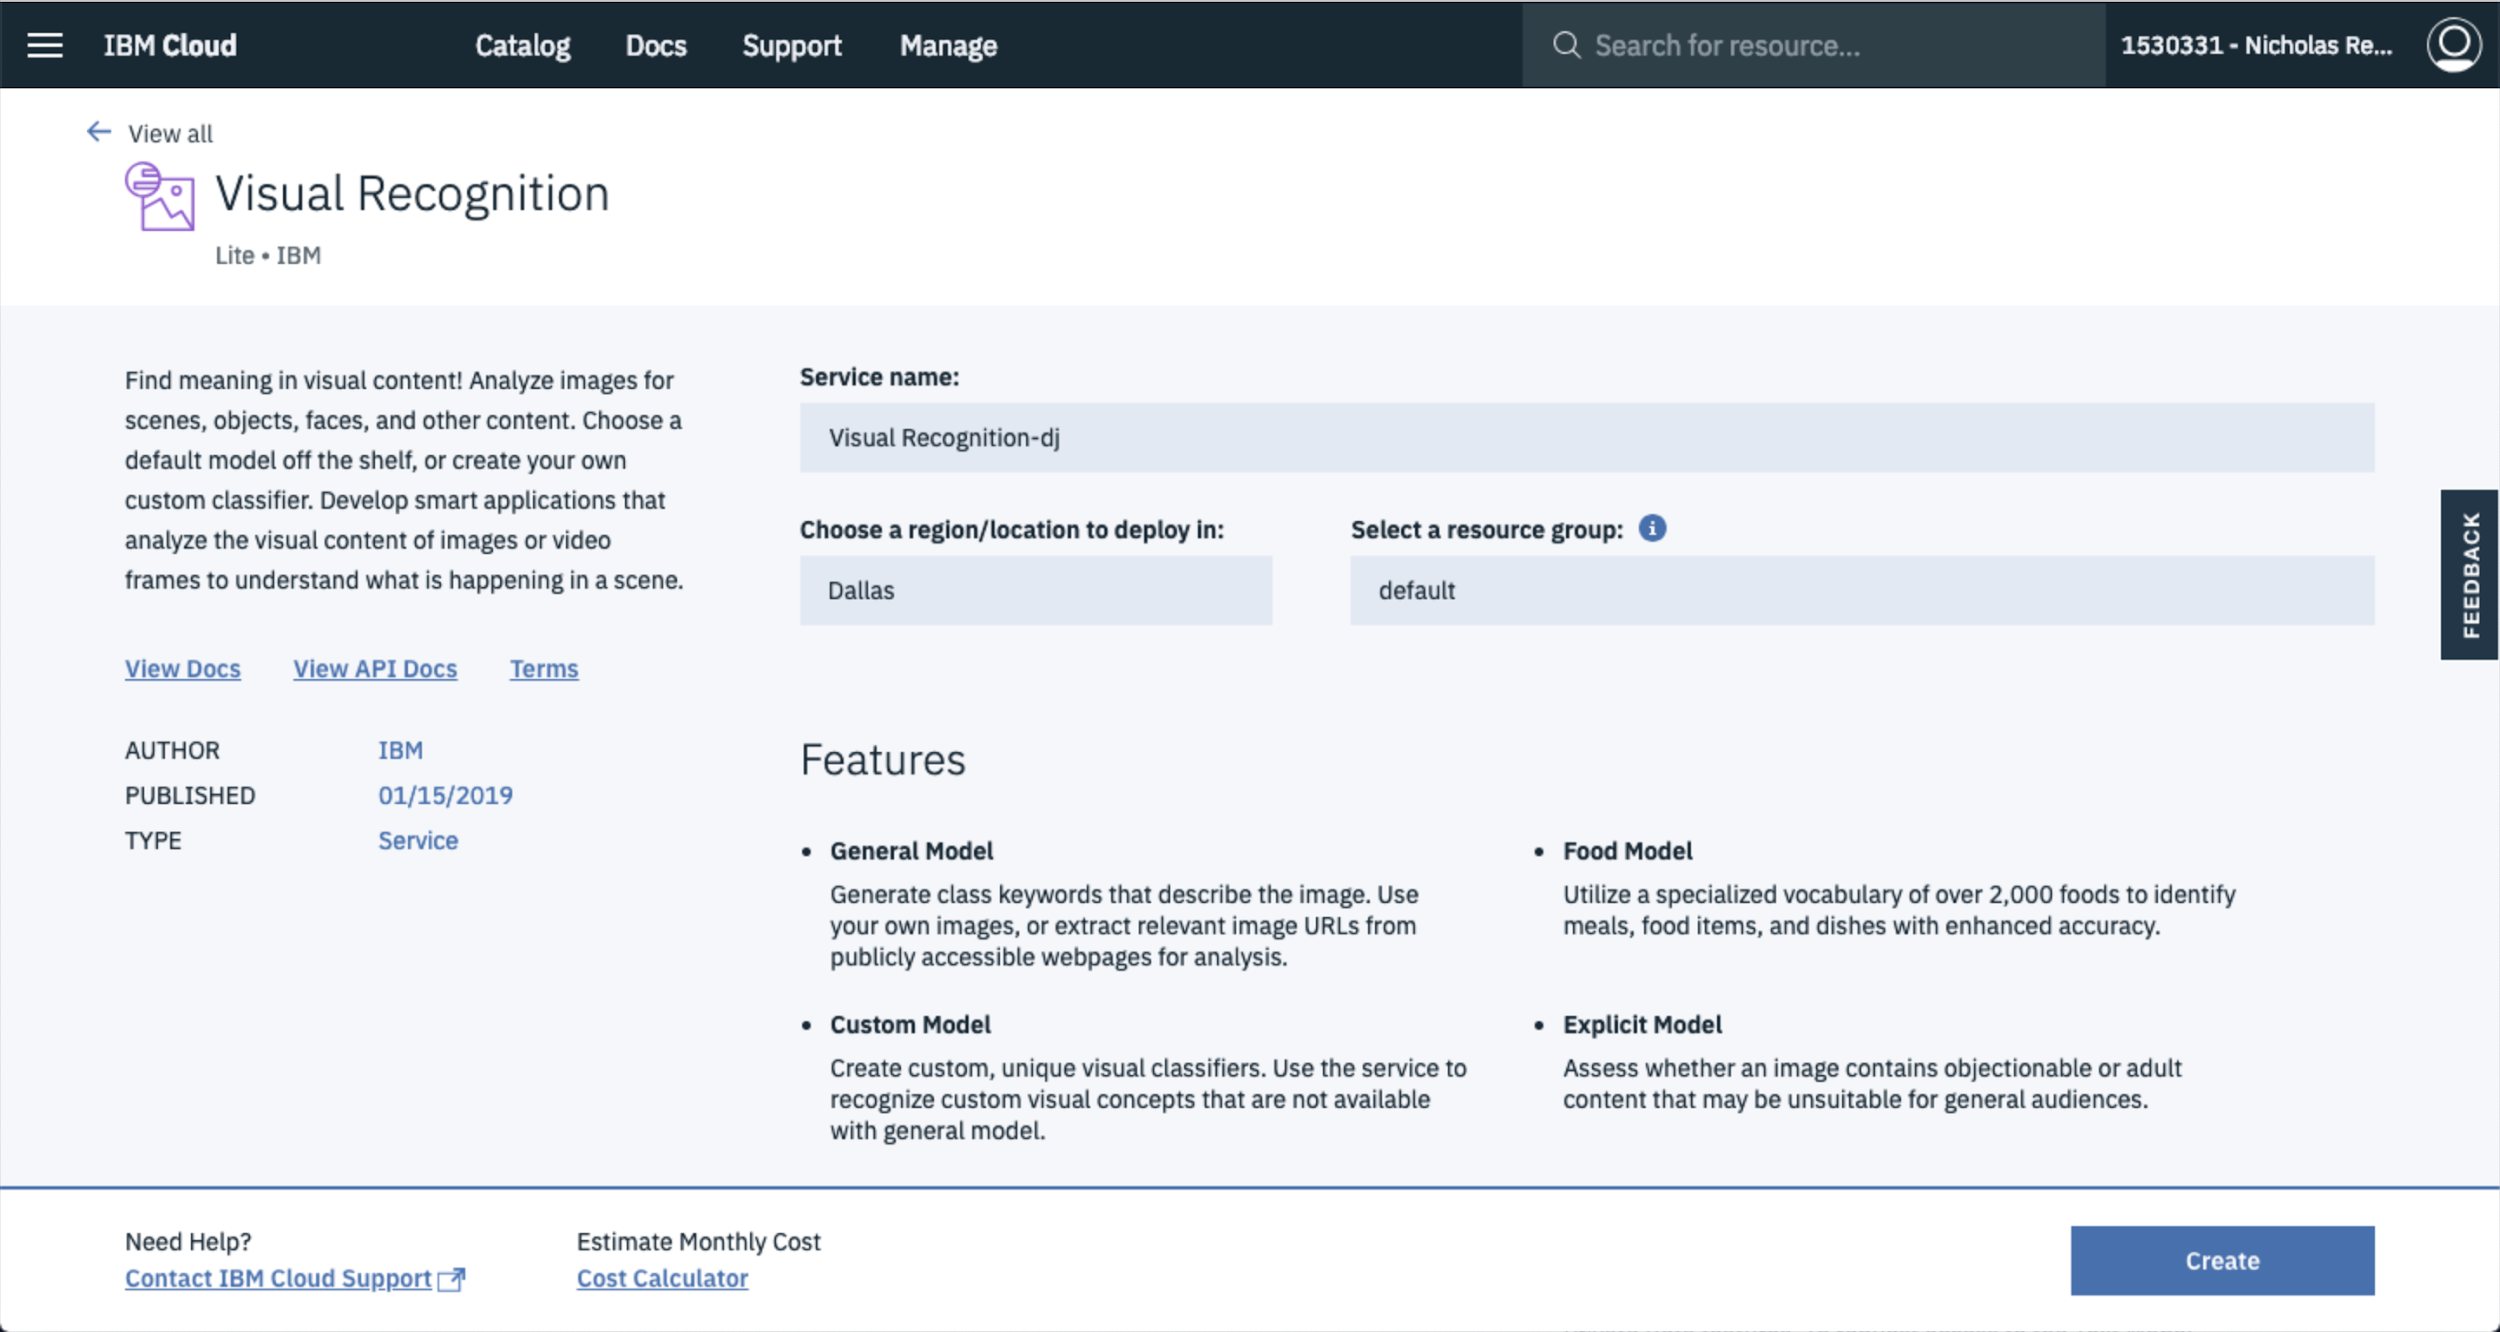
If you scroll down you’ll be asked to select a plan. The Lite plan is more than sufficient when just starting out. Select that one and click Create

Step 3 – Generate API Credentials
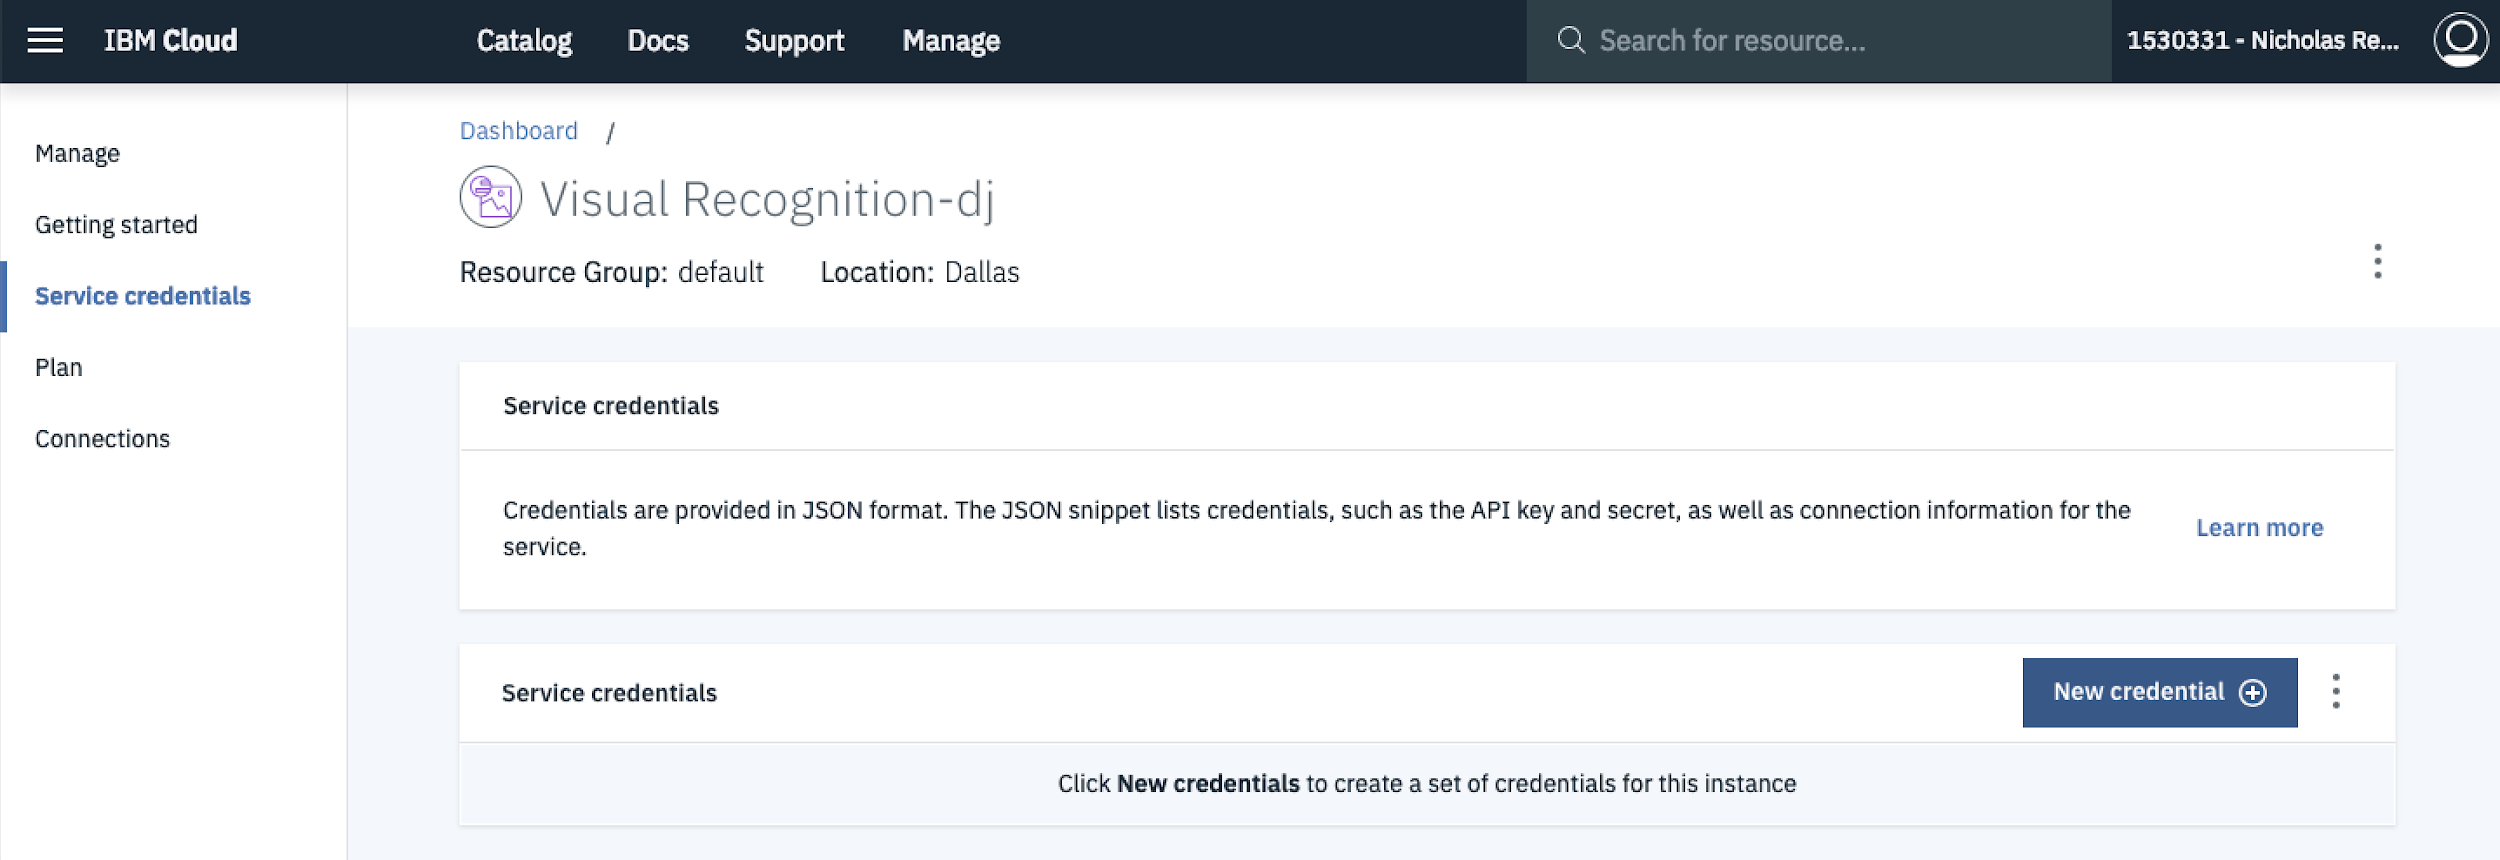
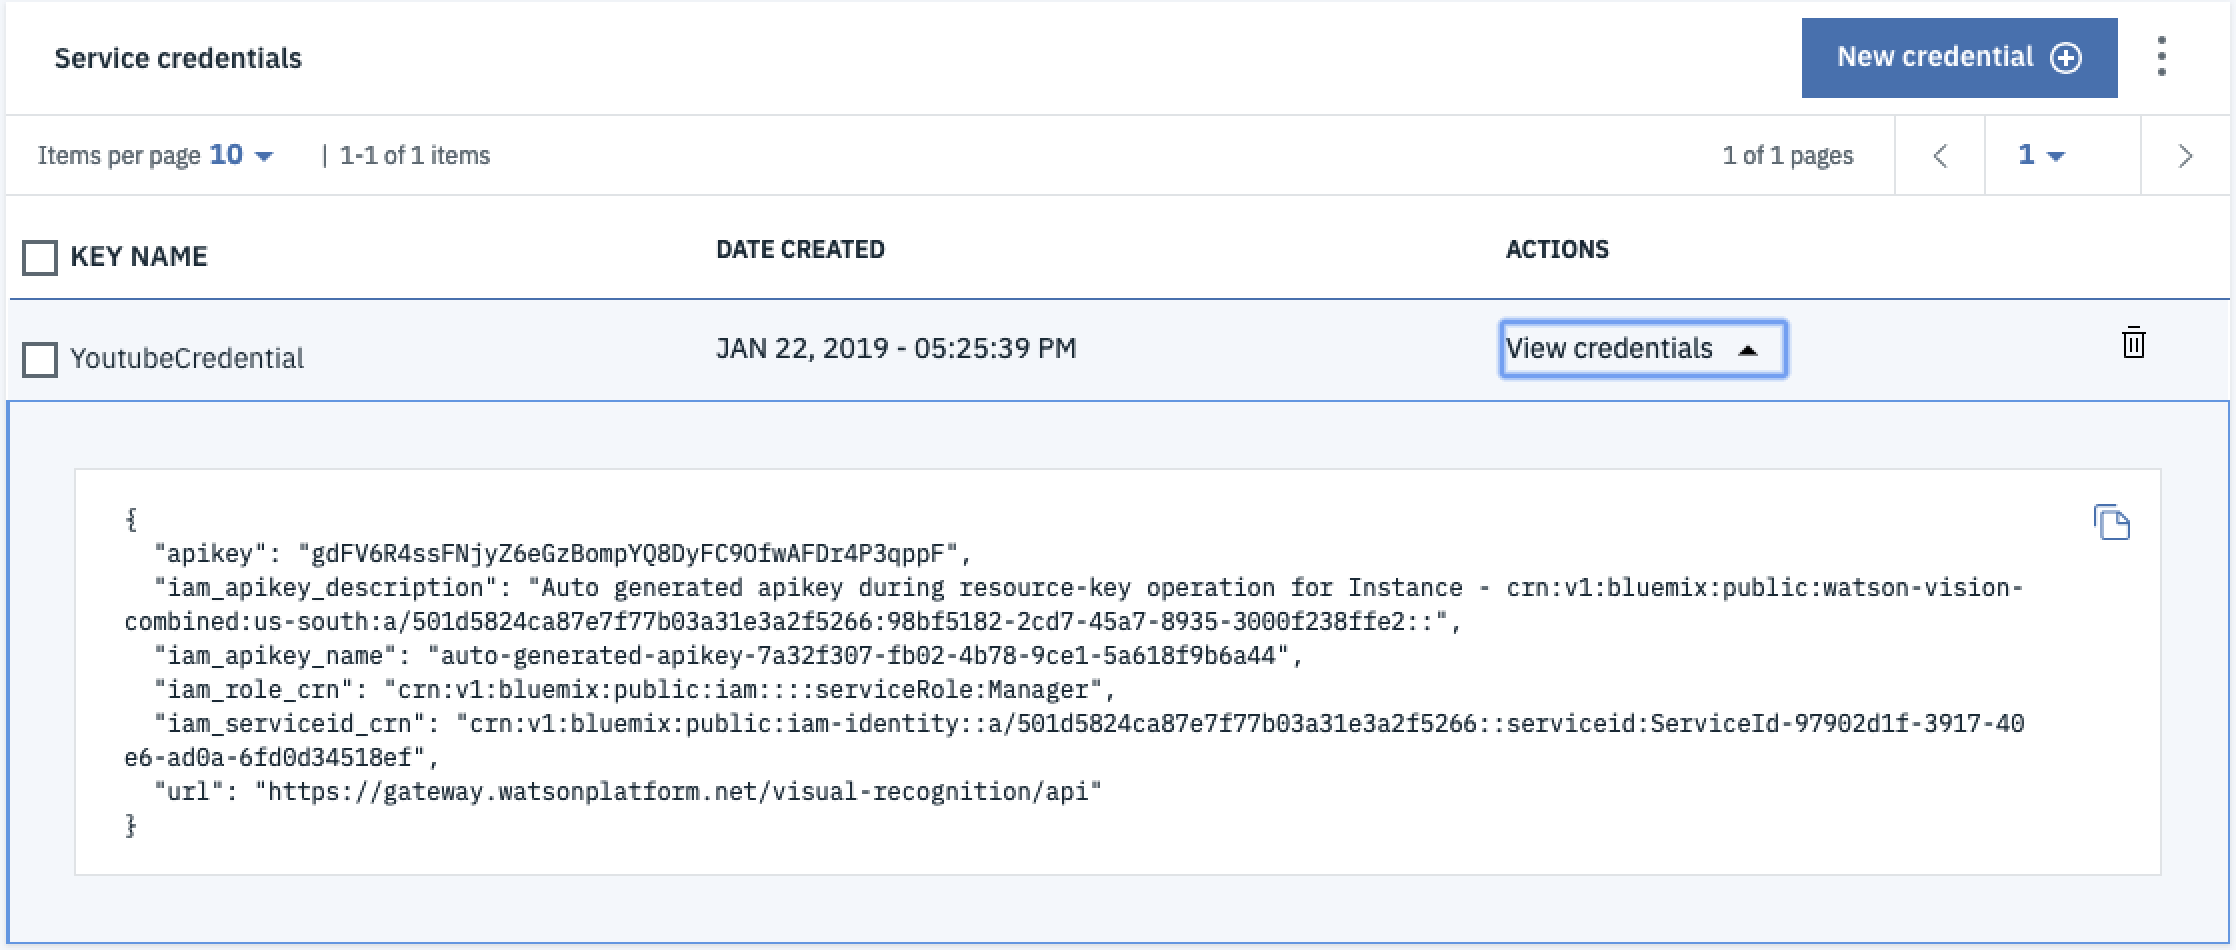
The Visual Recognition API uses token-based IAM to authenticate requests. The IAM credentials can be generated once you’ve created your service by going to Service Credential then Selecting New Credential.
Once there, create a new credential by entering a name, changing the role to Manager and selecting Auto Generate (optional) for the Select Service ID then hitting Add.
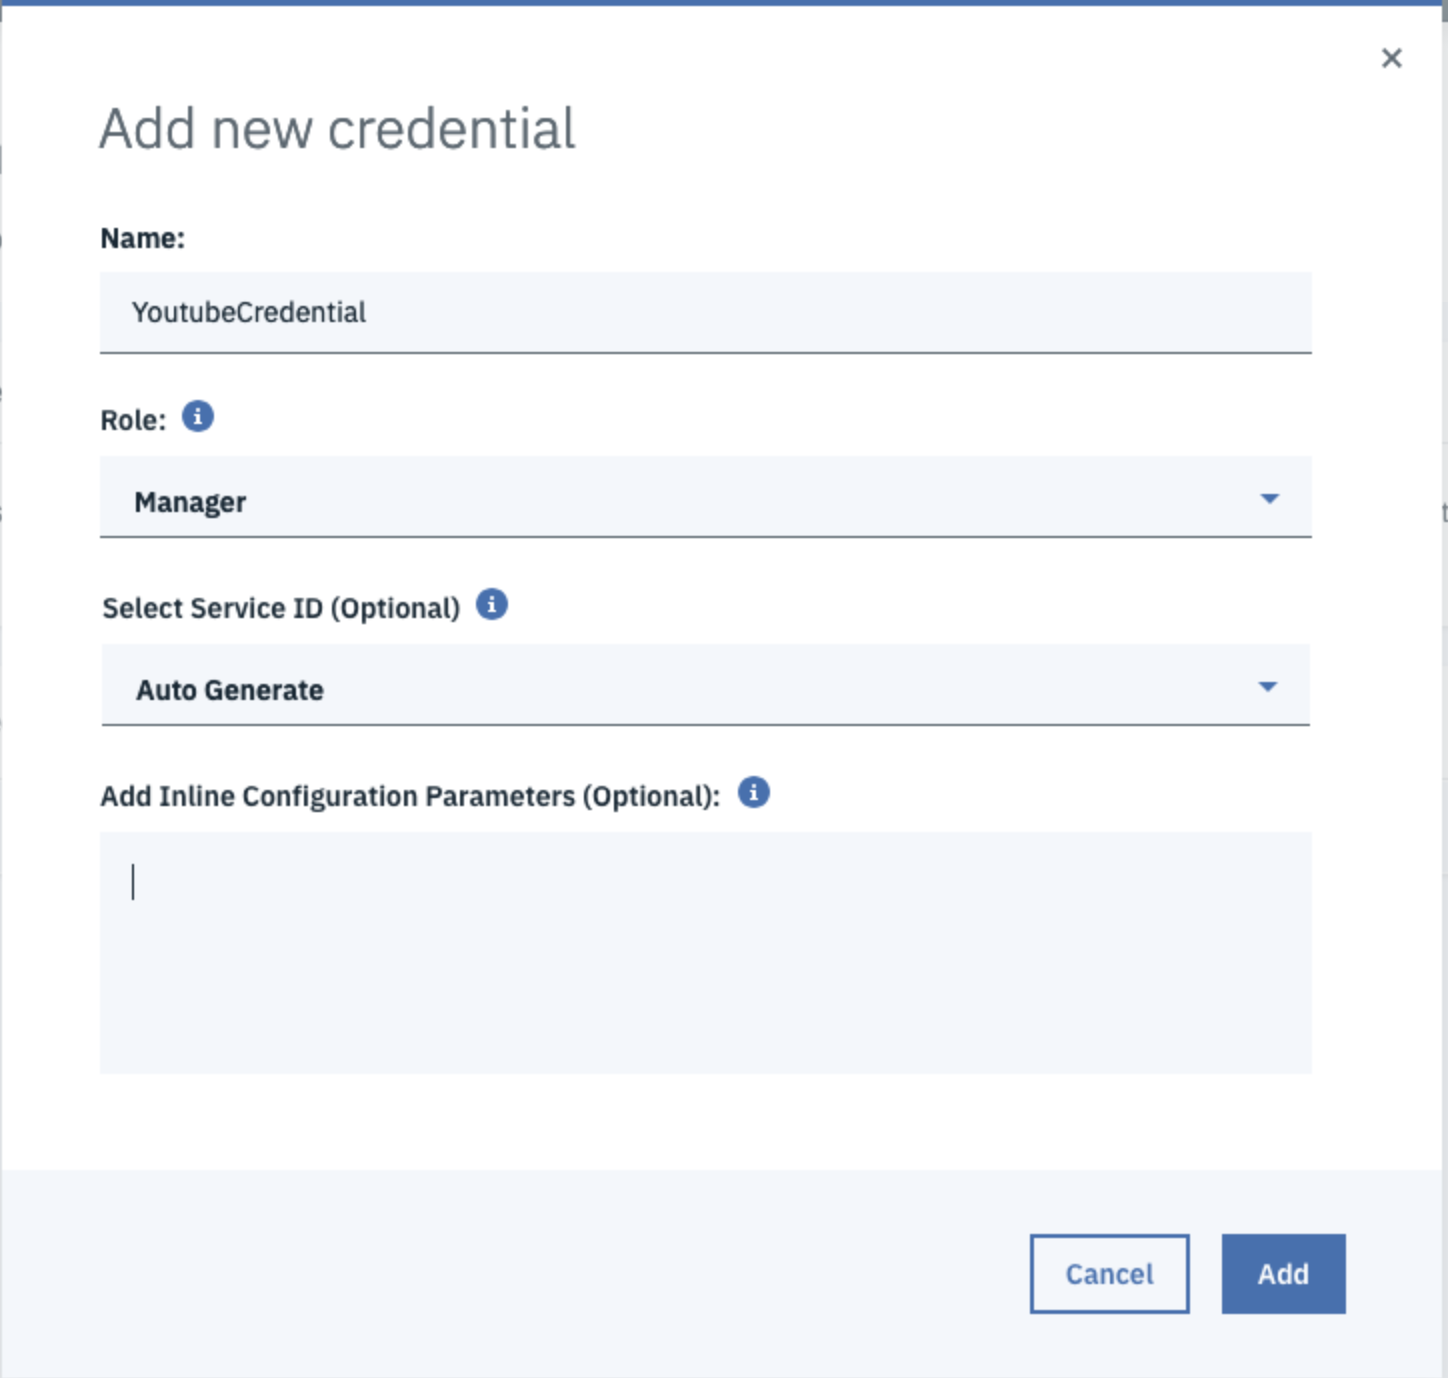
This will generate new credentials which will allow you to use the API when accessing it using Python later on. Click View Credentials and copy the apikey, you’ll need it in Step 5.
Step 4 – Install Watson Developer Cloud
We’re out of setup world now and we’re finally delving into some code. Because this example is going to use Python to access the visual recognition service, we’re going to need some modules to help us out.
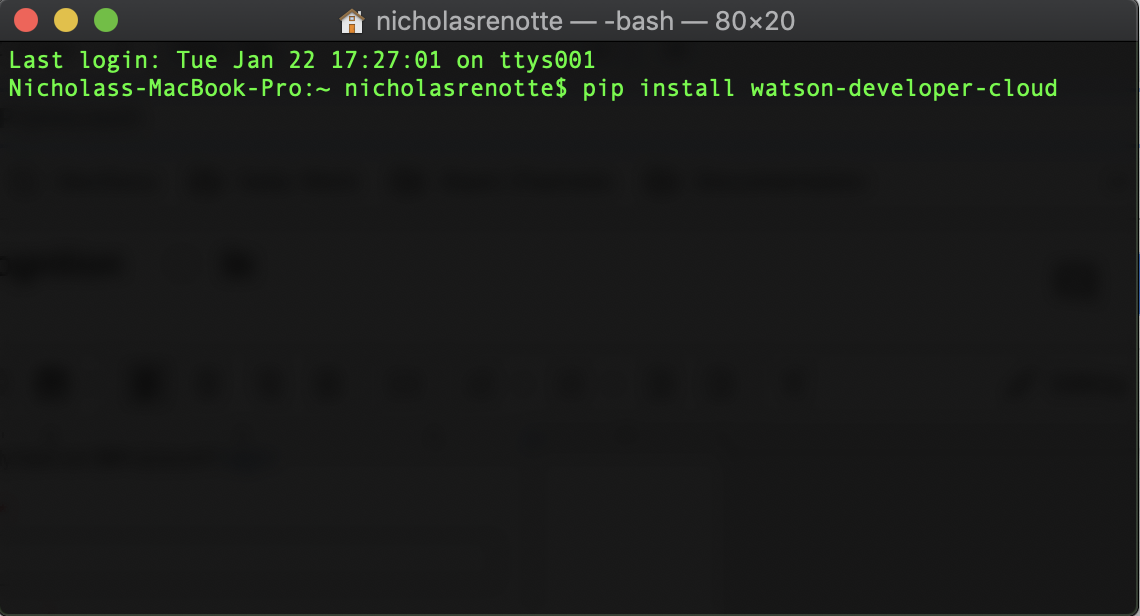
The key module that we’ll be using is watson-developer-cloud. To install it run:
pip install watson-developer-cloud
Step 5 – Classifying General Images
Alright, all the setup is done. It’s now time to start classifying some stuff. This example uses jupyter notebooks to interact with the API. If you’re not familiar with how to use notebooks, check out this quick tutorial.
The first step is to import the json module and the visual recognition method from the watsno_developer_cloud module.
import json
from watson_developer_cloud import VisualRecognitionV3
Then create a new instance of the visual recognition service and update iam_apikey to the apikey you generated in Step 3.
# Create instance of VR Service
visual_recognition = VisualRecognitionV3(
 '2018-03-19',
 iam_apikey='gdFV6R4ssFNjyZ6eGzBompYQ8DyFC9OfwAFDr4P3qppF') # Replace this with your APIKEY
Grab a url of an image you’d like to classify and update the url variable. Then run the classify method against the visual_recognition service to retrieve the classification.
# URL that you want to classify
url = 'https://cdn.shopclues.com/images/thumbnails/18729/320/320/78279966PC14275391591432900471.jpg'

# Call classify method from service
classes_result = visual_recognition.classify(url=url).get_result()

# Pretty print JSON result
print(json.dumps(classes_result, indent=2))
The response can be pretty-printed using json.dumps and should look similar to the result shown below. The image used was a basic desktop computer that looked something like this:
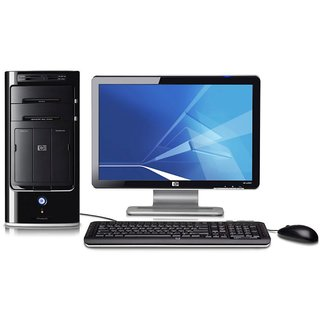
Looking at the classes returned you can see that the classifier accurately classified the image as a desktop computer.
# Check classes returned
classes_result['images'][0]['classifiers'][0]['classes']
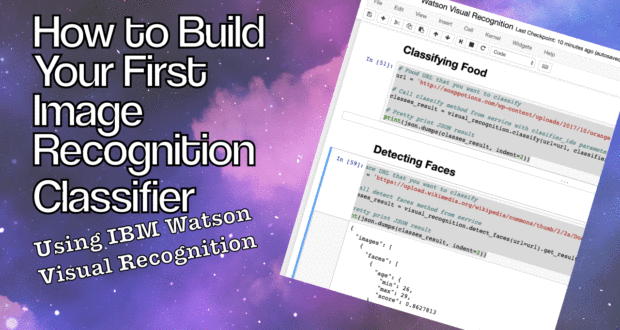
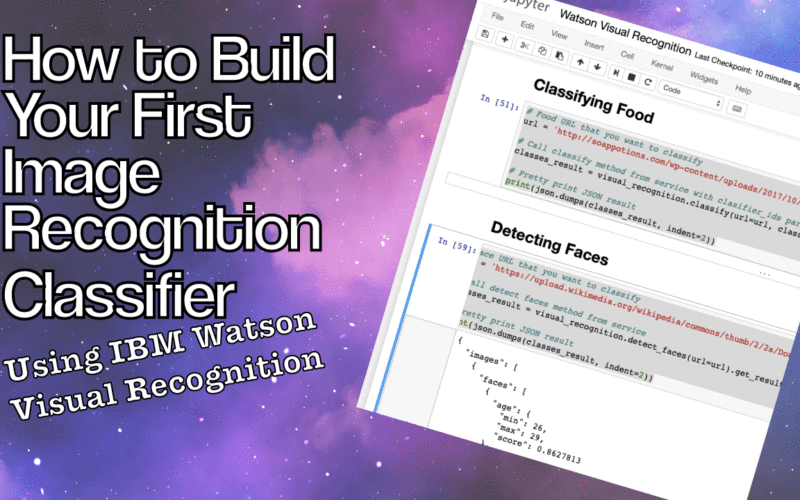
Step 6 – Classifying Food
One of the cool things about the visual recognition API is that you’re able to use more than just their basic classifier. For example the devs over at IBM have also developed a classifier that allows you to classify food.
To use that classifier just pass through an extra argument to the classify method. The argument required is classifier_ids=[“food”].
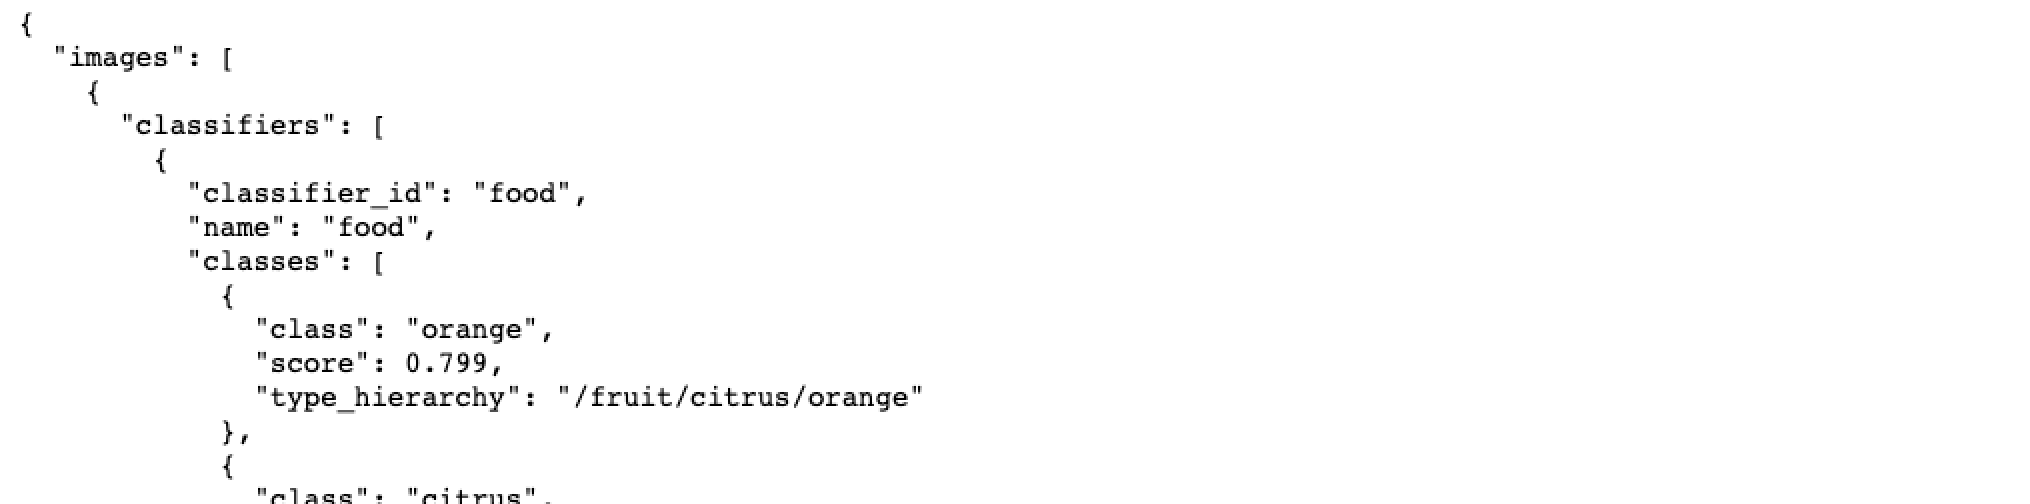
# Food URL that you want to classify
url = 'http://soappotions.com/wp-content/uploads/2017/10/orange.jpg'

# Call classify method from service with clasifier_ids parameter set
classes_result = visual_recognition.classify(url=url, classifier_ids=["food"]).get_result()

# Pretty print JSON result
print(json.dumps(classes_result, indent=2))
When you run this classifier you’ll actually notice that the response shows that the classifier_id being used is the food classifier. This might not seem all that important now but it becomes increasingly important when you start training your own models.
Step 7 – Detecting Faces
Watson VR also opens up the ability to detect faces. Rather than using the classify method we’ll use detect_faces to leverage the facial recognition api. One of the really neat things about this function is that it actually picks up multiple faces within a particular image and also estimates the gender and the age of that face!
To switch our code over so that it can detect faces, simply change the classify method to detect_faces and run the code. (NB: Update the url to one that has images of faces as well)
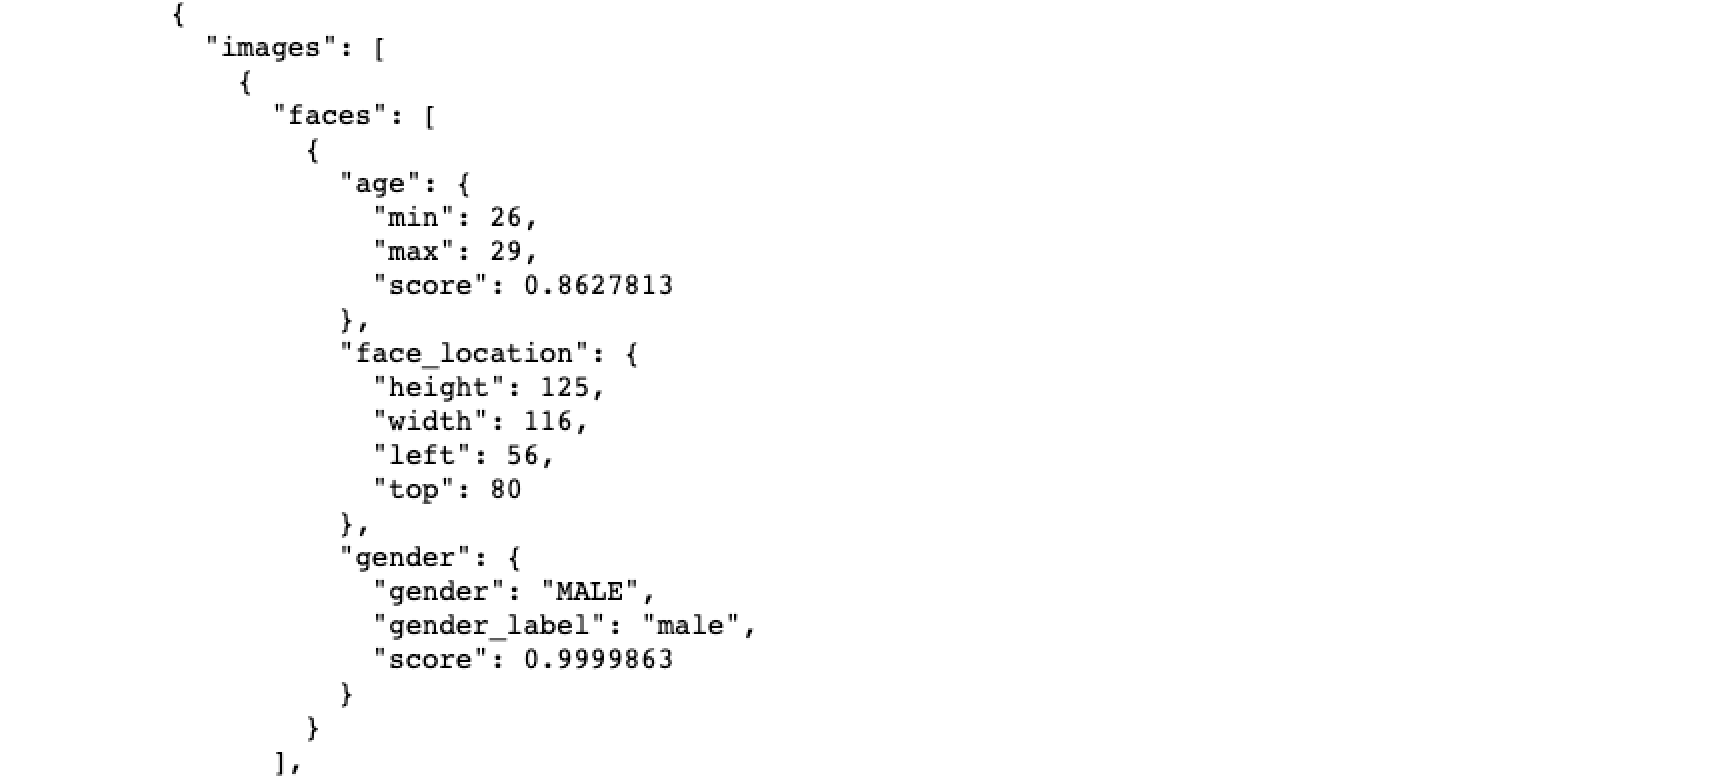
# Face URL that you want to classify
url = 'https://upload.wikimedia.org/wikipedia/commons/thumb/2/2a/Donald_Glover_TIFF_2015.jpg/220px-Donald_Glover_TIFF_2015.jpg'

# Call detect faces method from service
classes_result = visual_recognition.detect_faces(url=url).get_result()

# Pretty print JSON result
print(json.dumps(classes_result, indent=2))
The response should return an array of faces as well as the estimated age of that person, the location of the person’s face within the photo and the guestimated age
Step 8 – Custom Classifications
“This is great Nick, but i don’t really care about classifying fruit or detecting faces”
Well, you’re in luck because the visual recognition API allows you to train custom classes. This would be like training your own CNN using Tensorflow but way easier.
To do this, you need to load zip files containing images of what you’re trying to classify as well as images of things that don’t form part of that class. Then run the create_classifier method against your visual recognition service.
# Open each image zip file
with open('./beagle.zip', 'rb') as beagle, \
 open('./golden-retriever.zip', 'rb') as goldenretriever, \
 open('./husky.zip', 'rb') as husky, \
 open('./cats.zip', 'rb') as cats:

 # Create new classifier category
 model = visual_recognition.create_classifier('dogs',
 beagle_positive_examples=beagle,
 goldenretriever_positive_examples=goldenretriever,
 husky_positive_examples=husky,
 negative_examples=cats).get_result()

# Pretty print JSON result
print(json.dumps(model, indent=2))
Assuming everything went well this will return a response that shows that the model has started training.
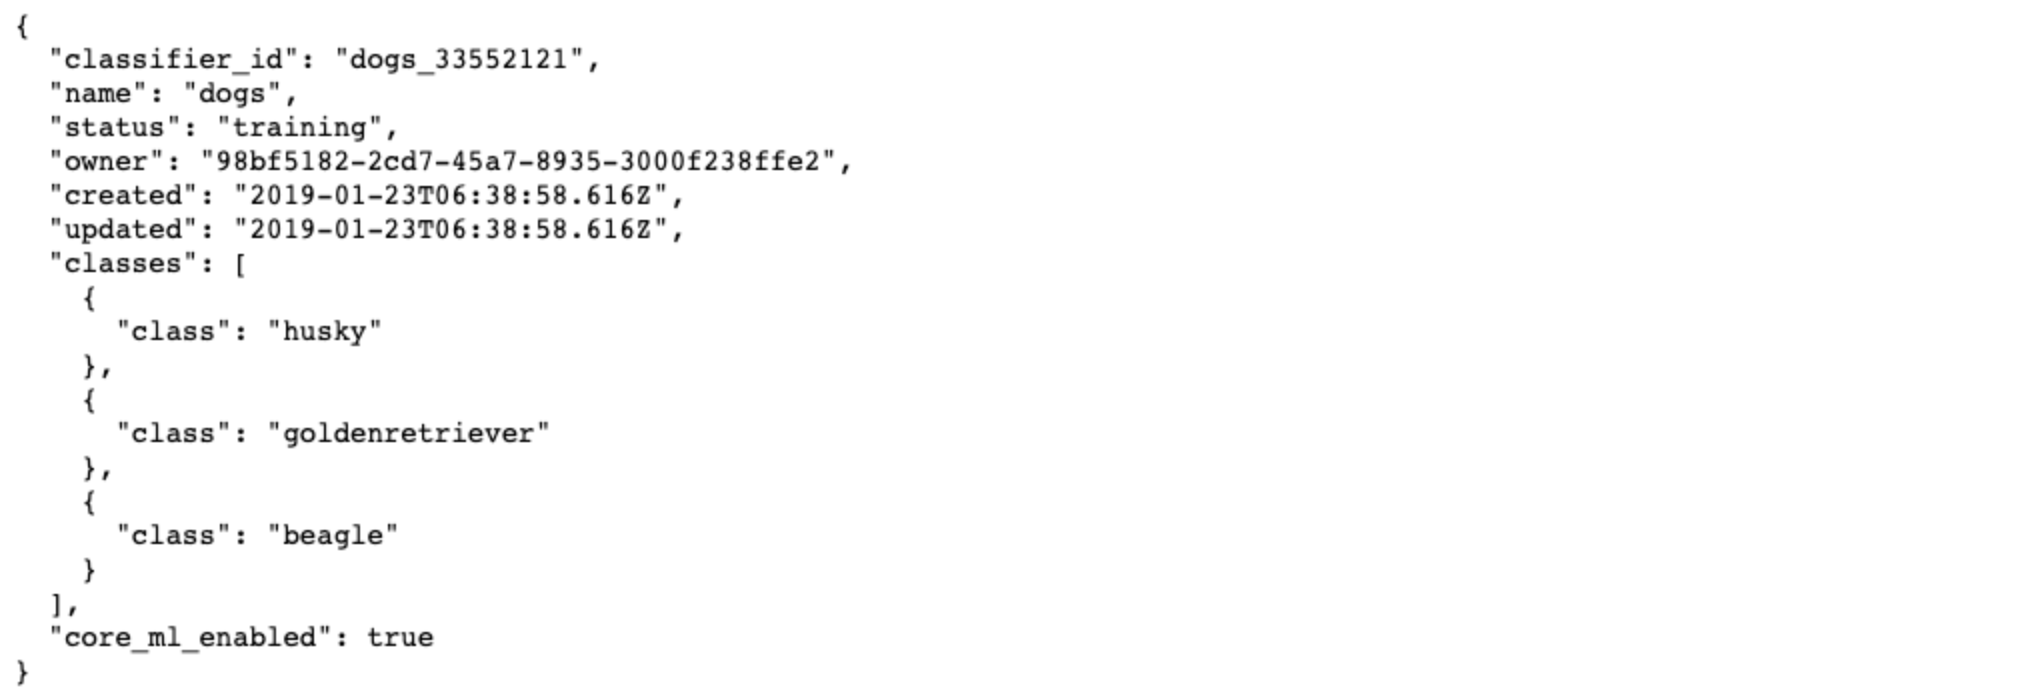
We can check on the training status using the get_classifier method.
# Check status of classifier
classifier = visual_recognition.get_classifier(classifier_id='dogs_33552121').get_result()

# Pretty print JSON result
print(json.dumps(classifier, indent=2))
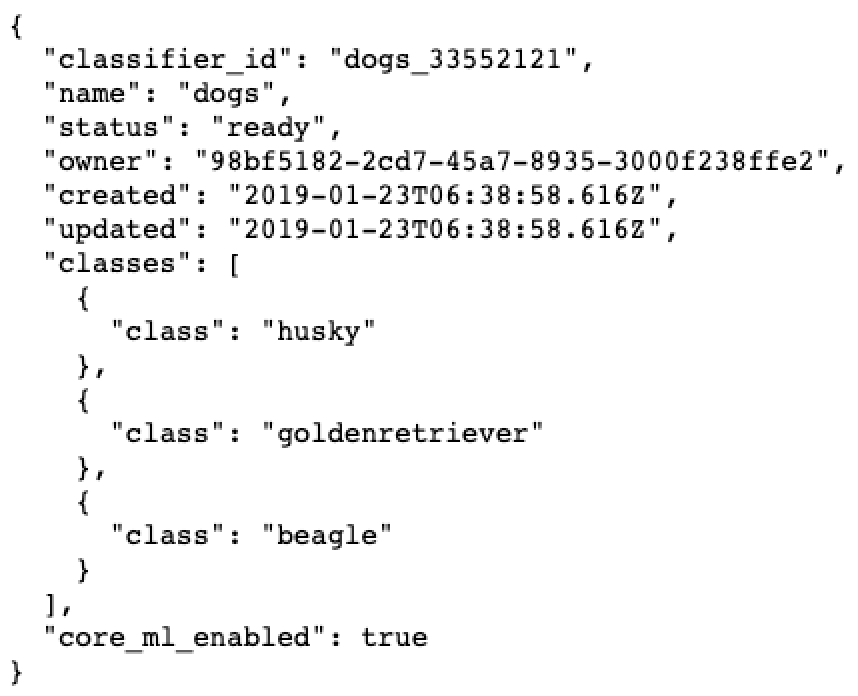
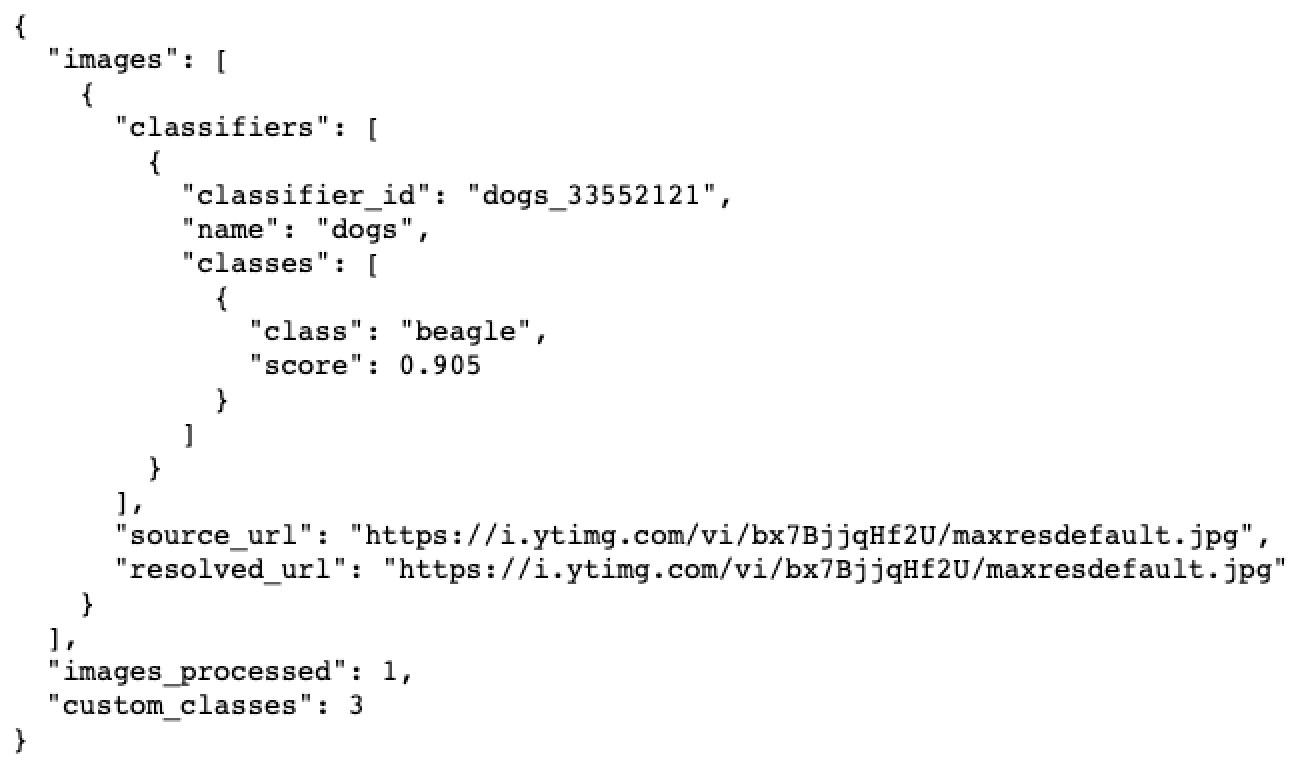
Once the status has changed from training to ready we can use the model to classify custom images in this case, pictures of dogs.
# URL from custom class that you want to classify
url = 'https://i.ytimg.com/vi/bx7BjjqHf2U/maxresdefault.jpg'

# Run classifier using classifier ID from custom classifier result
result = visual_recognition.classify(url=url, classifier_ids=["dogs_33552121"]).get_result()

# Pretty print JSON result
print(json.dumps(result, indent=2))
And that’s a wrap. Off you go to classify images and stuff. If you get stuck feel free to use some of the resources below or drop a comment alongside this post and I’ll ping you right back.
Need More Help?
IBM Watson Visual Recognition Documentation