The clock is ticking. You’re flat out. That work pile is beginning to tower over you.
Maybe…you shouldn’t have put your hand up in that last meeting.
“We need this model built yesterday.”
Guess it’s another late night ahead.
If only…you had more.
More data scientists.
More help!
If only!
What if you could get that help you needed…without having to build out the team?
What if you could quickly and efficiently build production grade models?
What if you just used Watson Auto AI?
Watson Auto AI allows you to build and deploy machine learning models without writing a single line of code. In less than four steps you can have a production grade regression or classification model securely deployed and available for development teams via REST API. It even takes care of time consuming tasks like hyperparameter tuning and feature engineering.
This post runs through how to build and deploy a model using Auto AI from start to finish. By the end you’ll be able to:
- Create a new Auto AI Experiment
- Evaluate model performance using the leaderboard
- Deploy and make predictions using Watson Machine Learning
Ready to kick things off…scroll on down and start with Step 1 below!
↓↓↓↓↓
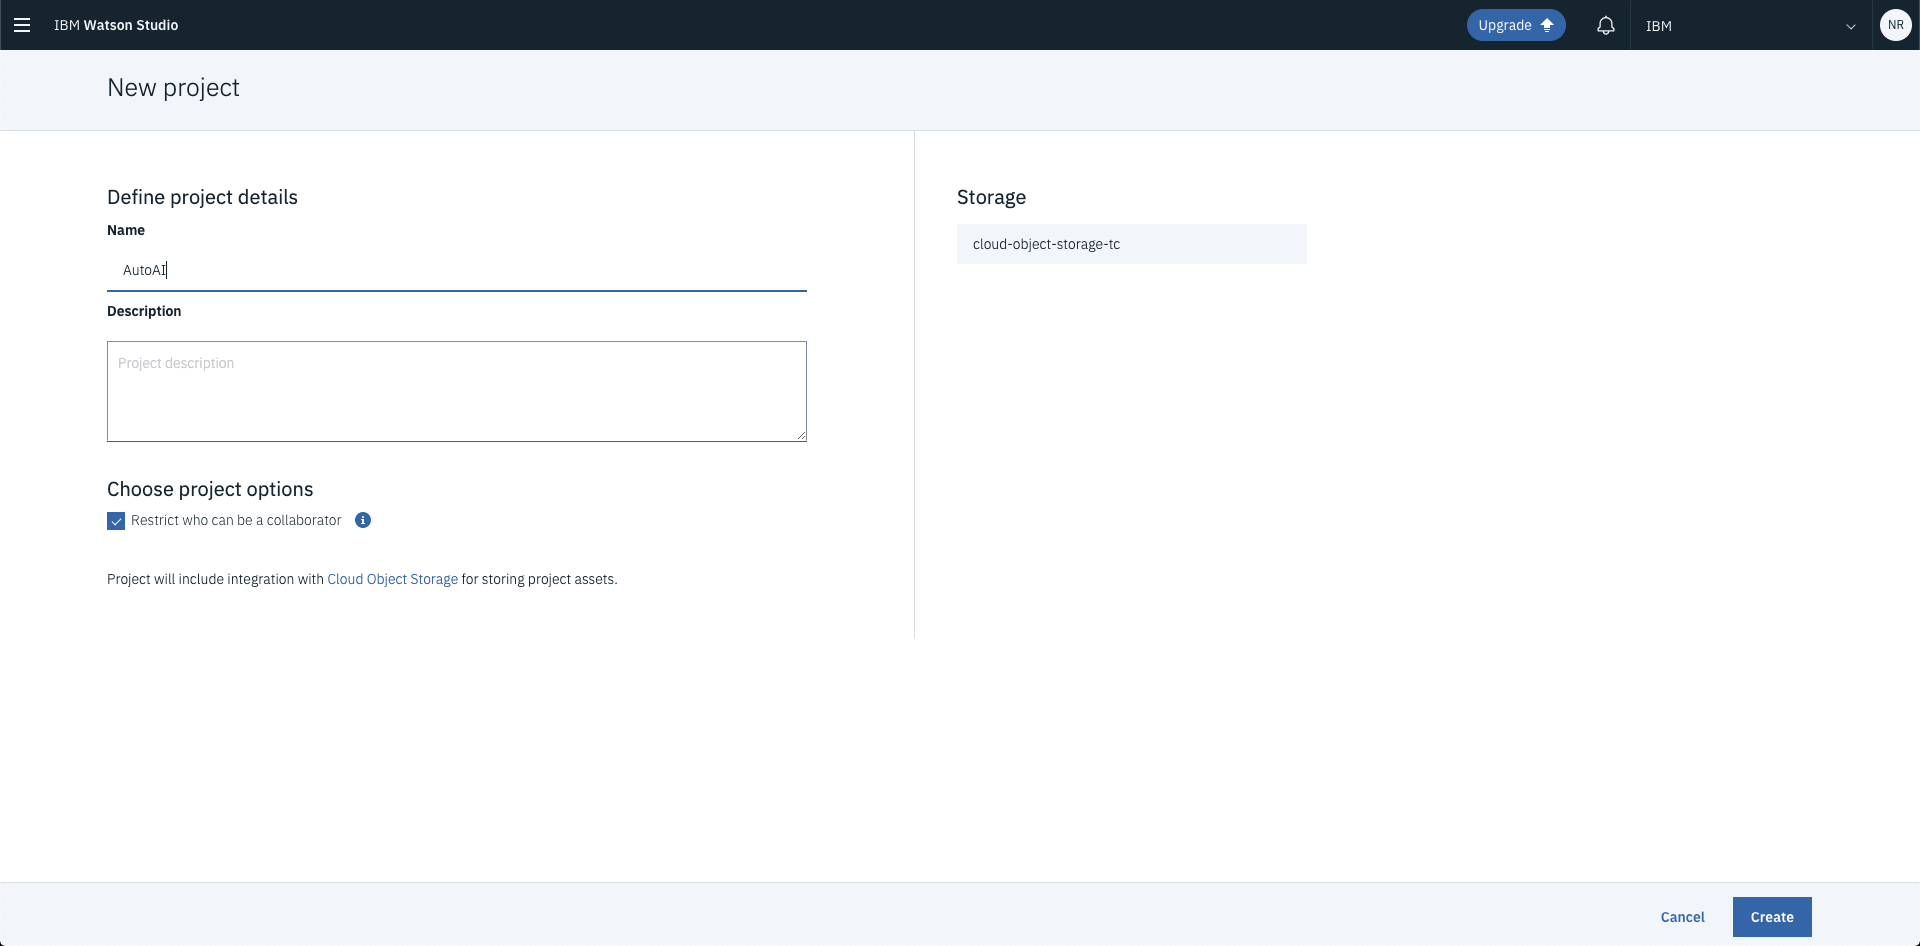
1. Create a Project and Setup Watson Auto AI
This walkthrough is going to be completed using…drumroll please…
Watson Studio
So head on over there and start by creating a new project.
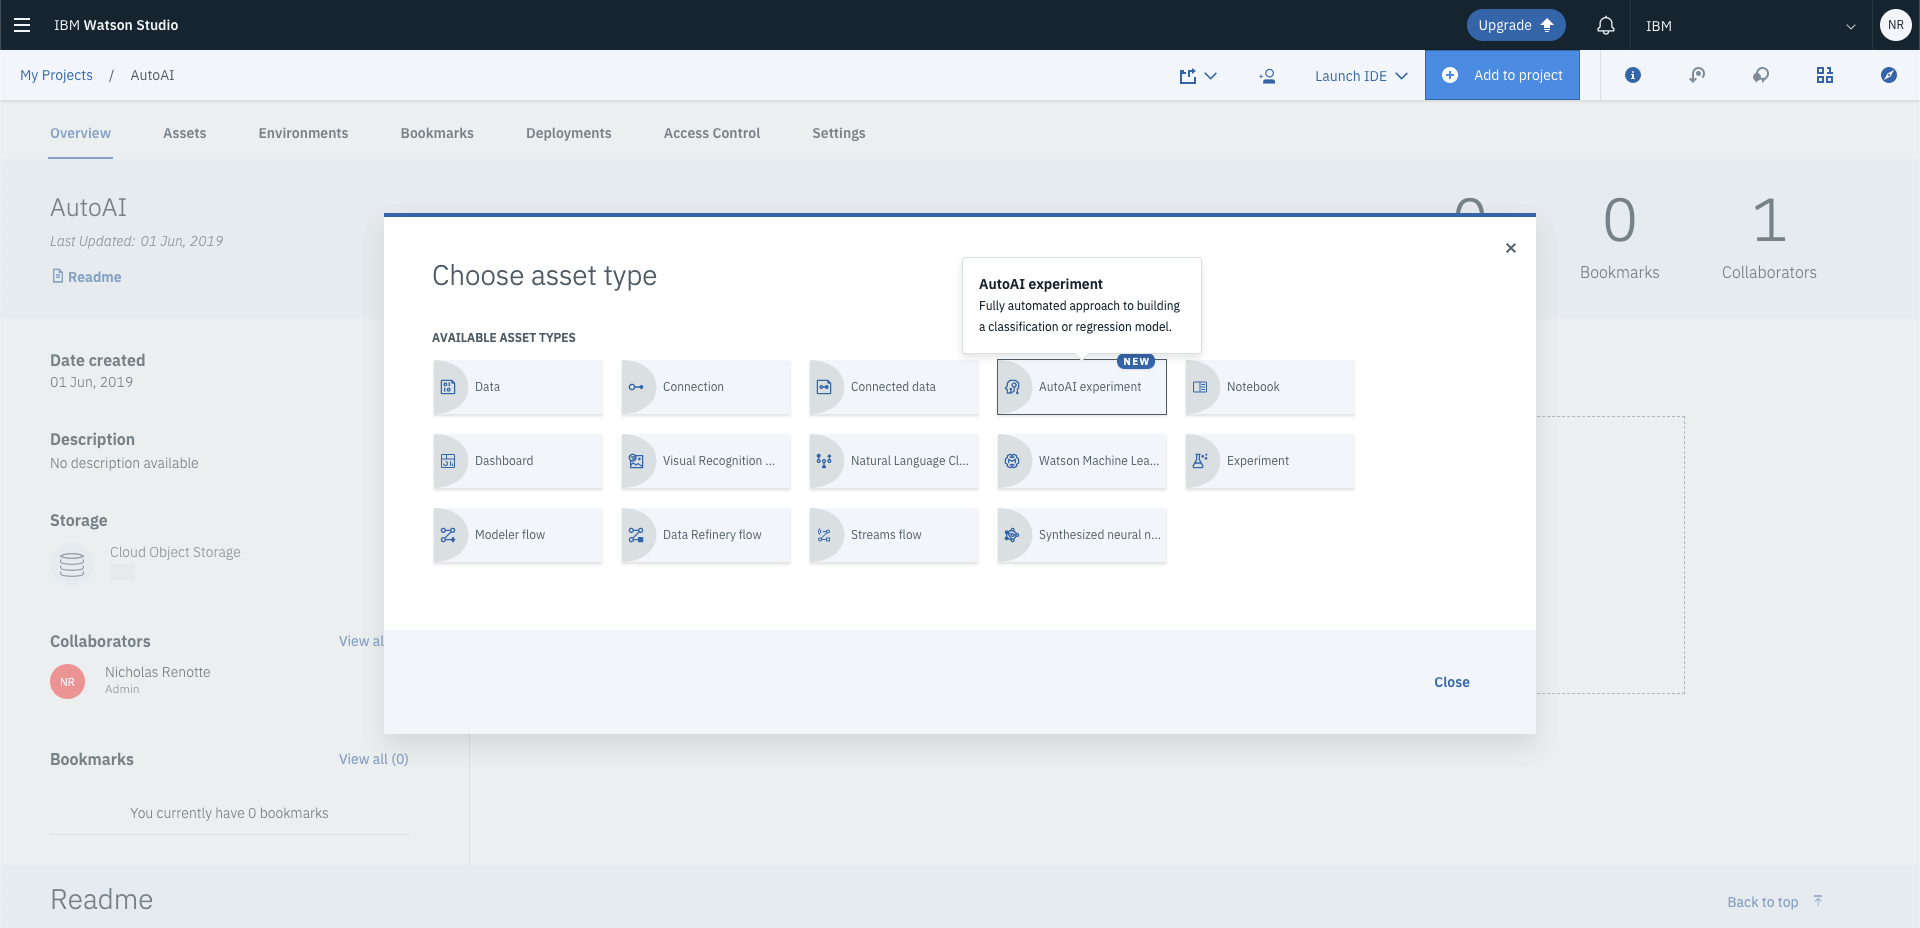
Next add a new Auto AI Experiment to your project. To do this, select Add to Project and select Auto AI experiment.
Side Note: Auto AI and Watson Machine Learning work hand-in-hand within Watson Studio to help build and deploy machine learning models. Later in this post, you’ll add the Machine Learning service to the project.
Once you’ve selected Auto AI Experiment you’ll be redirected to the Auto AI setup page.
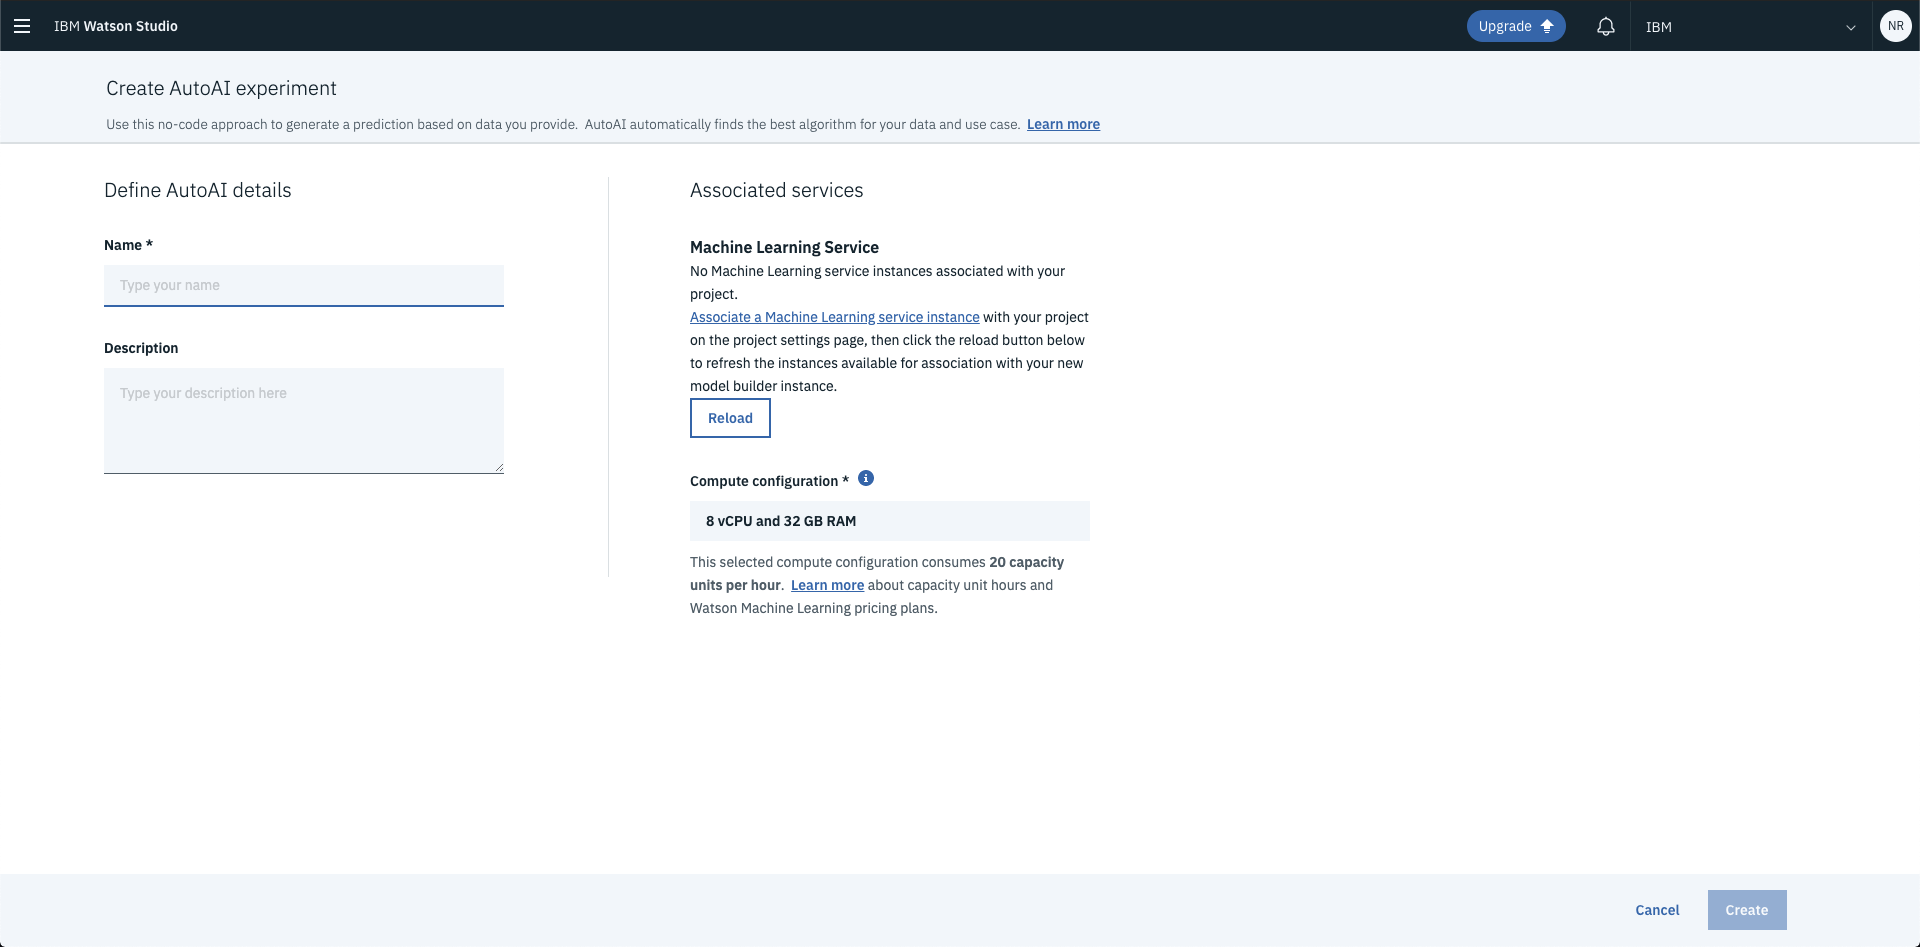
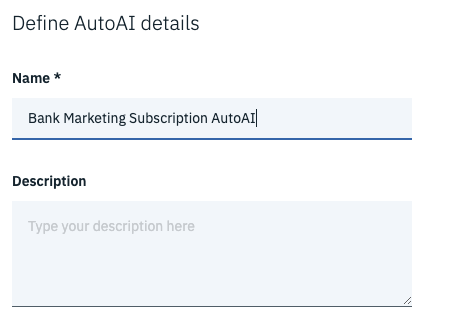
Click into the name field and enter a name that’s appropriate for your model. In this case, the example that you’ll be building is based on a bank marketing dataset (more on this later) so the description reflects that….but feel free to change it to something relevant to your use case!
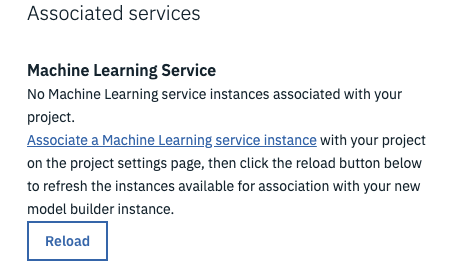
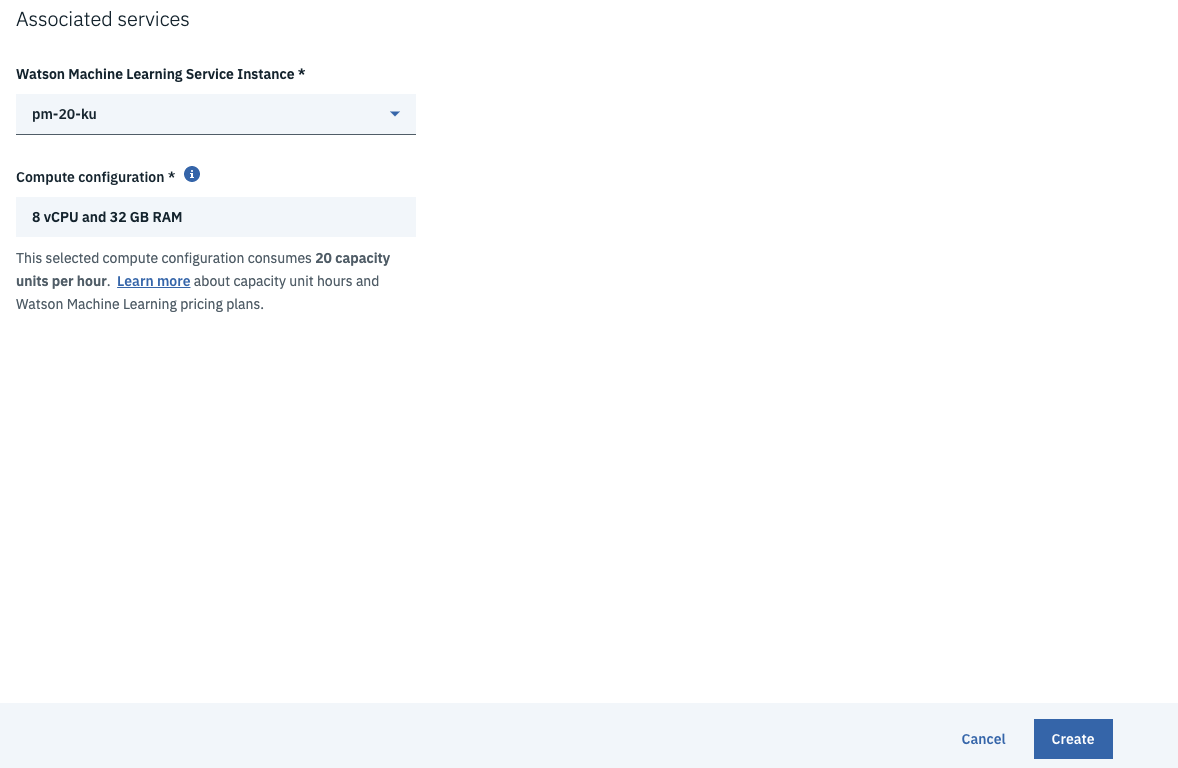
You’ll need to associate a Watson Machine Learning Service. If you’ve built predictive models on Watson Studio before, chances are high you’ll already have a service created. If not; fret not, you’ll be able to create one soon!
Click Associate a Machine Learning service instance.
If you have an existing Machine Learning service, simply select it by choosing the service in the dropdown and clicking Select. In the screengrab below the machine learning service is called pm-20-mx. Yours may be named differently…that’s perfectly fine.

If you don’t have a service created or if the dropdown above is blank, select New.
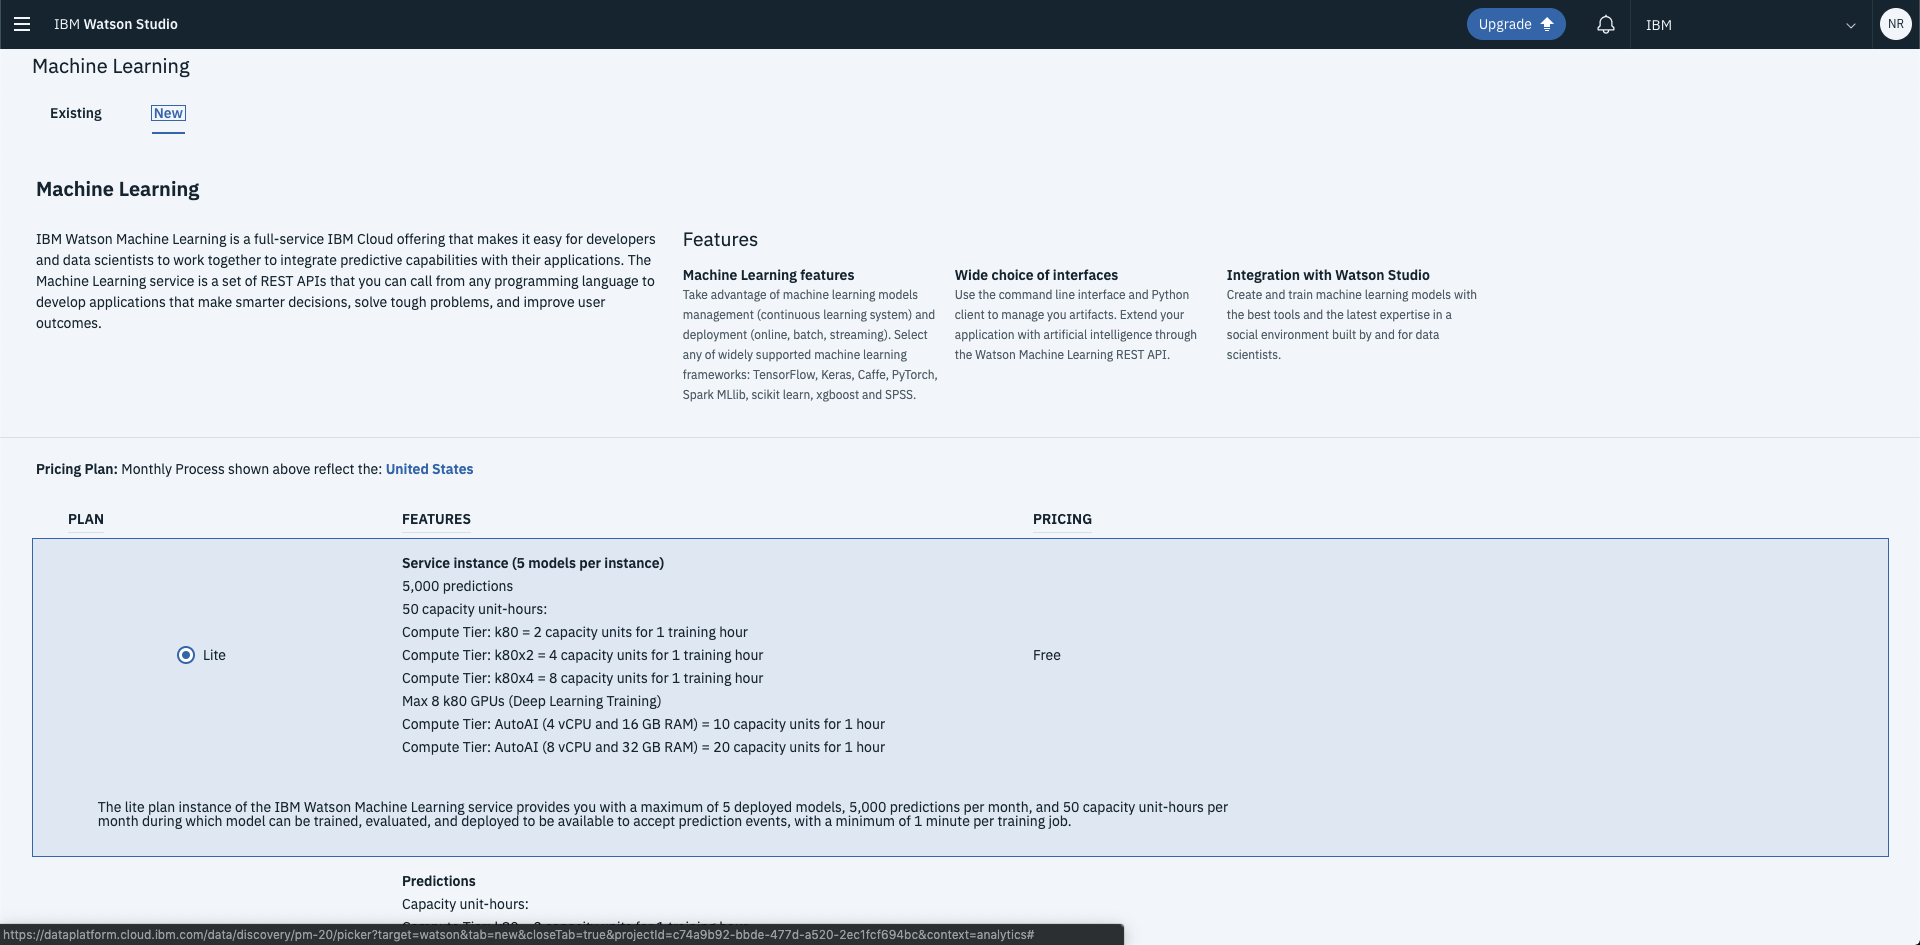
Then scroll down the bottom right and click Create. This will create a new machine learning service.

Then head on over back to the Auto AI creation page and select Reload to display your associated services. Then click Create…this will start setting up your Auto AI service!!
That’s step one…down!
2. Upload your Data and Choose the Target
As soon as you’ve finished setting up your Auto AI experiment you’ll be automatically redirected to the Auto AI start screen. From here you’re able to select the dataset you want to connect to and choose your target variable. If this is your first time using Watson Studio or you don’t have any existing datasets you can also upload a new training csv to work with from here as well.
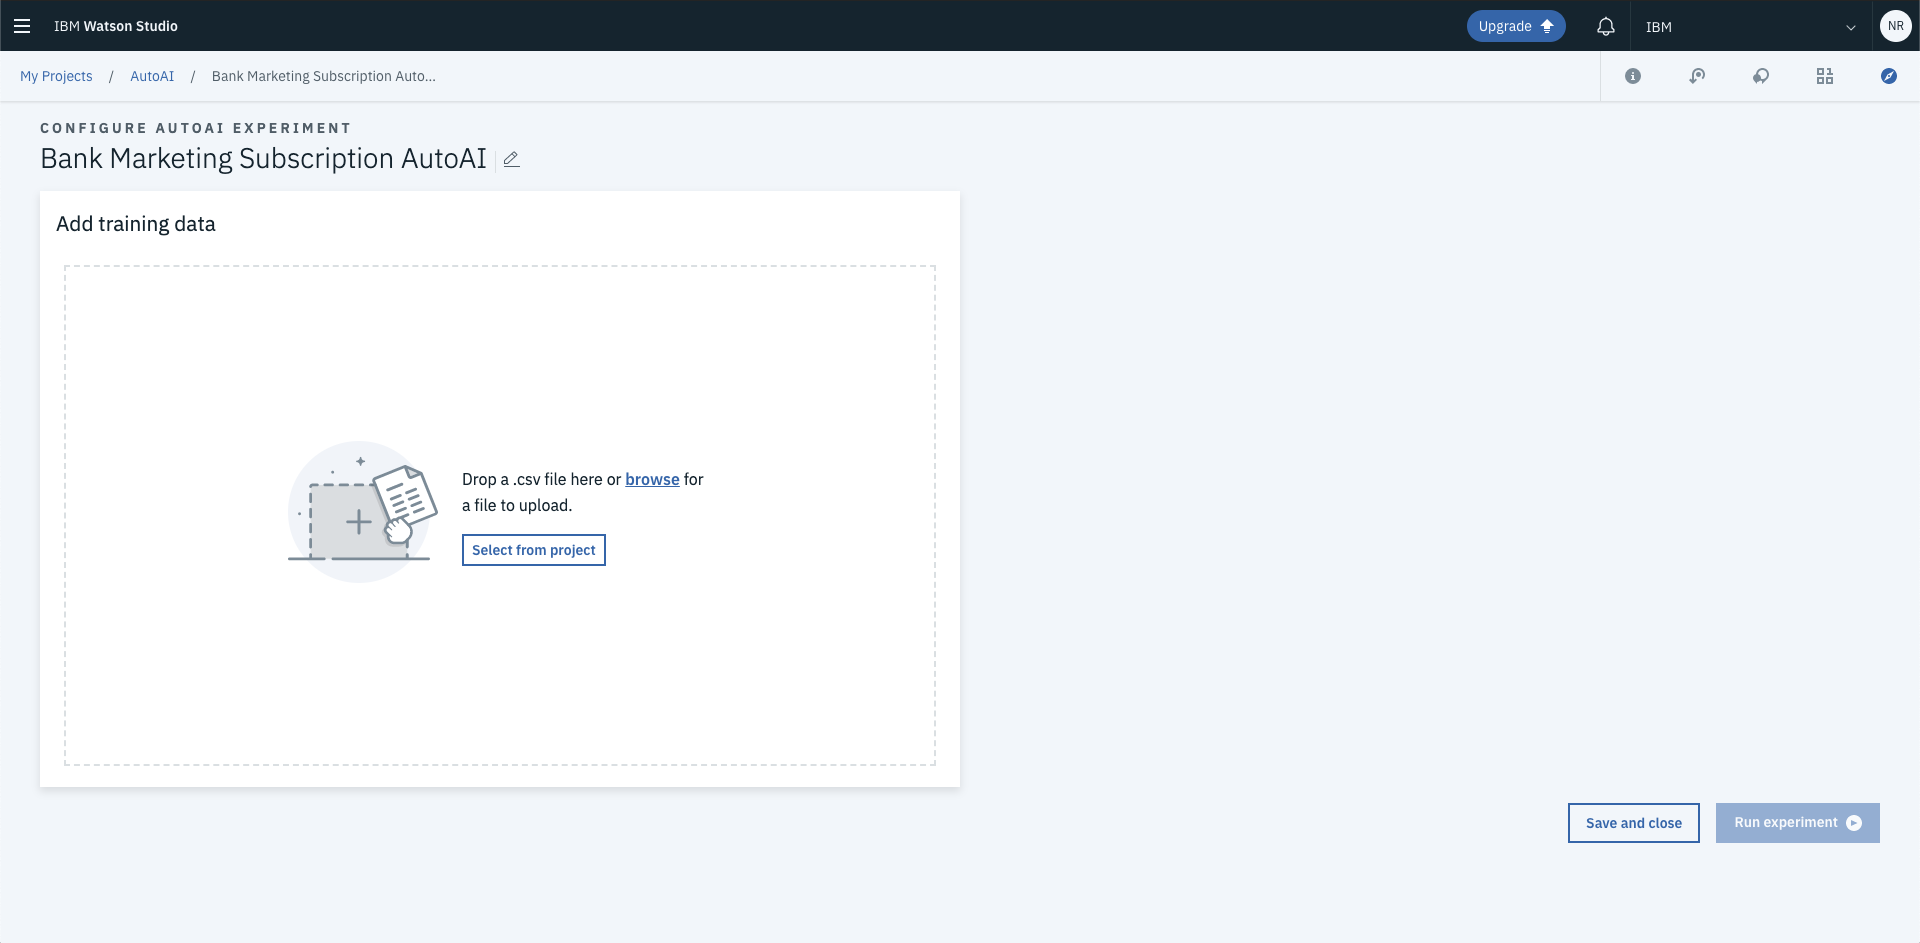
In this case, let’s upload a new dataset.
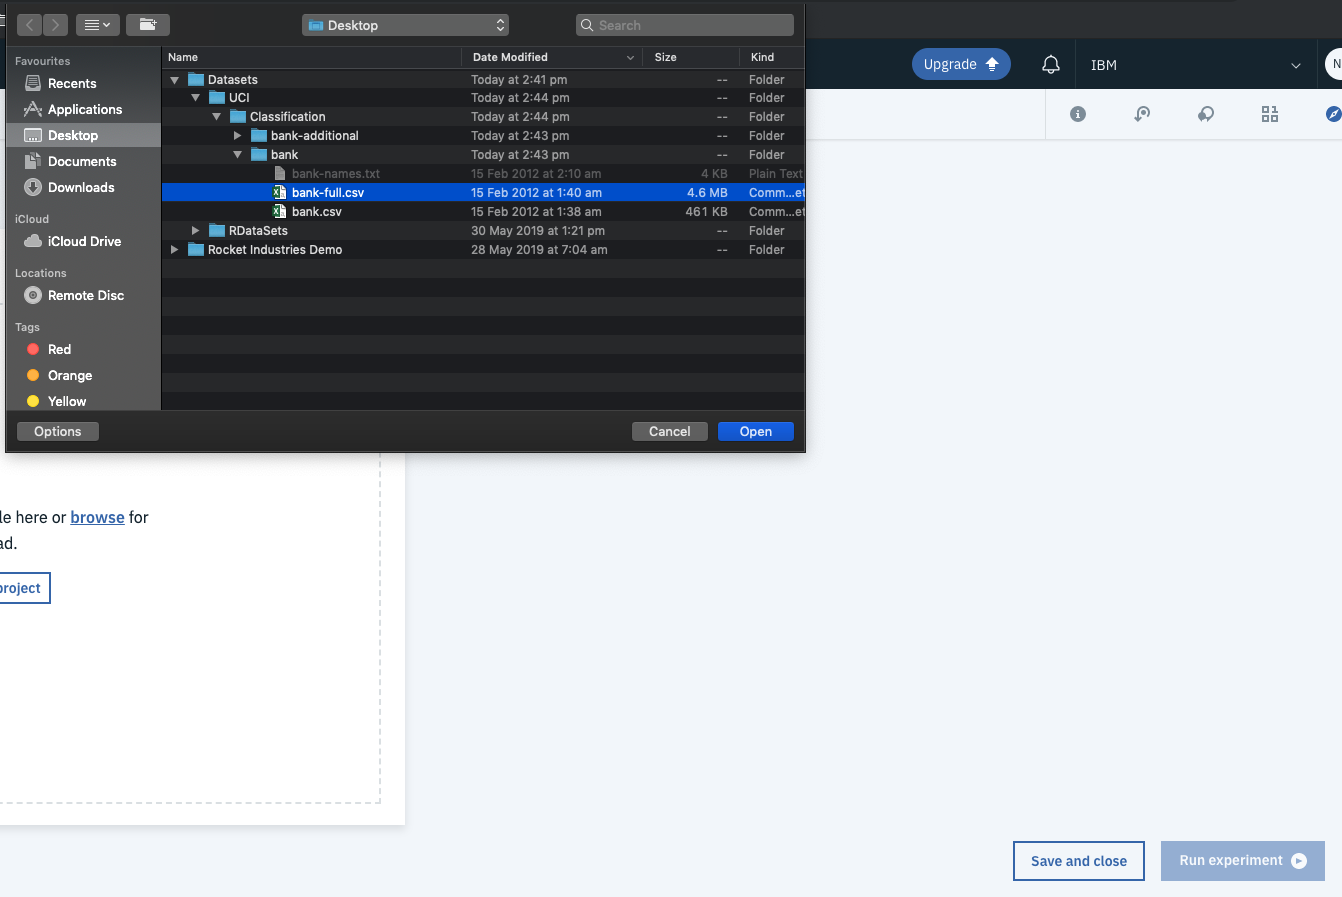
In order to upload a new dataset select Browse and choose the dataset that you want to use for the experiment. If you want to follow along with this same example you can download the dataset from the UCI Machine Learning Repository Bank Marketing dataset.
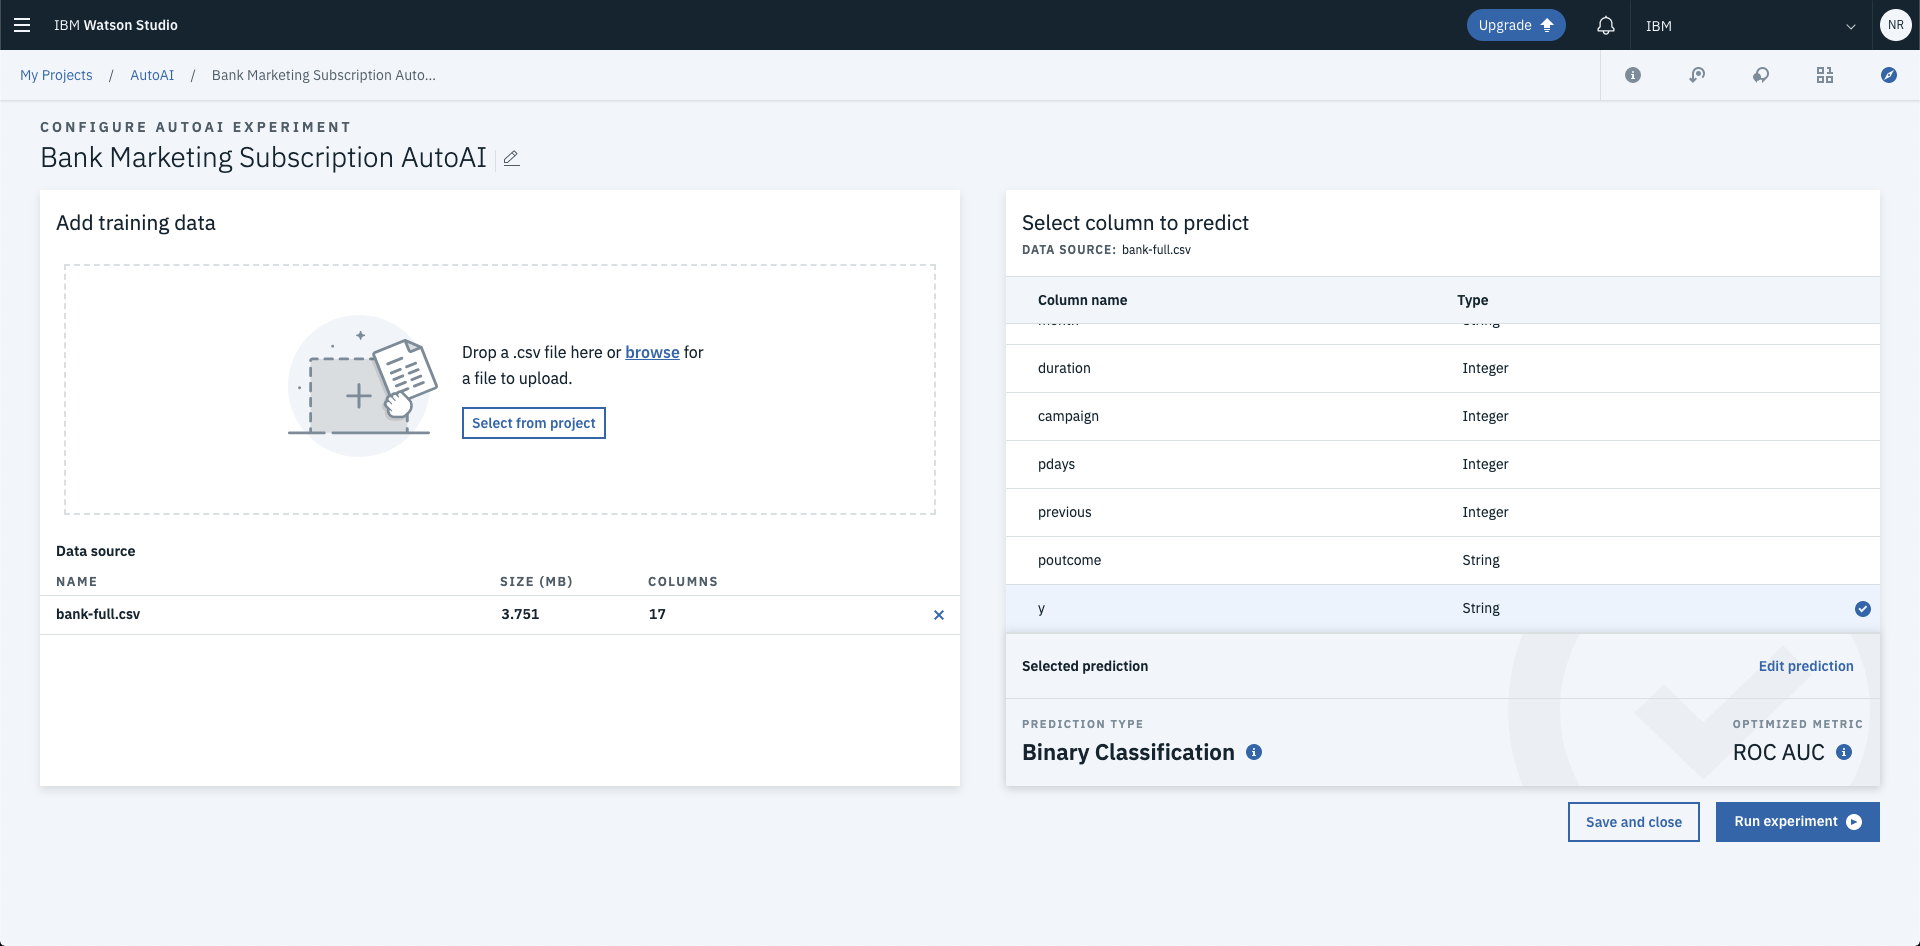
Once its finished uploading, the service will automatically start processing the columns giving you the option to select your target variable.
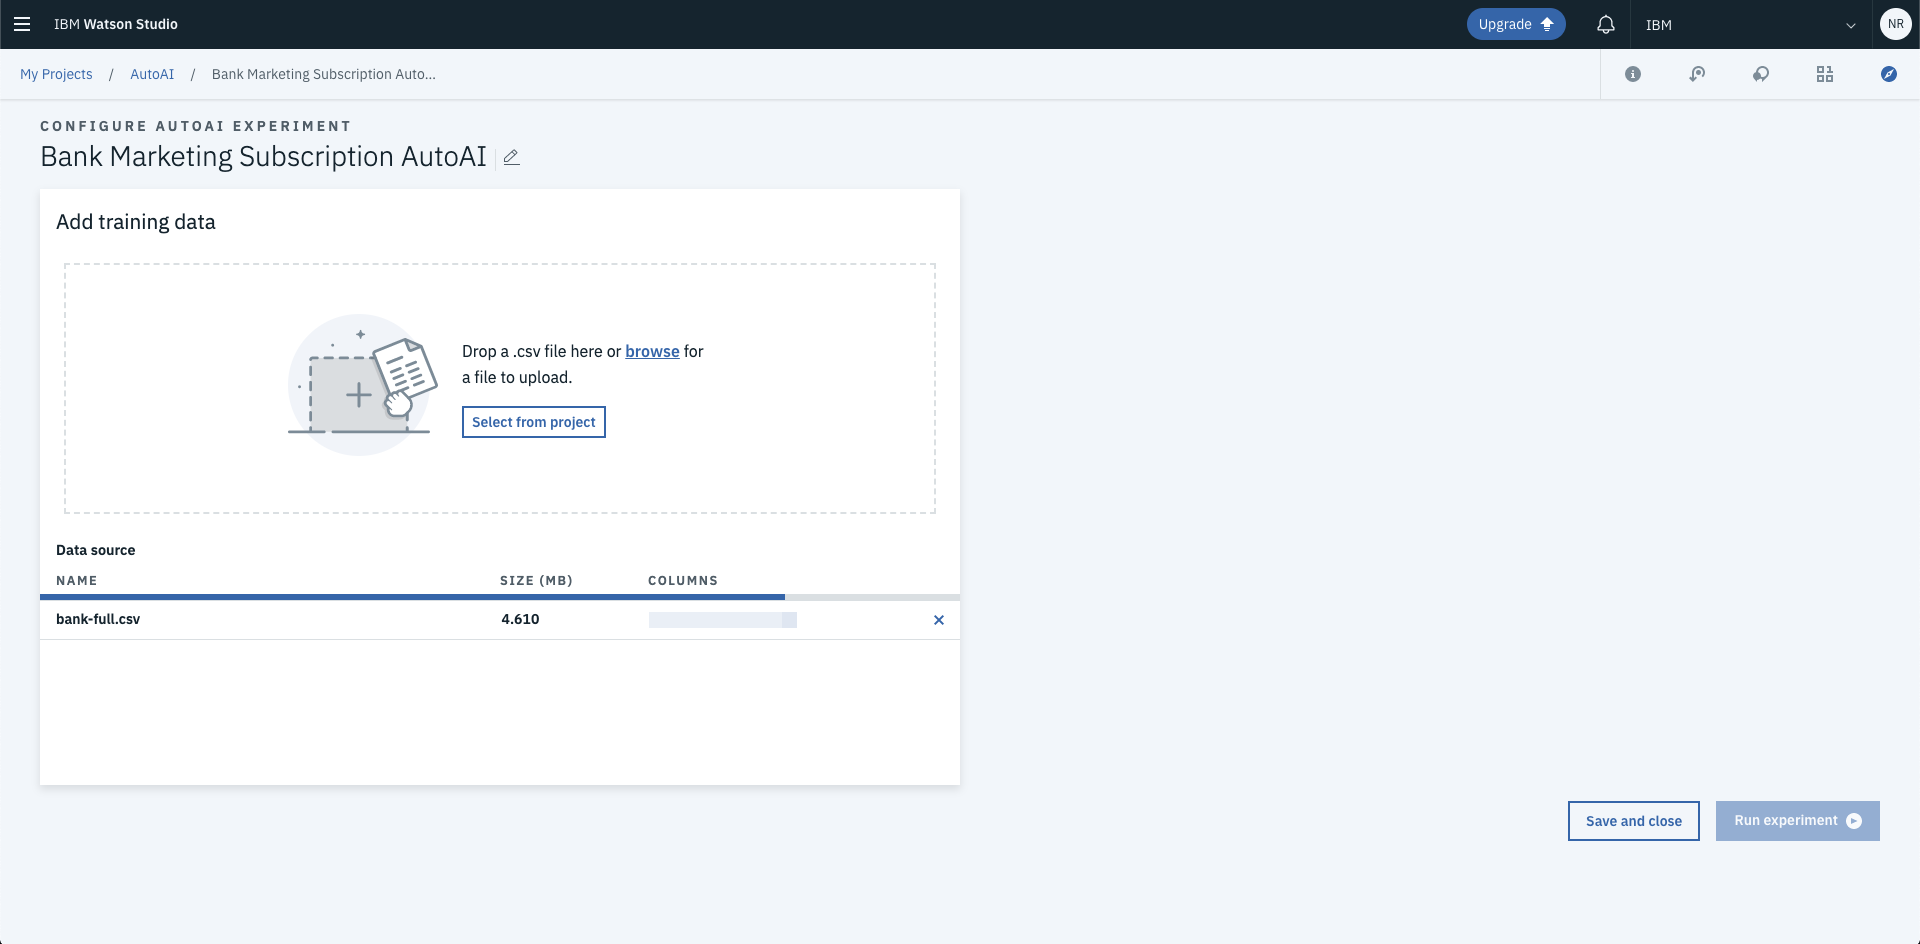
Side Note: This dataset is based on bank marketing data. The purpose of the data collected was to analyse which clients subscribed to a term deposit following a marketing campaign. Column y is the target field with a response of “yes” indicating that the prospective client subscribed.
Knowing that select Column y as the Column to Predict from the right side of the screen.
The awesome thing about Auto AI is that it will automatically determine the most appropriate machine learning approach based on the values in the target. You can see below that the prediction type has been correctly flagged as Binary Classification with Area Under the Curve (AUC) selected as the optimization metic.
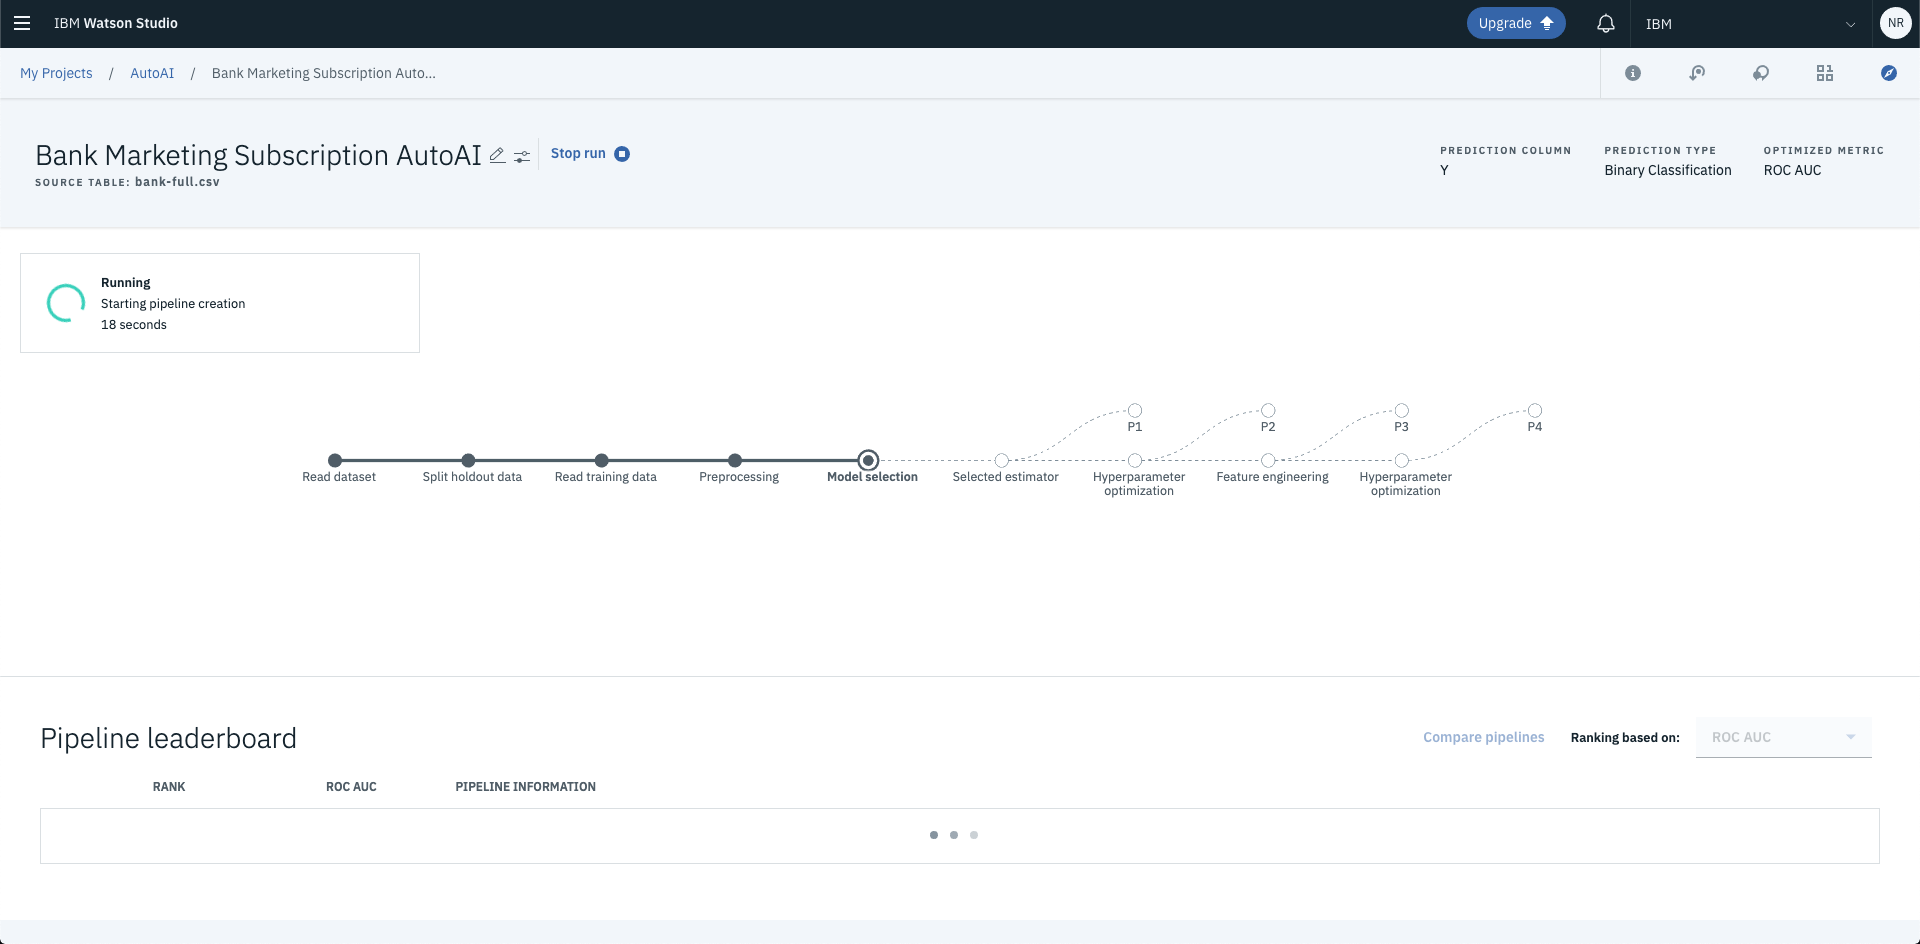
The next step is to select Run Experiment.
This is where it really gets interesting, Auto AI will automatically start training your model and start tuning the model to get the best possible prediction.
3. Evaluate Model Performance
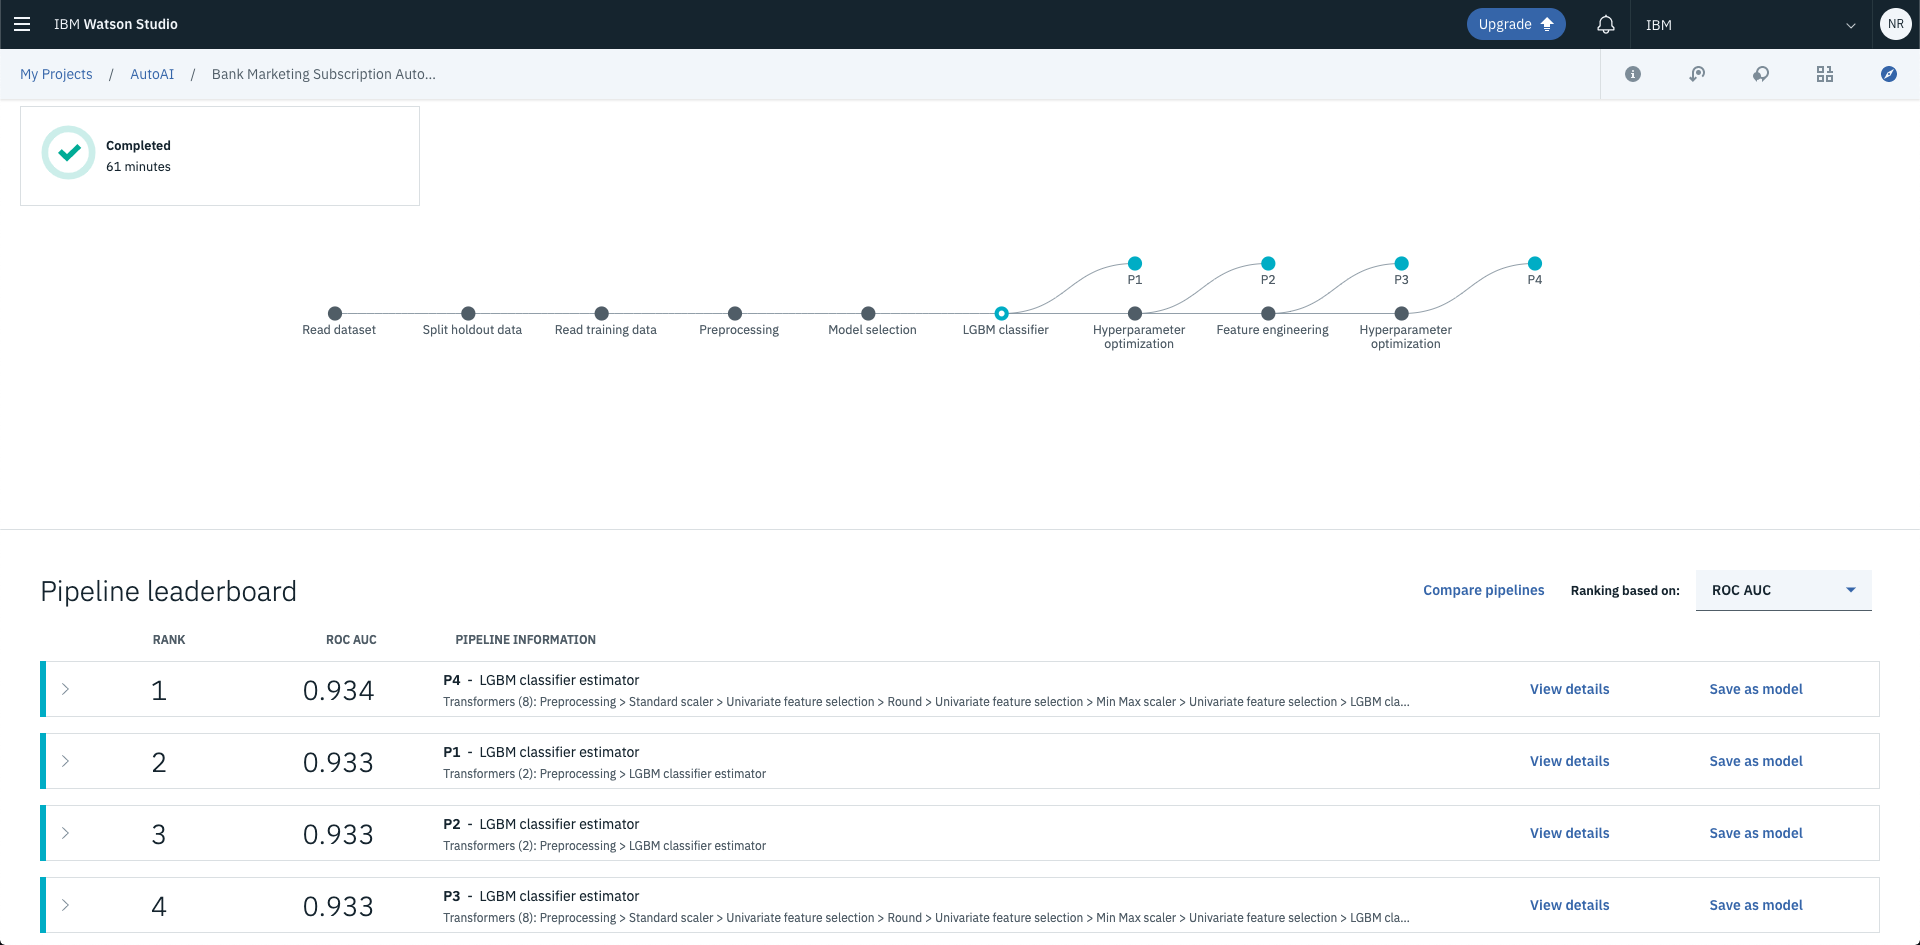
As the experiment runs, you’ll be able to see the results of the model in real time.
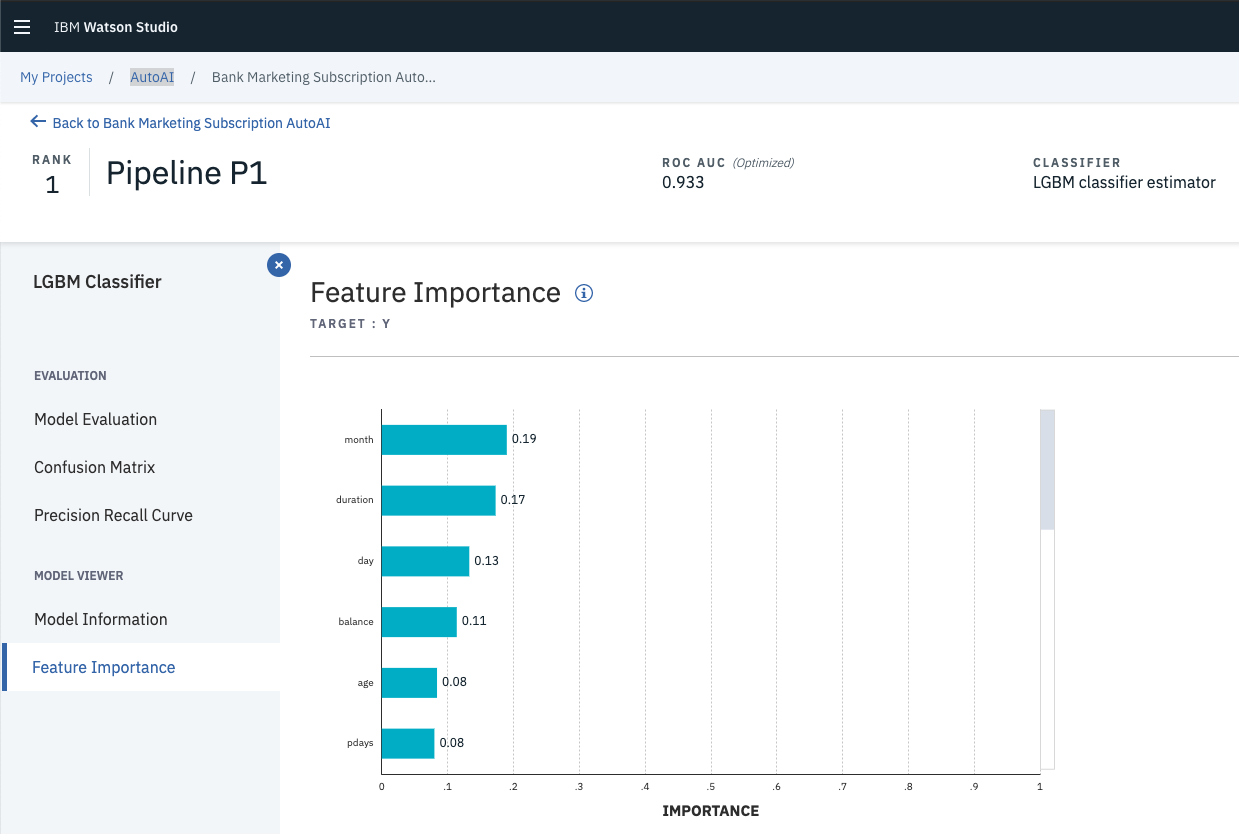
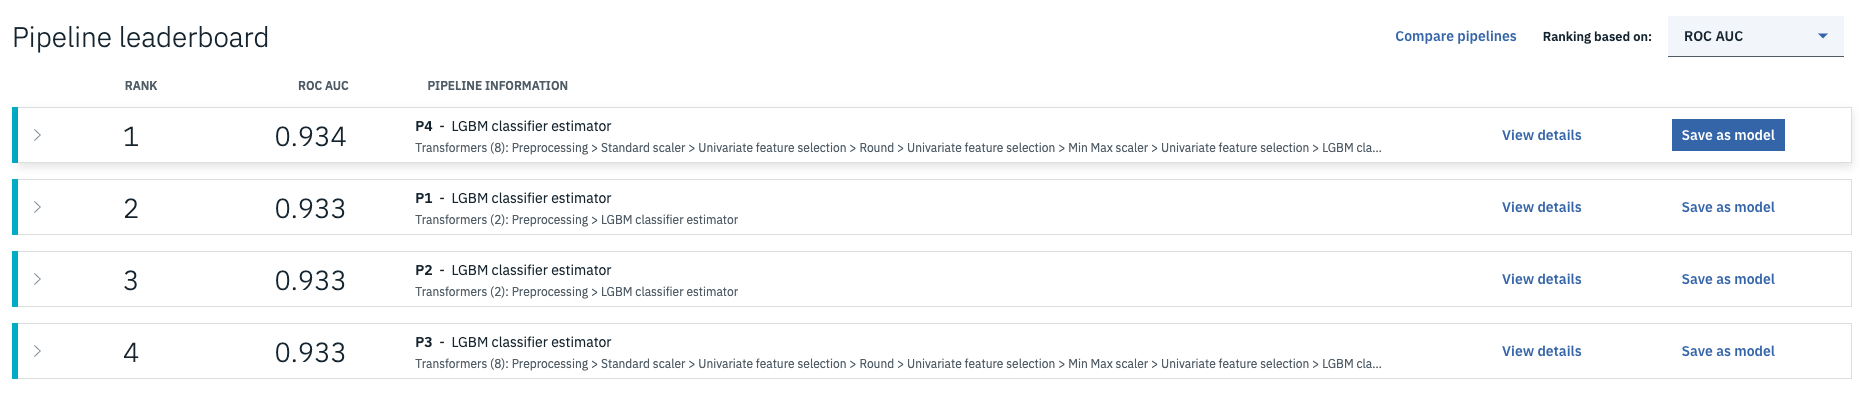
In the screenshot below, you can see the results of the highest performing model, in this case it’s the Light Gradient Boosting Machine (LGBM) algorithm.
From here, Auto AI will continue tuning hyperparameters to eek out the best out of the algorithm and improve predictive performance.
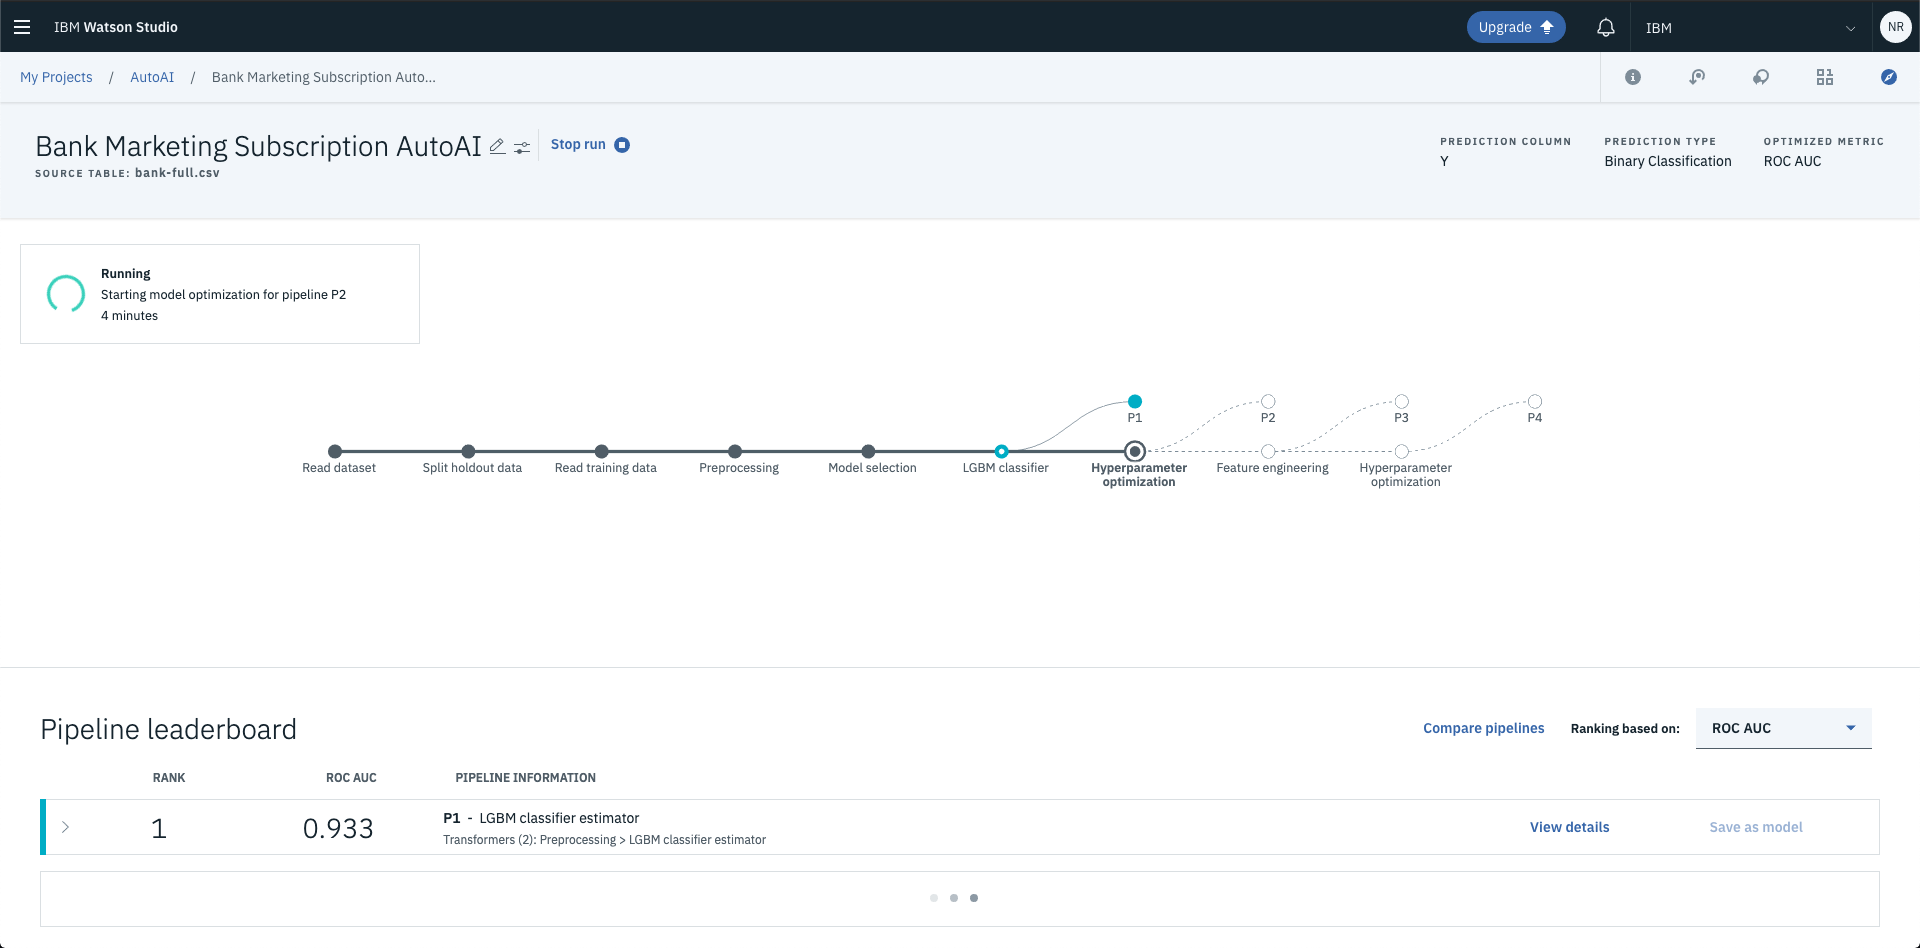
While this is happening, you can start reviewing the performance of the untuned model. To do this simply click View details.
Side Note:This option is available for all of the pipelines once they’re available.
As this model is focused around a classification problem the metrics will focus on those that best help Data Scientists evaluate performance around that problem e.g. AUC, TPR, FPR, Precision and Recall. For more on these metrics, check out this post on Towards Data Science.
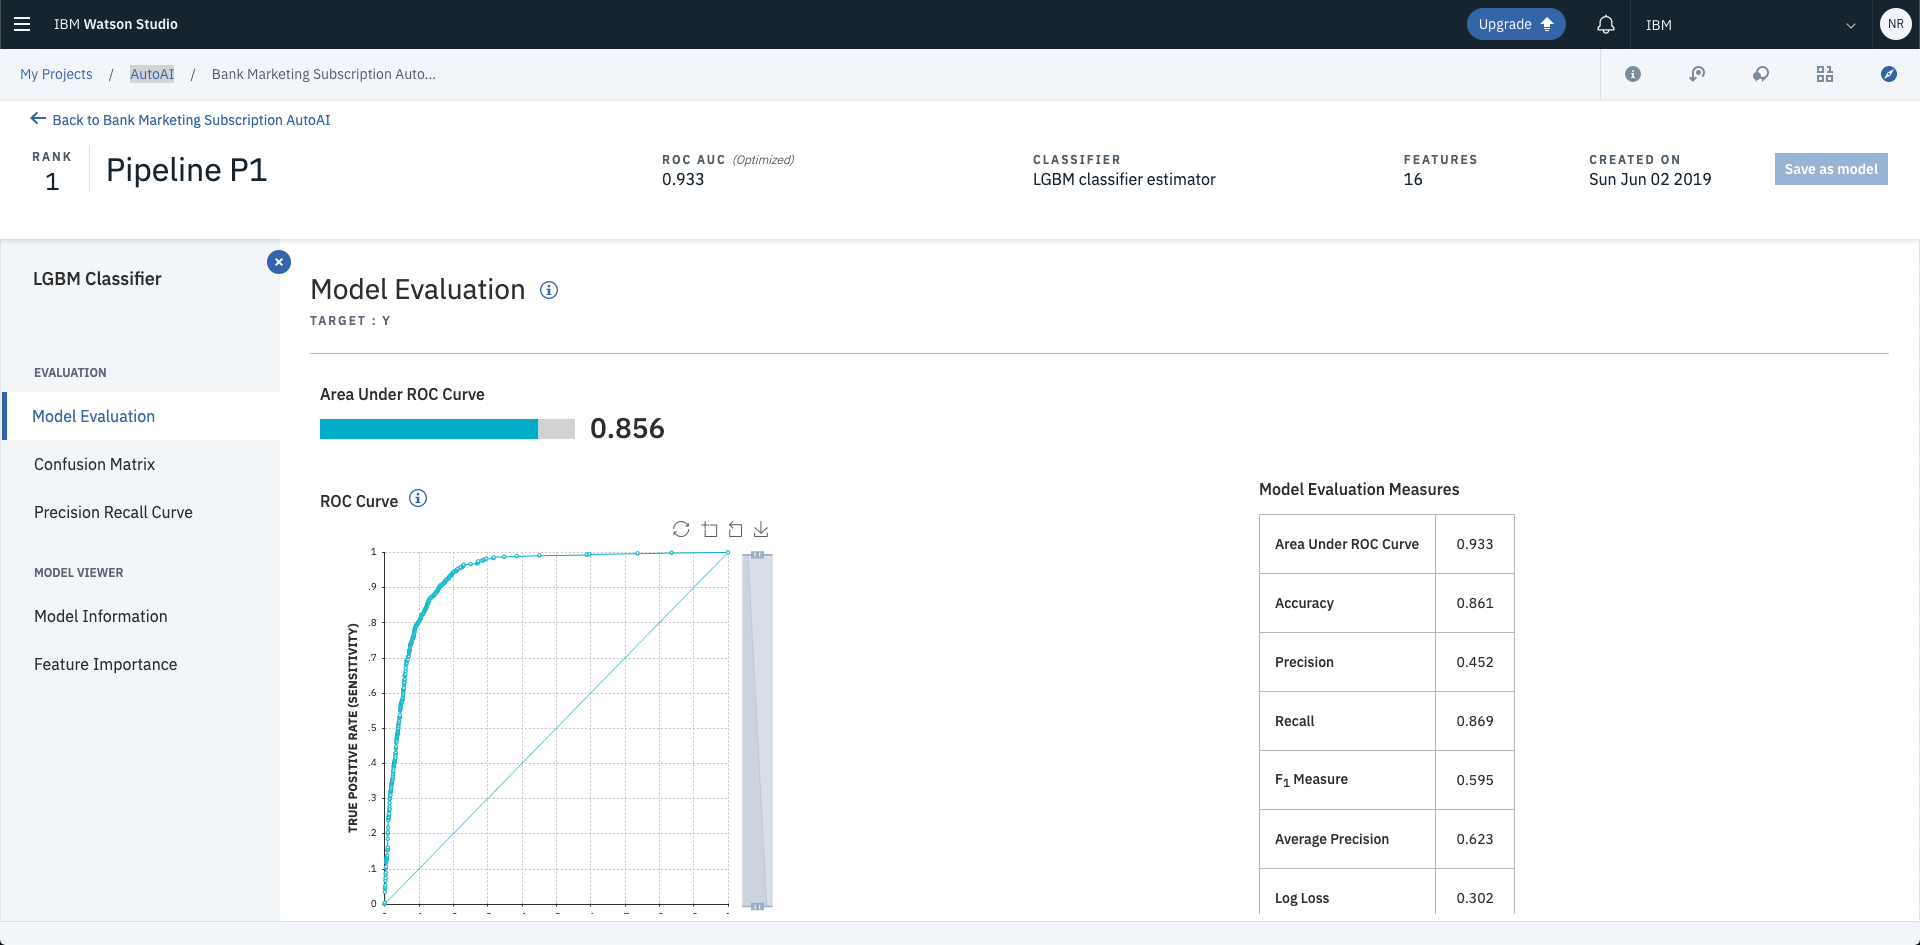
From this view you’re also able to analyse Feature Importance. The visualisations are particularly useful when explaining what factors are important to business users.
Once you have more than one result on the leaderboard you’ll be able to compare the results from the different pipelines. Simply select Compare Pipelines from the pipeline leaderboard.
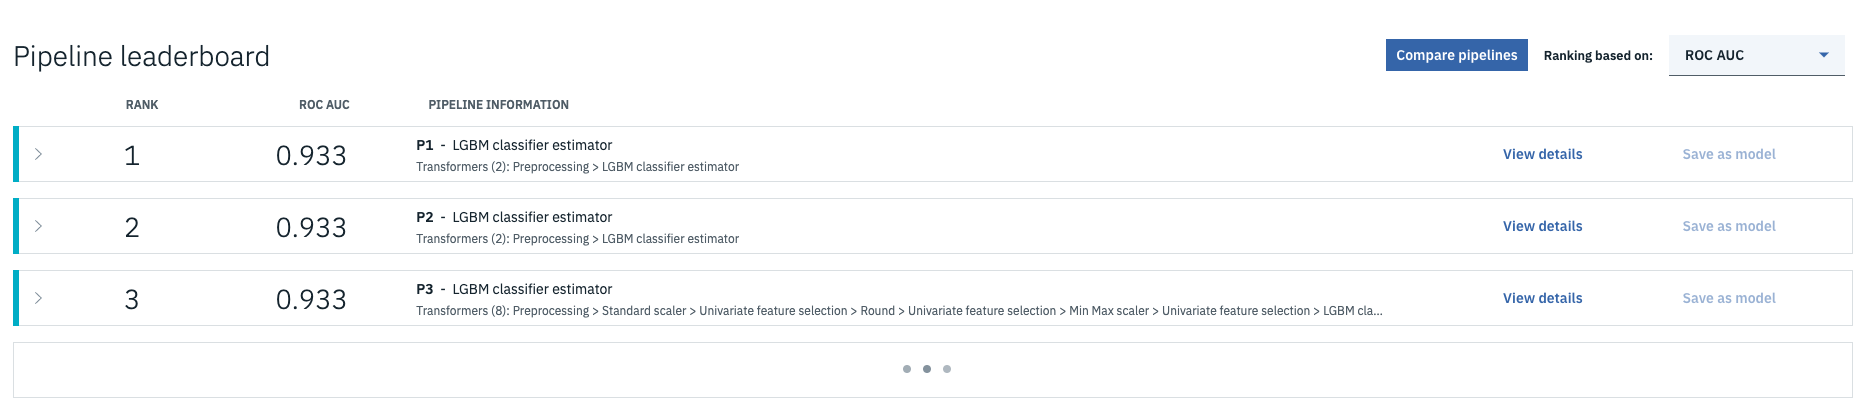
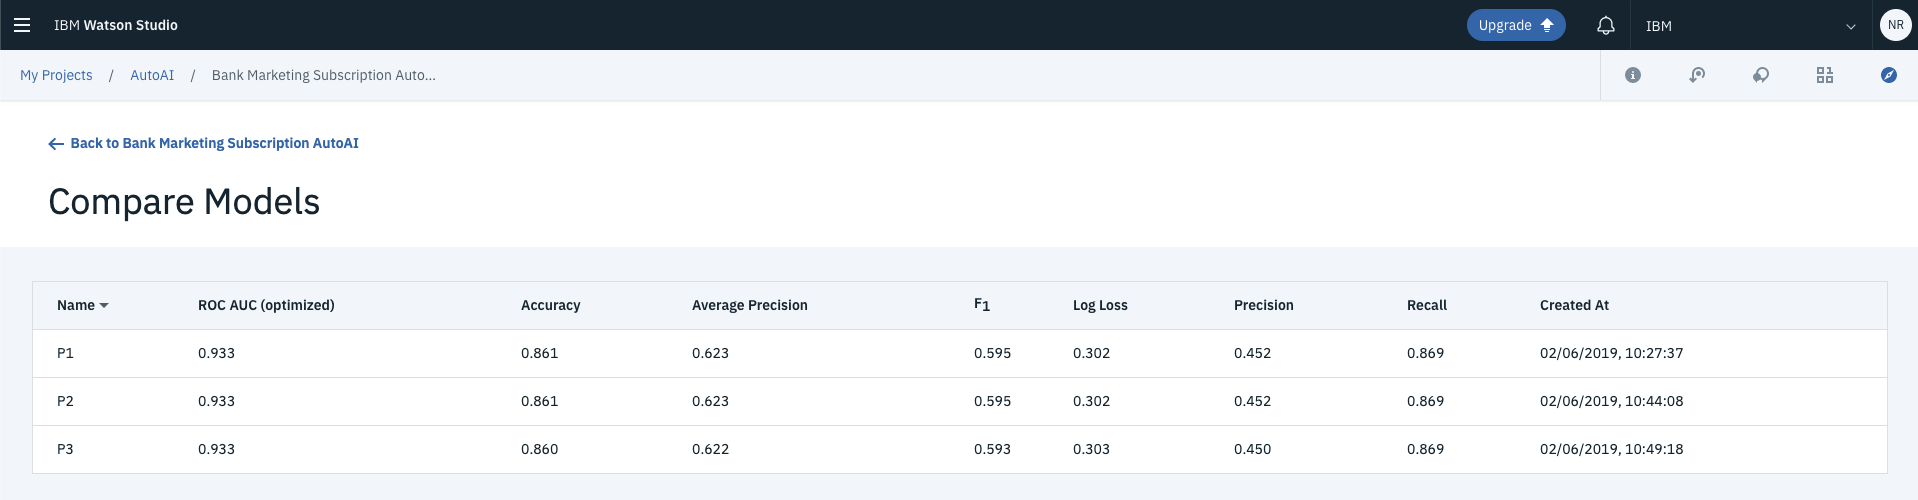
From the resulting screen you’ll be able to evaluate each model’s performance based on a variety of metrics.
4. Deploy your Auto AI Model
Finally, once the entire training and tuning pipeline has completed you’ll have the option to save a model and deploy it into production for use.
In order to save the model, select the highest ranking model and click Save as model.
Name the model and choose the machine learning instance to associate to then select Save.

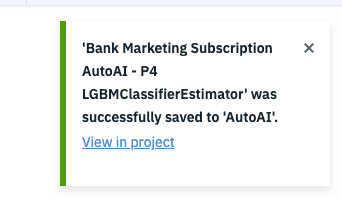
Once saved, you’ll receive a notification in the top right hand corner. From here you can start deploying the model via REST API, simply click View in project from the notification. This will redirect you to the deployments screen.
Then select the Deployments tab.
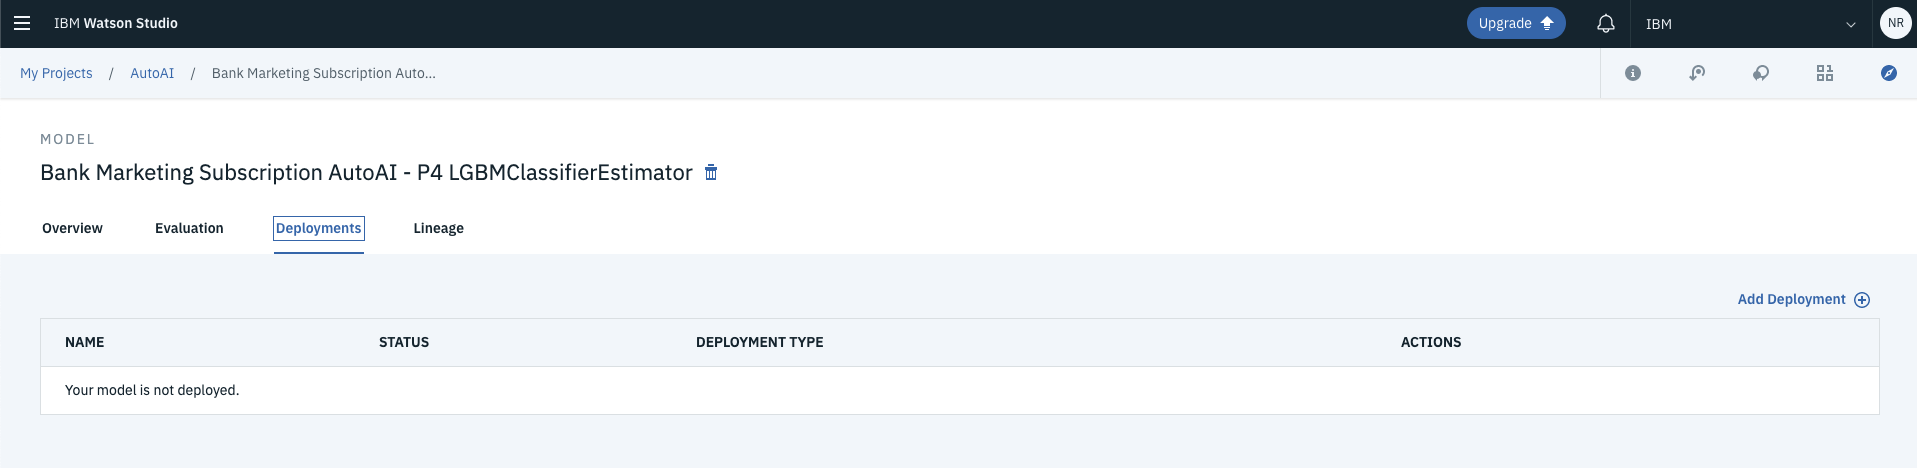
And choose Add Deployment.

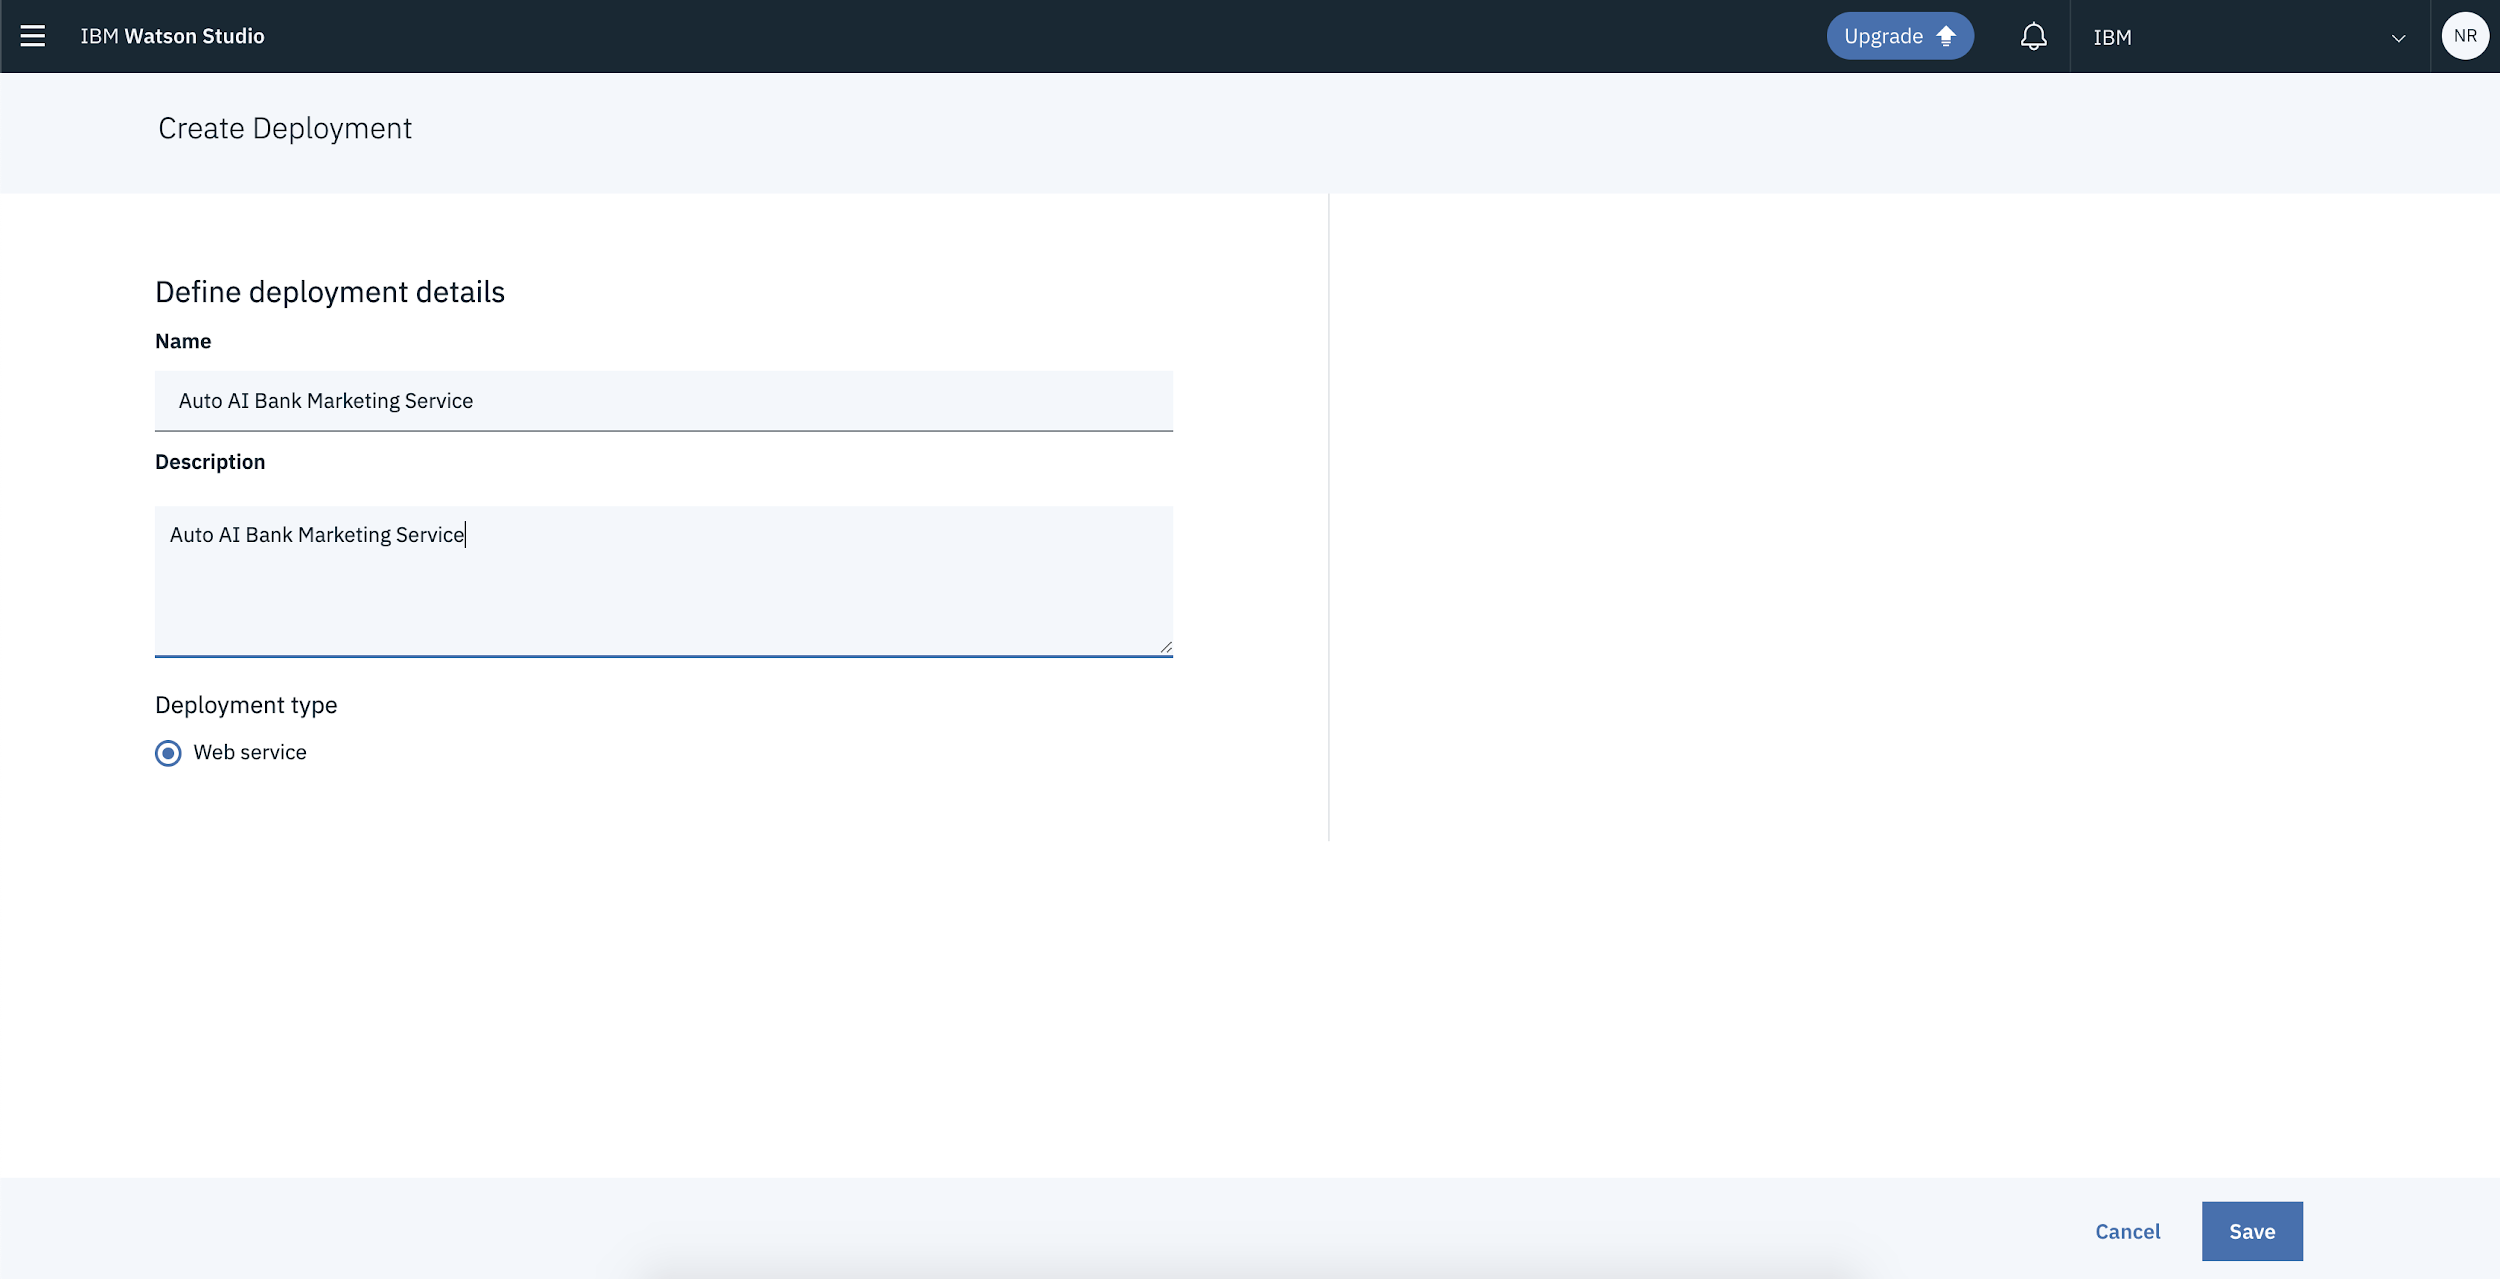
Name your deployment and hit Save.
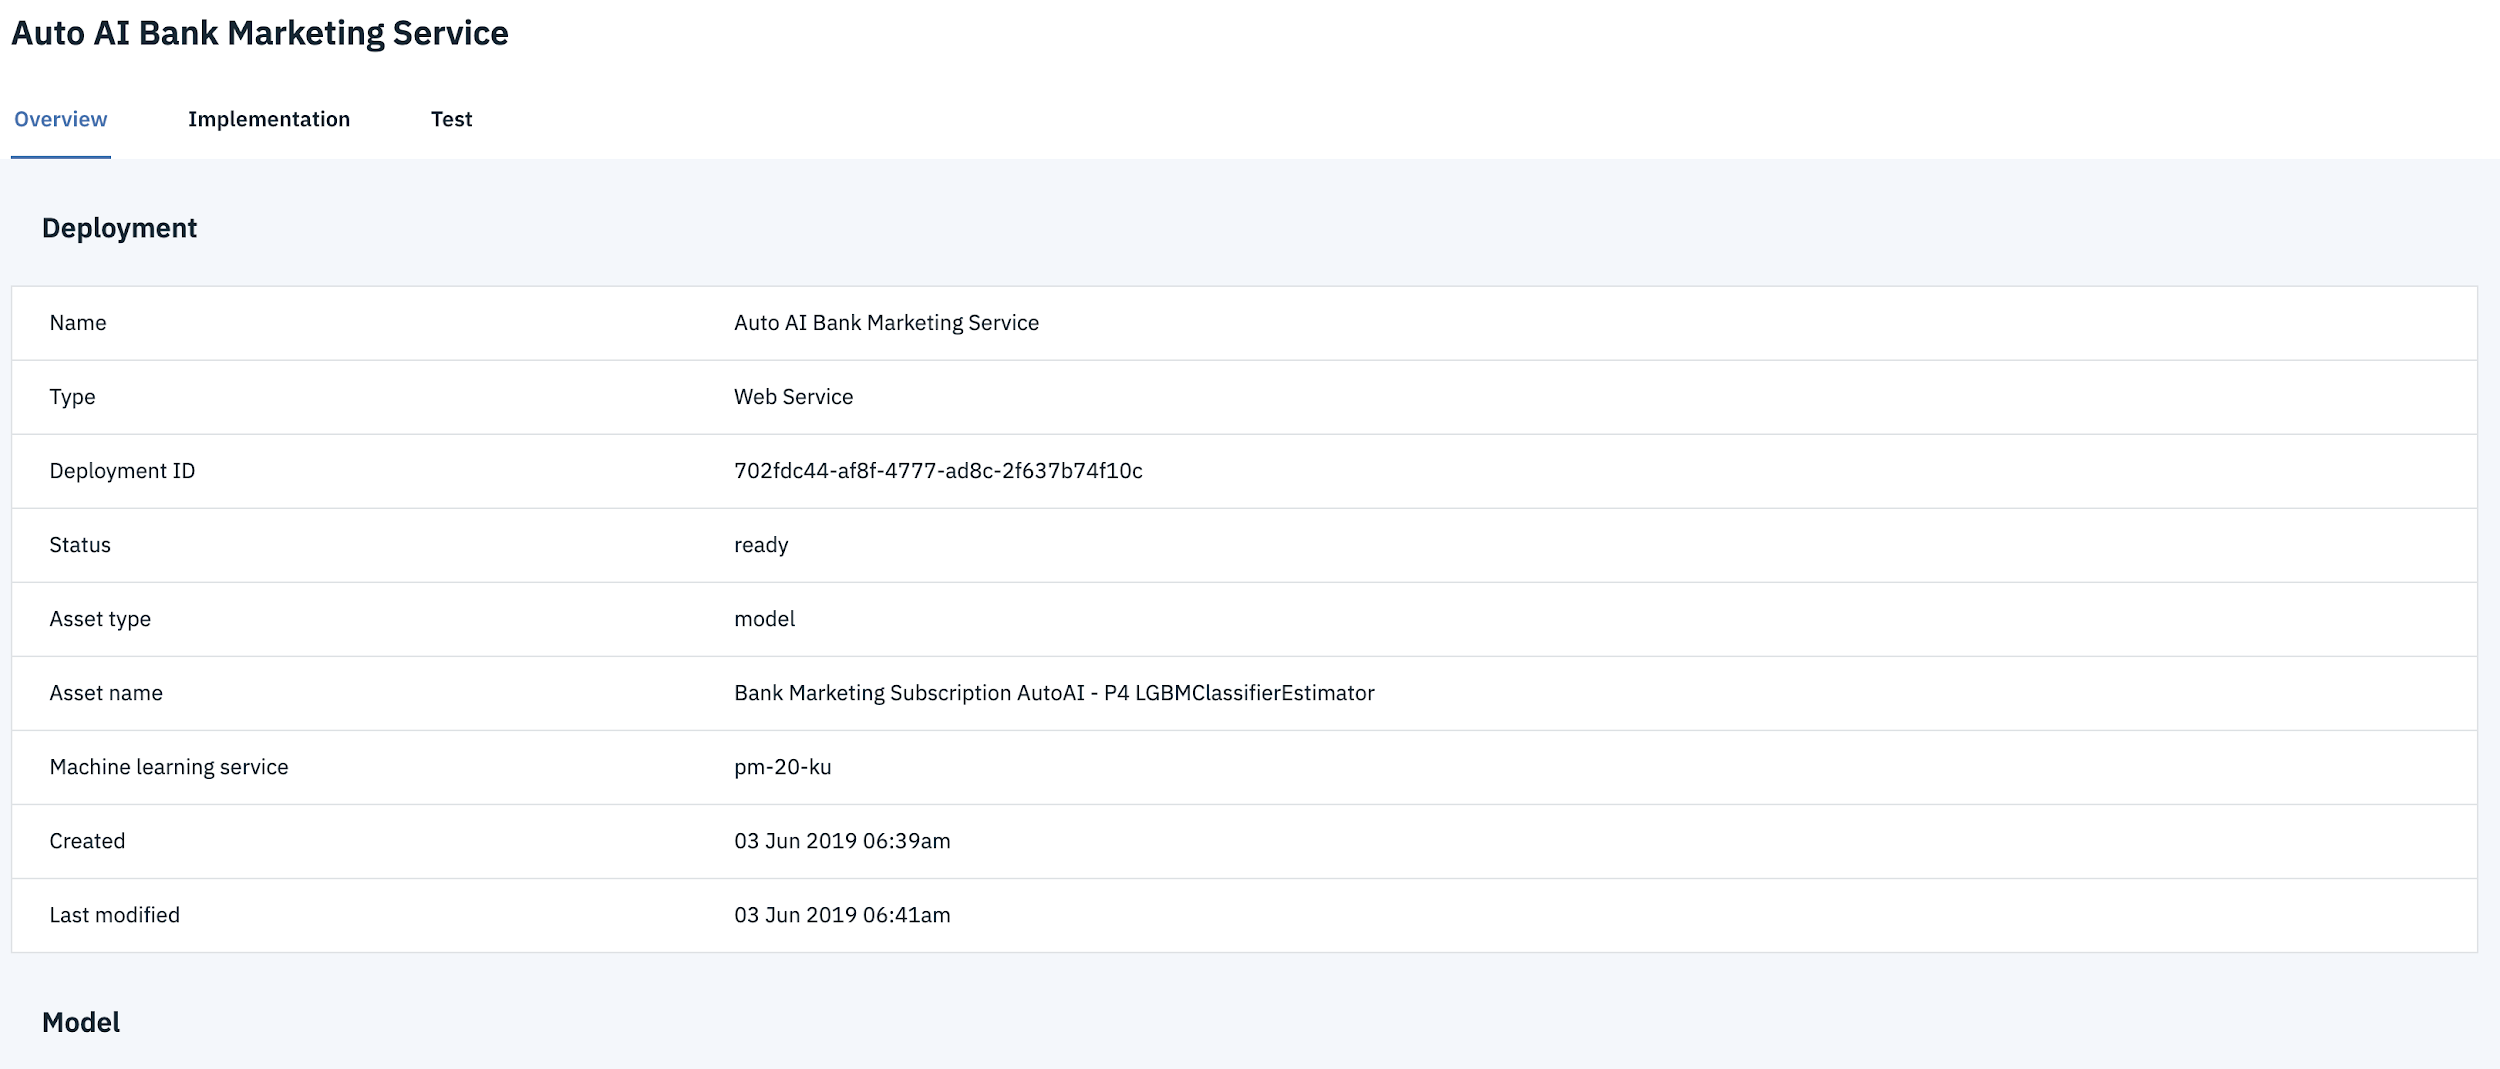
As soon as you select Save you’ll be redirected to a deployment status screen. From here you can monitor the status of your new deployment. Once the status changes from initializing to ready you’ll be able to query the endpoint to make predictions via a regular HTTPS request.

Instructions for how to use the API are included within the service details. Click on the name of the deployment i.e. Auto AI Bank Marketing Service. This will give you details on deployment.
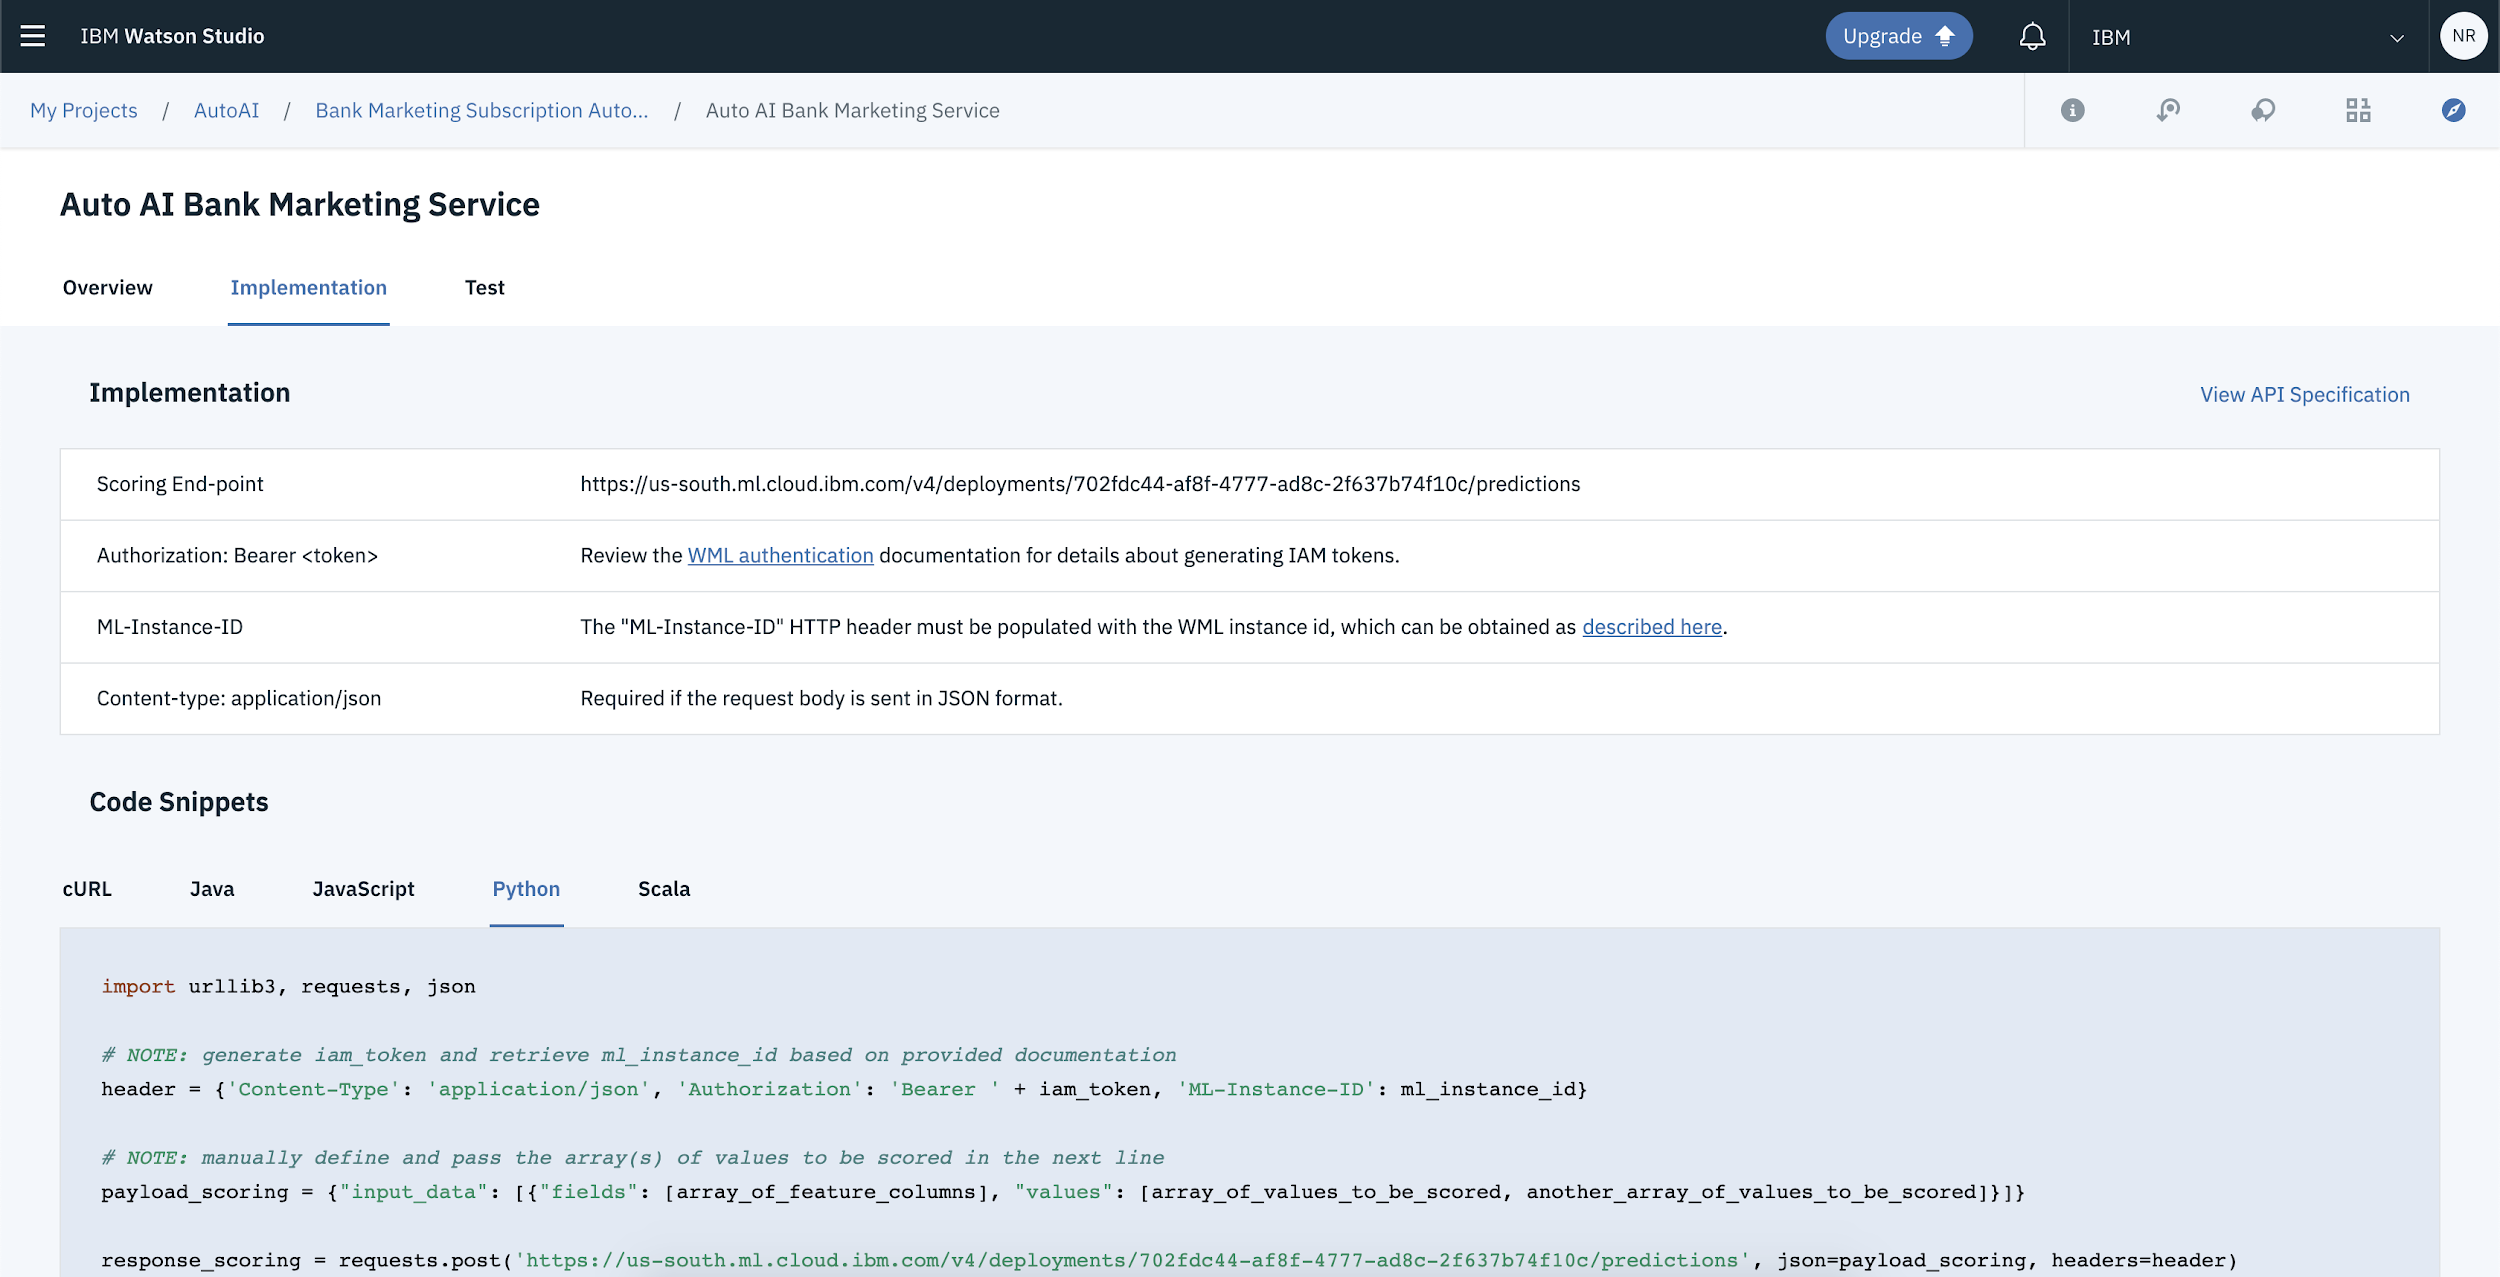
Finally select Implementation. From here you can access code snippets required to implement the Auto AI predictive model into embedded applications using a variety of languages including cURL, Java, Python, Javascript and Scala.
And there you have it…how to build a predictive model from start to finish using Watson Auto AI Experiments. If you loved this post please please please, make sure you subscribe for more data goodness!