“But…can it connect to {insert random API here}.”
One of the great things about systems is that they’re usually made with code. If the code behind that system is open and accessible then you can do a whole bunch of whizbang wizardry and hopefully make your life a little easier.
One of the great things about Watson Assistant is that it can connect to just about any open API using Webhooks.
What are webhooks you ask?
Webhooks are data and executable commands sent from one app to another over HTTP instead of through the command line in your computer, formatted in XML, JSON, or form-encoded serialization. They’re called webhooks since they’re software hooks—or functions that run when something happens—that work over the web.
https://zapier.com/blog/what-are-webhooks/
TL;DR; In plain talk: they’re a lightweight connector that makes connecting web applications super straightforward.
Watson Assistant makes it super easy to connect to webhooks. This post shows you how to create a simple assistant in Watson Assistant and call the external Swapi API using webhooks to get information on Luke Skywalker…interested? Give it a go below.
1. Create a Skill
Righto, first thing we’re going to do is create a new assistant. If you already have an assistant created and just want to start hooking it all up then head on down to Step 3 to start creating your cloud functions. If you haven’t keep on keeping on and read along.
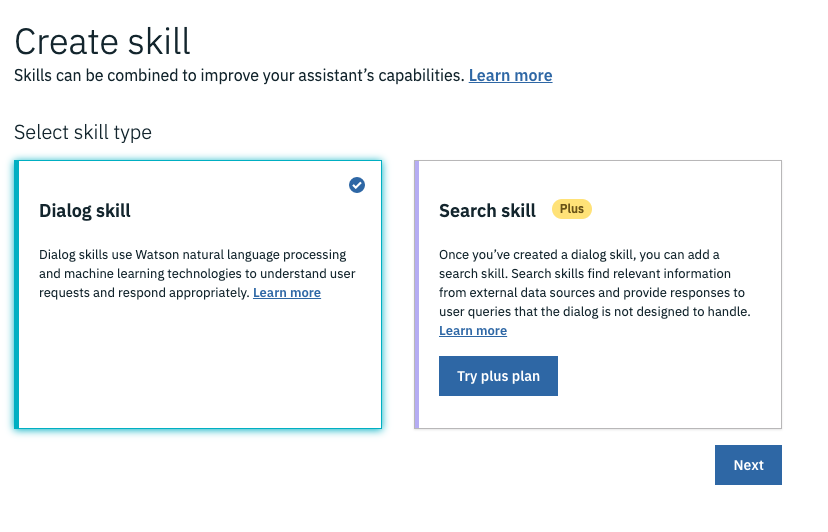
From your Watson Assistant home page, select Skills and choose Create skill.
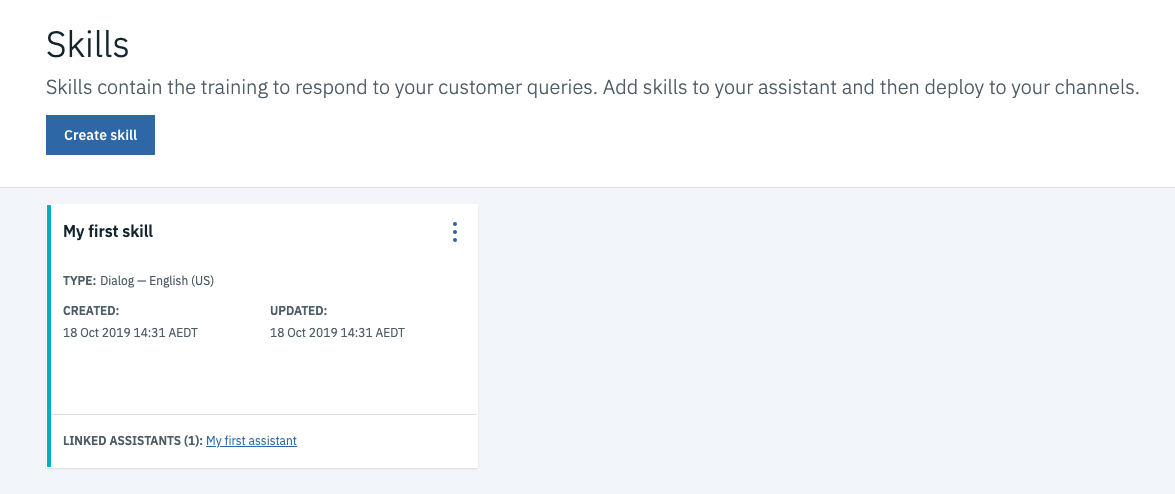
In this case, you’ll be creating a basic Dialog Skill. Choose that one and hit Next.
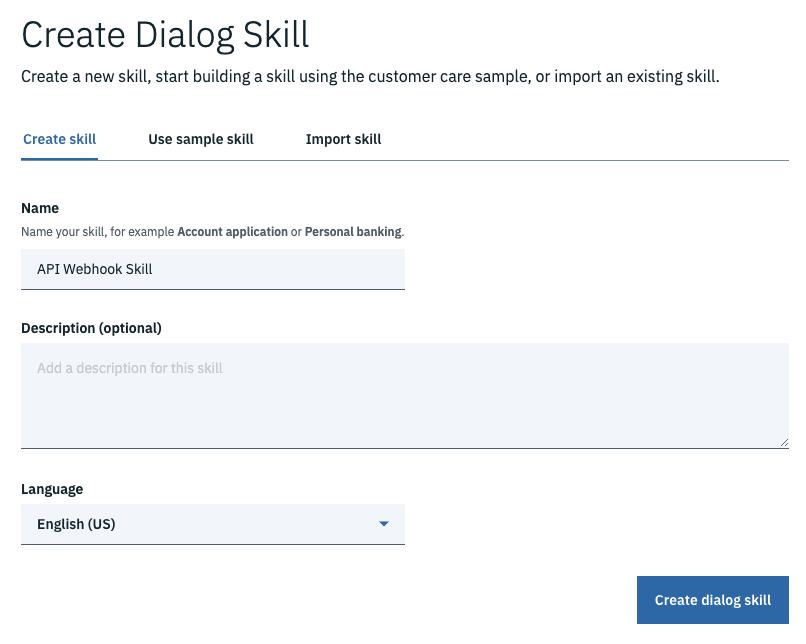
From here you can name your skill. In the screenshot below it’s been named API Webhook Skill but you could call it anything really…the choice is yours!
2. Create An Intent To Get Luke Skywalker’s Height
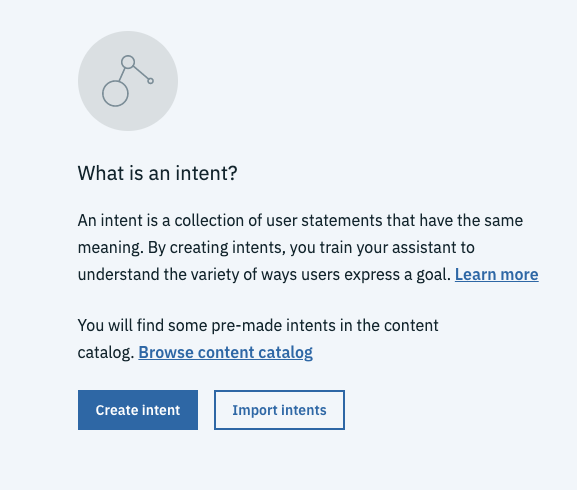
Intents allow you to connect a user’s utterance to an action. The intent that you create will be used as a trigger for Watson Assistant to grab data from the API.
Hit Create Intent.
In this tutorial you’re going to be connecting to the Swapi API which allows you to get Star Wars data. The Swapi API can be swapped out for just about any other open API, this is intended to show you what’s possible. If you get stuck or need help with a specific API, ping me a message on LinkedIn (@nicholasrenotte).
The particular API call you’re going to make will allow you to get details on any Start Wars character. In this case, you’ll focus on getting Luke Skywalker’s height. So, create an intent called #getcharacterheight and include some examples of utterances that a user might make.
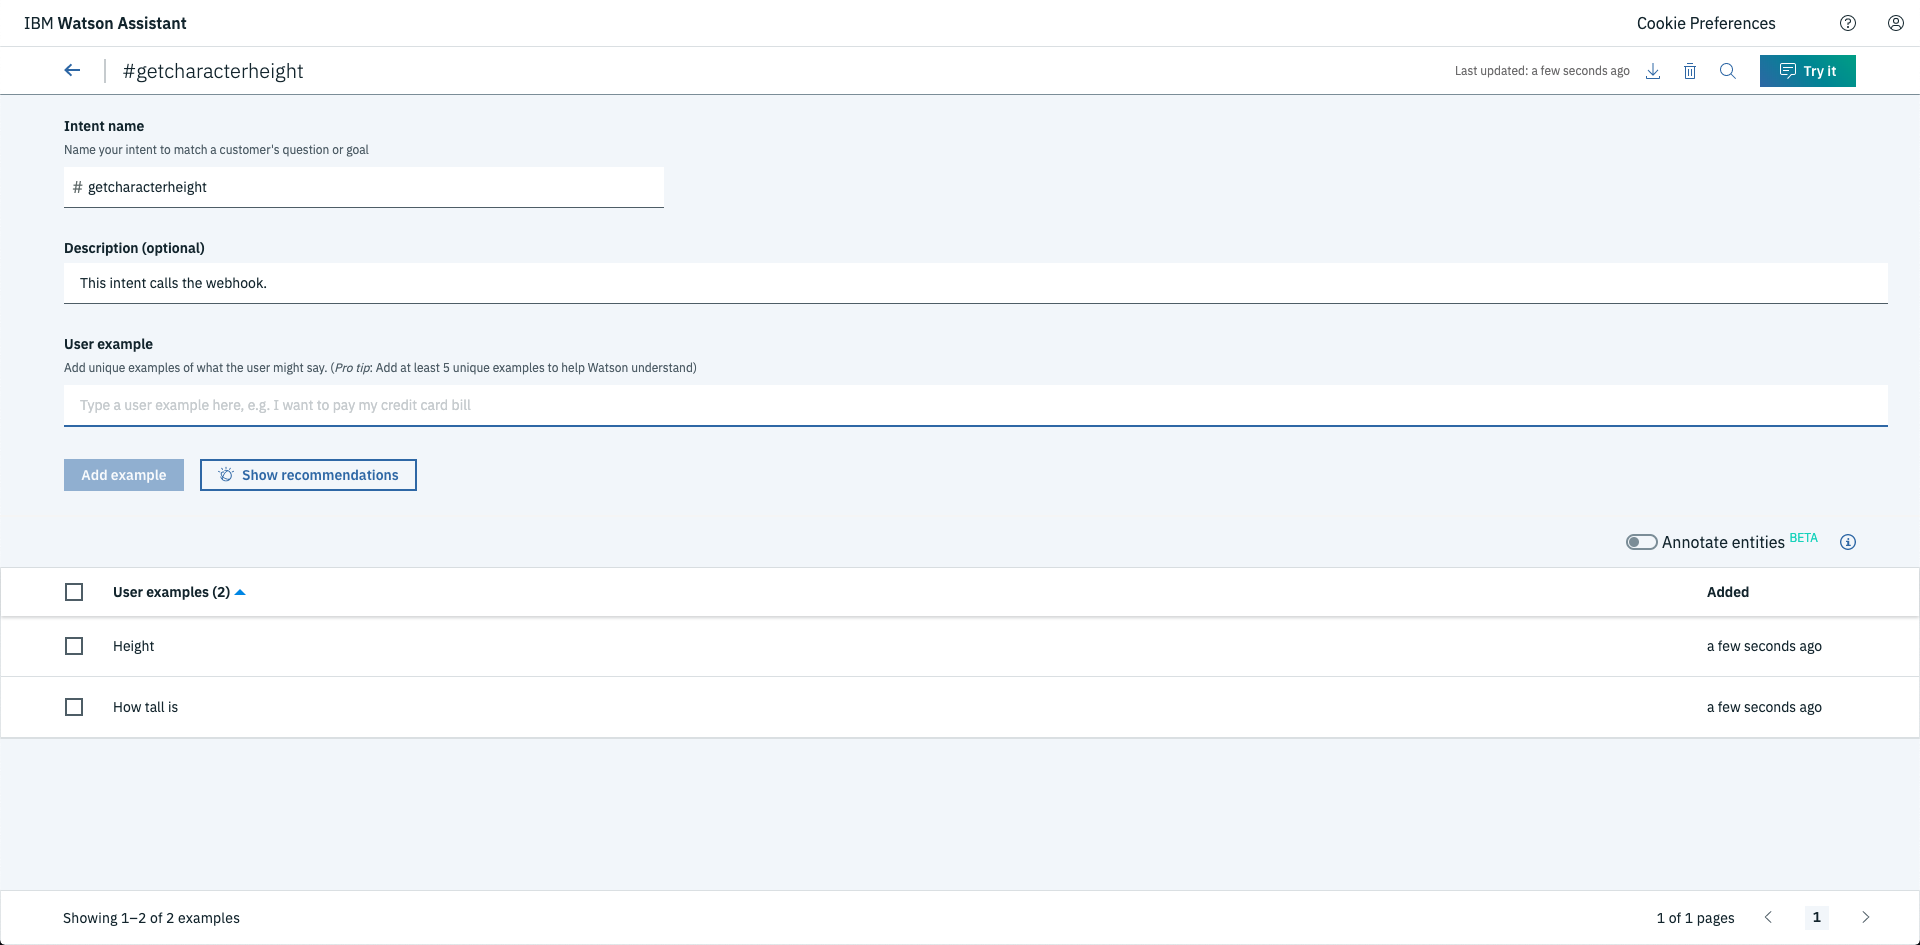
N.B. Don’t get too hung up on adding intents these can be changed and retrained later on. Just focus on having a few listed.
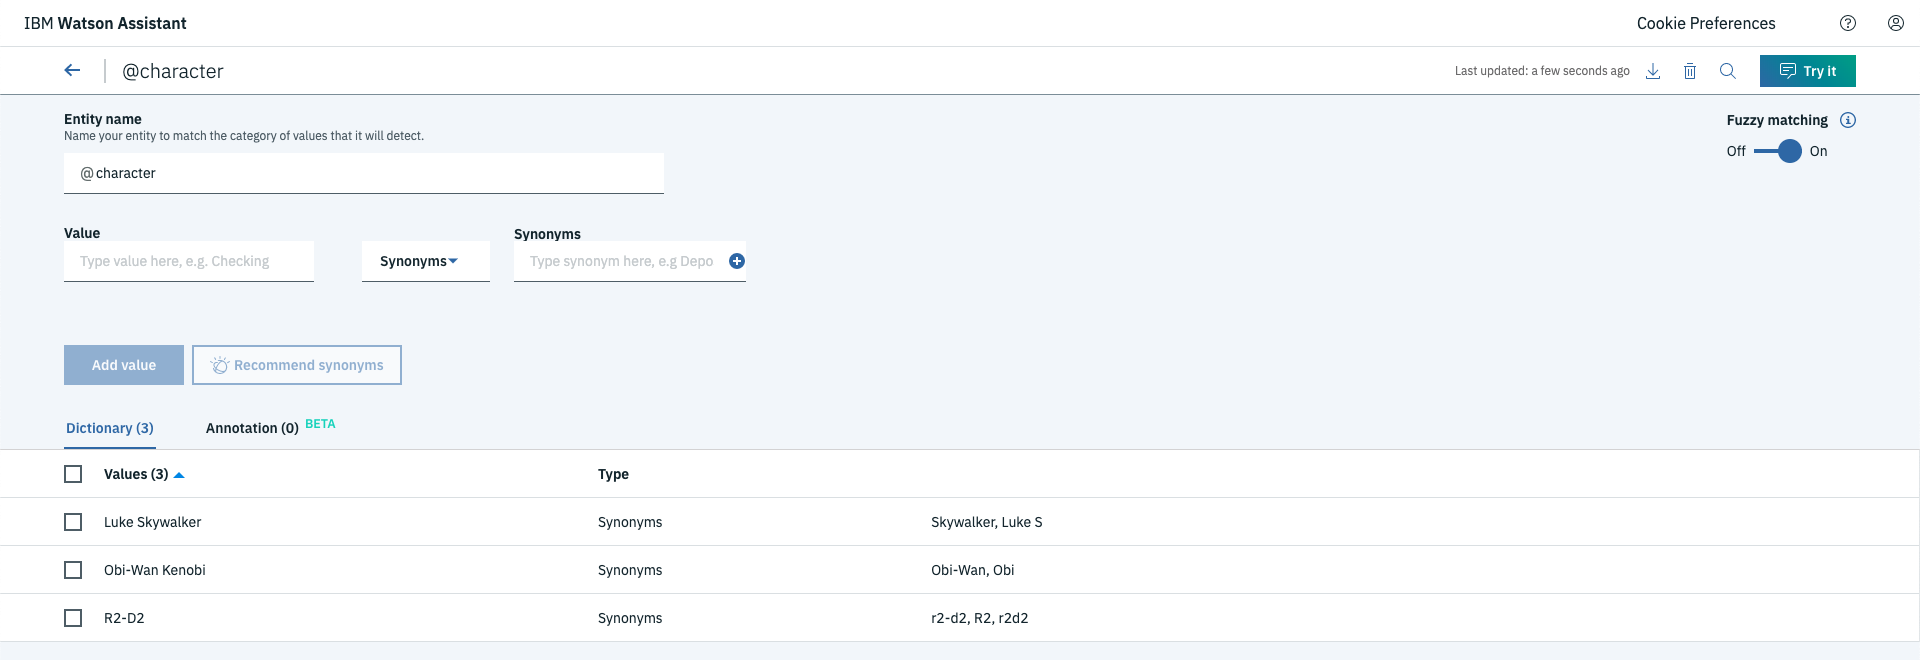
3. Create an Entity That Includes Mr Skywalker
You’ve now created an intent to draw out a users’ purpose, create an entity that includes character names. Storing character names as entities allows you to pass through different characters as parameters to the API call later on.
4. Create A Cloud Function (Aka Webhook)
This is where the magic happens. Cloud functions (aka webhooks) able to easily integrate with Watson Assistant. Through these functions, you’re able to make calls to just about any API imaginable.
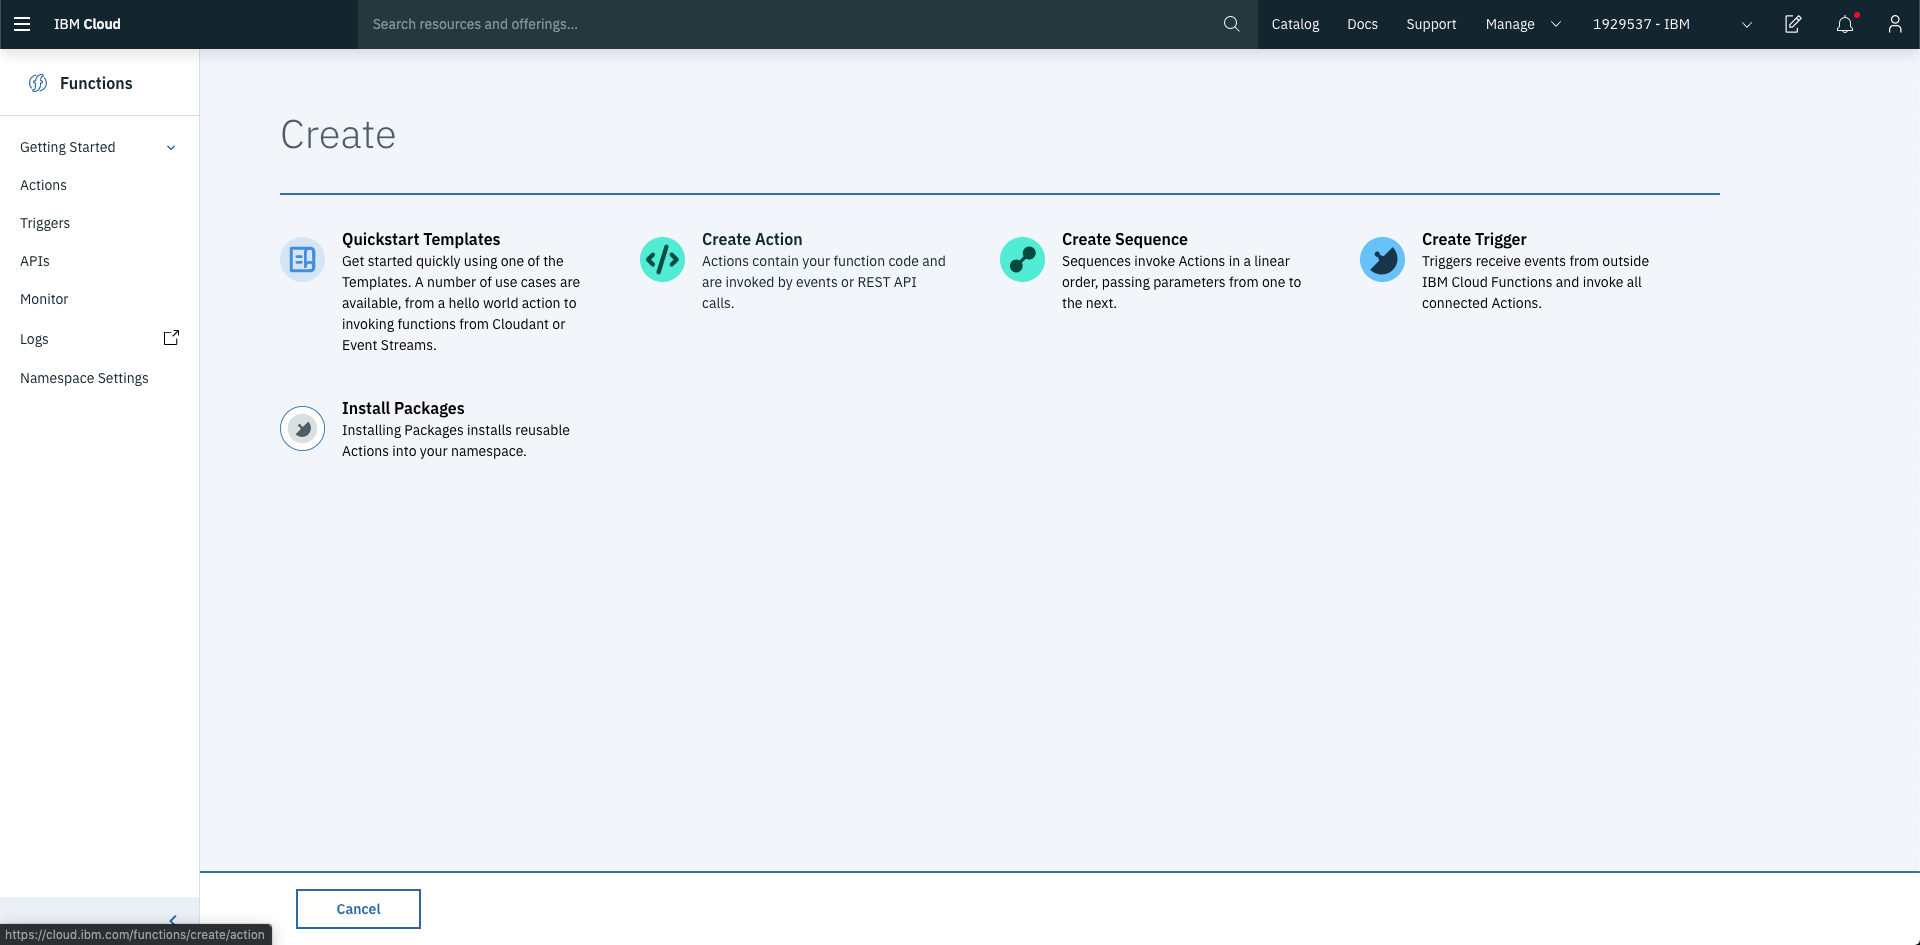
Head on over to the Cloud Functions console to create a new function. Then select Create Action, the action represents a single code function that can be called from Watson Assistant.
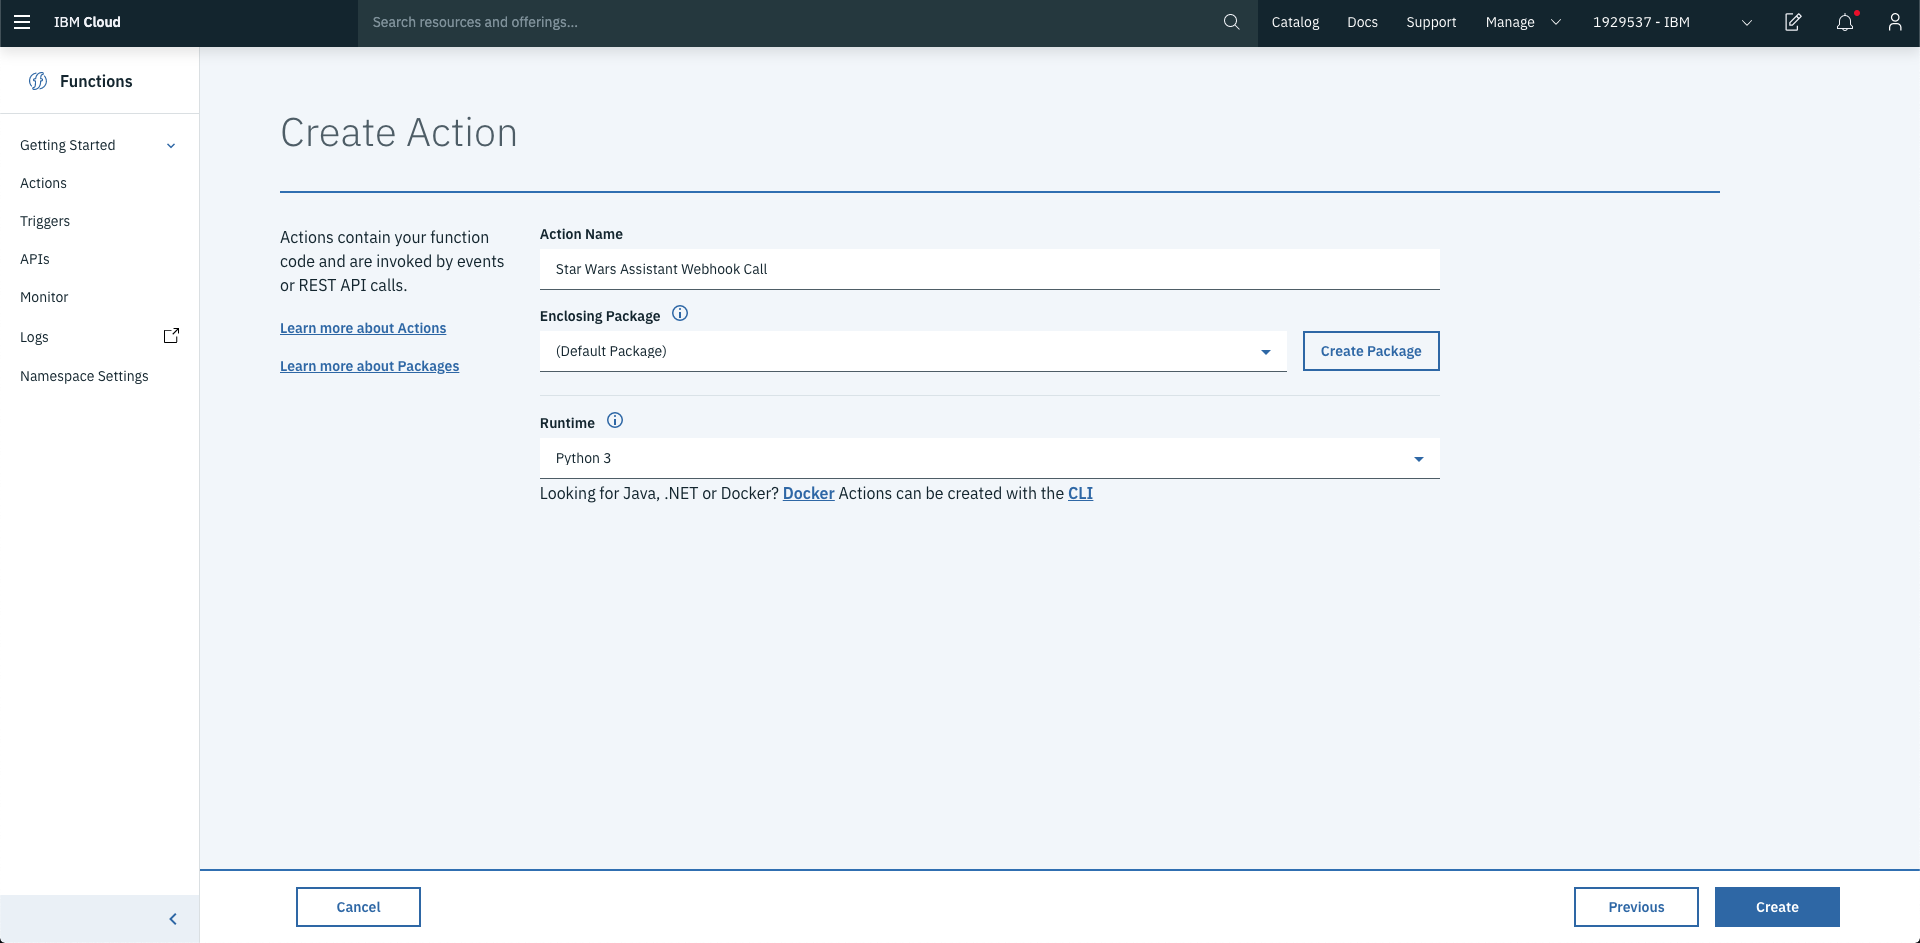
Name your function something verbose and change the runtime to Python 3. If you’re a JS fan you can also write your function using Node or a bunch of other languages as well.
In this case the code that is included below makes a call to the Swapi.co API (line 8). This URL can be changed and repointed to another API if required.
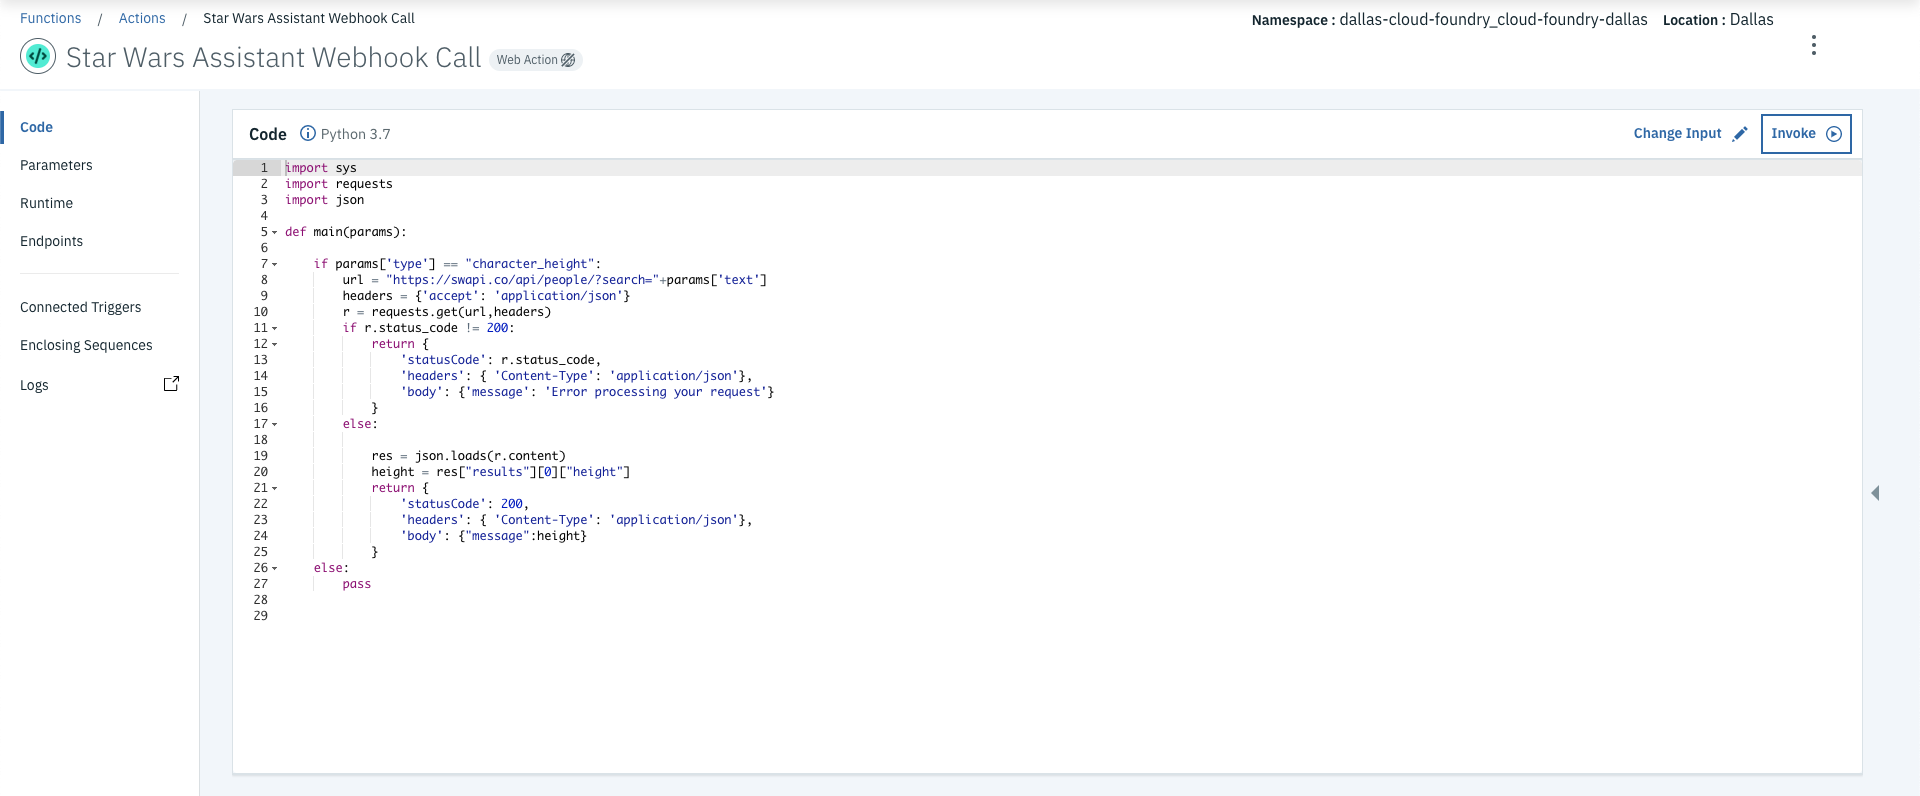
Test it out by running the Invoke button in the top right. N.B. An explanation of the code can be found in the Github repo.
Now that you have a functioning function, you need to enable it as a Web Action. This allows the function to handle incoming calls from Watson Assistant.
Select Endpoints from the left hand side of the page and check Enable as Web Action and Save your changes.
Copy down the URL that’s created under Web Actions, you’ll need this for Step 5

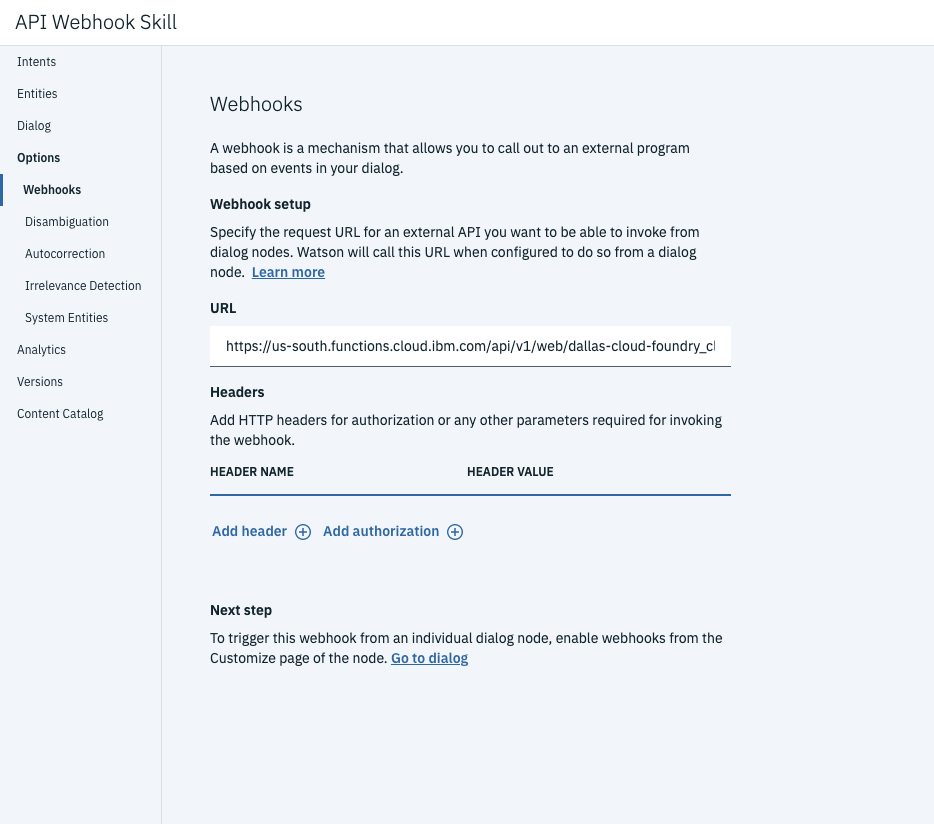
5. Enable Webhooks in Your Skill
Now that you’ve created your webhook it’s time to start connecting it to Watson Assistant. Note you’ll need the URL created from the end of Step 4.
Choose Options>Webhooks and paste the URL into the input box.
6. Call The Webhook from the Dialog
You’ve made it to the final step! All that’s left to do now is create the dialog and process the response from the webhook.
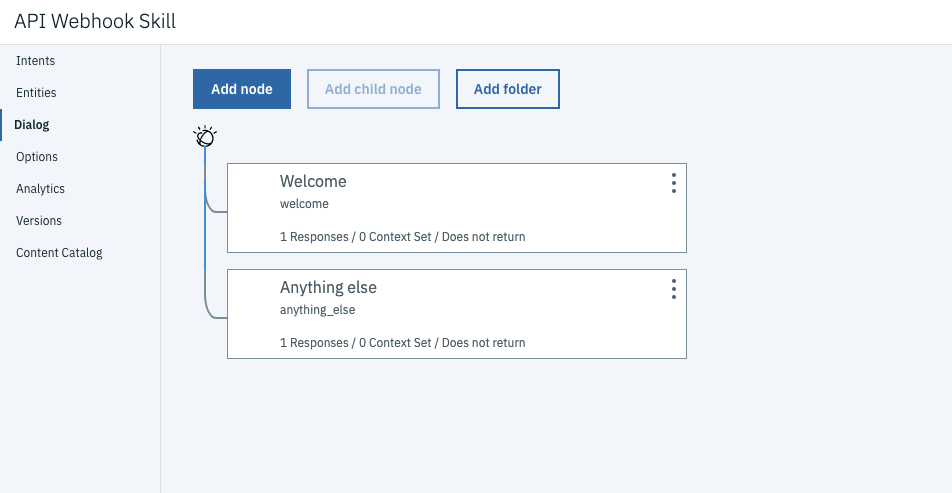
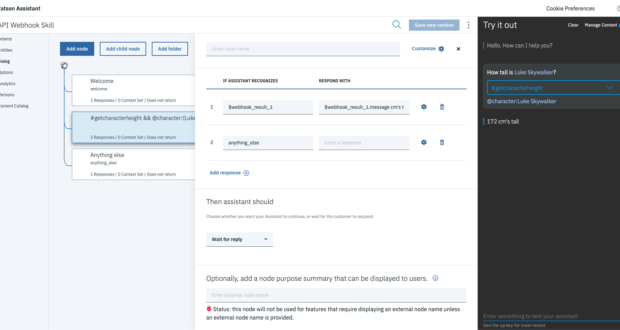
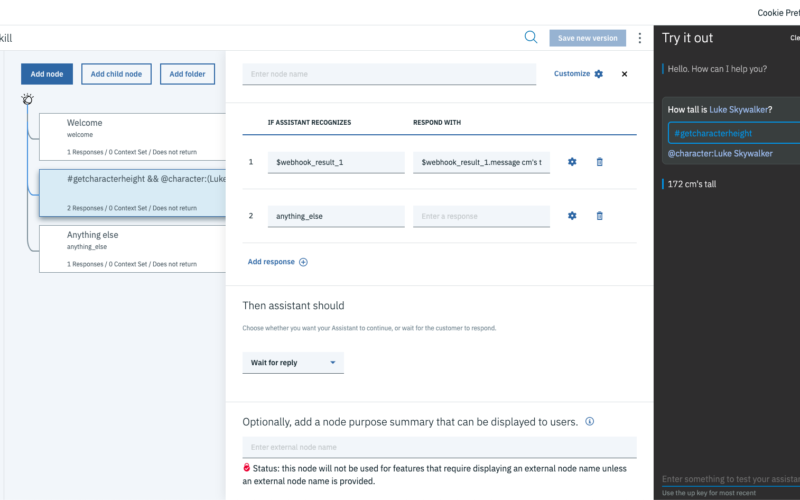
Create a new dialog node that’s triggered by the #getcharacterheight intent and the mention of Luke Skywalker. It should look like the screenshot below.

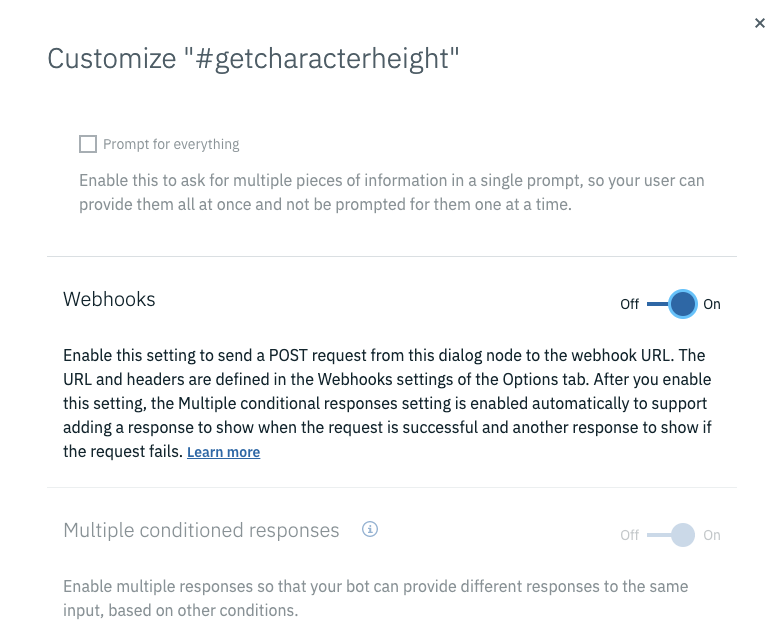
Next select the Customize button from the dialog node to switch on webhooks.
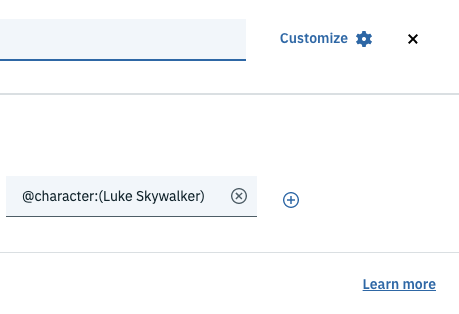
This allows the dialog node to make calls to the webhook from Step 5 and process the response.
Now you can pass through parameters to the webhook function call. If you take a close look at line 8 of the webhook function, the type parameter below is evaluated.

N.B. If you wanted to process other API calls from your function you could add other condition nodes in the Cloud Function and simply pass through different type parameters in the dialog below. Note also in line 10 of the Cloud Function, you pass through the text parameter (shown below) which allows you to search for Luke Skywalker in the Swapi database. (Optional: If you wanted to search for another character you could change the value below or better yet you could create another node which stores the character entity in a context variable.)
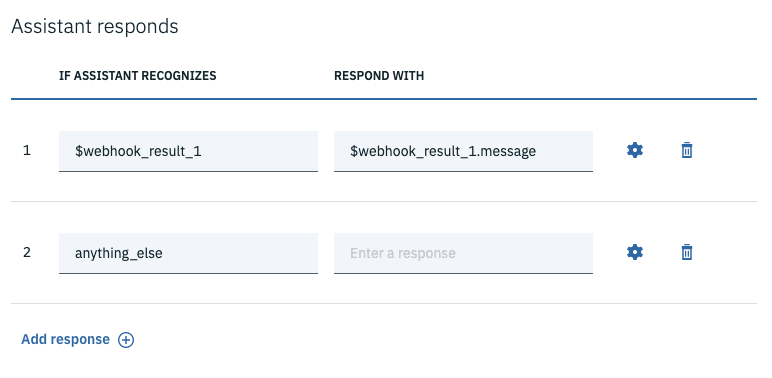
Once this node is triggered, the webhook will be called which will subsequently call out to the Swapi API. Your assistant will then retrieve the result and have it available in the $webhook_result_1 variable. In this case, the height of the Luke Skywalker is stored in the message key, so it can be accessed by evaluating $webhook_result_1.message.
Now that you’ve done all of that, you can finally test it out. You can see in the screenshot below that the correct entity and intent has been identified and what is returned is Luke Skywalker’s height of 172 cms!

This sheds a little light on what’s possible with Watson Assistant webhooks and hopefully makes your life just that little bit more technologically amazing.
If you found this useful, be a champ and share this post! I’d be forever super thankful!
Nick